Adding Categorized Content Manually
This section provides an overview of adding categorized content and discusses how to add new categorized content.
|
Page Name |
Definition Name |
Usage |
|---|---|---|
|
EPPCM_ADDCONT_SEC |
Specify the type of content that you want to add to a folder in categorized content. |
|
|
EPPCM_CONT_MAIN |
Enter content properties such as title, summary, and content location; submit content for publication; and maintain comments or discussions specific to that piece of content, among other functions. The name of this page and its fields that appear depend on the content type that you selected on the Browse Categorized Content - Add Content page. |
|
|
EPPCM_CONT_LOC |
Move content to a different folder or add content to multiple folders. |
|
|
EPPCM_CONT_TREEADD |
Select new locations for the content. |
|
|
Move Content |
EPPCM_CONT_TREEMOD |
Move content to a different folder. |
|
Post Details Page |
EPPDF_VIEW_TOPIC |
Start a new discussion or edit an existing discussion for this content item. See Starting and Viewing Discussions, Post Details Page section. |
|
Edit a Post Page Add a Reply Page |
EPPDF_REPLY_TOPIC |
Edit an existing discussion or respond to a discussion. See Starting and Viewing Discussions, Edit a Page and Add a Reply Page section. |
|
Content Notification |
EPPCM_CONT_NTFY |
Send email notifications of saved content to the list of interested parties. |
|
Comments |
EPPCM_CONTCOMM_SEC |
Enter any additional comments about this content item. |
Using the Categorized Content navigation menu item Browse Folders, you can navigate through the hierarchy and manually add folders and content. You can also edit the attributes of manually added folders and content, as well as add menu items and import managed content.
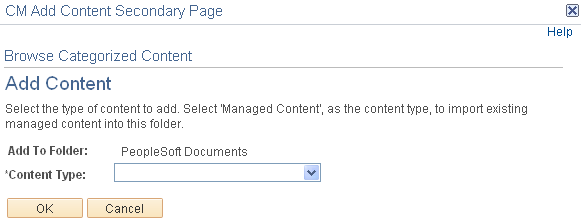
Use the Browse Categorized Content - Add Content page (EPPCM_ADDCONT_SEC) to specify the type of content that you want to add to a folder in categorized content.
Navigation:
Click a title link in the Browse Categorized Content page, and click the Add Content button on the Content Properties page.
This example illustrates the fields and controls on the Browse Categorized Content - Add Content page. You can find definitions for the fields and controls later on this page.
Field or Control |
Description |
|---|---|
Content Type |
Select a content type. Available options are:
|
OK |
After you select a content type and click this button, a Categorized Content Properties page appears based on the content type you selected. When content is added to managed content, its status is set to checked out. |
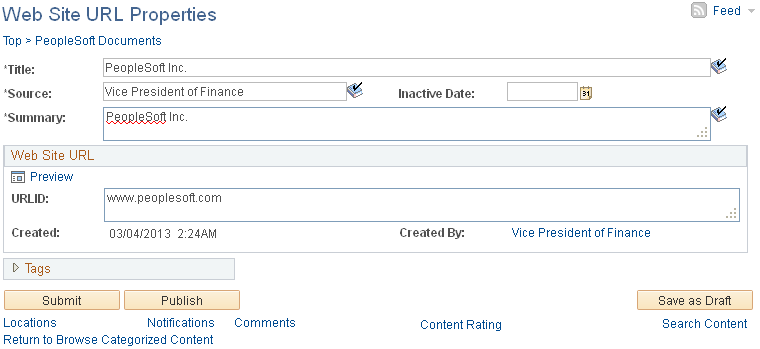
Use the Categorized Content Properties page (EPPCM_CONT_MAIN) to enter content properties such as title, summary, and content location; submit content for publication; and maintain comments or discussions specific to that piece of content, among other functions.
Navigation:
Click the Add Content button on the Browse Categorized Content page.
Select the type of content to add, and then click OK on the Add Content page.
Note: The name that appears on this page depends on the content type that you selected on the Browse Categorized Content - Add Content page.
This example shows the Web Site URL Properties page with the Web Site URL option selected in the Browse Categorized Content - Add Content page:
This example illustrates the fields and controls on the Categorized Content - Web Site URL Properties page. You can find definitions for the fields and controls later on this page.
Field or Control |
Description |
|---|---|
Menu Item |
Use the search icon to select an approved menu item. |
Save as Draft |
Click to save this content item in draft format. You can continue to edit the content property fields for this item. Content in draft status does not appear on the Browse by Category page because it is not published. |
Publish |
Click to save and publish this content item. All fields become read-only. Published content appears on the Browse by Category page to users who have the viewer roles for the parent folder where the content is located. |
Unpublish |
Click to save the content and save it to Pending Publishing. Nonpublished content does not appear on the Browse by Category page. |
Locations |
Click to set the publish and expiration date for the content in this location and set the item to be published. |
Notifications |
Click to create a list of interested parties or send email notifications of saved content to the list of interested parties. |
Save |
Click to save the content item without changing the publish status. |
Submit |
Click to save and submit the content item for publishing. |
Comments |
Click to add additional comments about this content item. |
Search Content |
Click to search existing content within the Categorized Content feature. |
Start Discussions |
Click to begin a discussion topic. Note: Discussion topics stay with the content item and cannot be accessed outside of the Content Properties page. |
View Discussions |
This link is available if the discussion topic already exists for this content item. Click to view, edit, or enter a response to a discussion. |
To translate Content Management HTML/Text content, you must translate the same content version into the various languages you want to display. This means that you must save the content version as a draft, and translate it for each appropriate language. Check in or submit the content version after it is translated for all appropriate languages.
If content is being translated into one or more foreign languages, perform the language translations on the content after the content is checked out. When all translations are completed, you can check content in.
Note: Content comments are not translated. You will see the comments from the language that you entered last.