Adding a Piece of Managed Content
This topic discusses ways to add content attachments and new content to Managed Content folders.
|
Page Name |
Definition Name |
Usage |
|---|---|---|
|
EPPCM_ADDCONT_SEC |
Specify the type of content you want to add to a folder in managed content. |
|
|
EPPCM_CONT_MAIN |
Enter content properties such as title, summary, and content location to submit content for publication and to maintain comments or discussions specific to that piece of content, among other functions. After you select a content type, a Content Attachment Properties page appears based on the content type you selected. When content is added to managed content, its status is set to checked out. |
|
|
EPPCM_CONT_LOC |
Move content to a different folder or add more locations. |
|
|
EPPCM_CONT_TREEADD |
Select new locations for the content. |
|
|
Content Attachment Properties - Move Content |
EPPCM_CONT_TREEMOD |
Move content to a new folder. |
|
Content Notification |
EPPCM_CONT_NTFY |
Send email notifications of saved content to the list of interested parties. |
|
Comments |
EPPCM_CONTCOMM_SEC |
Enter additional comments about this content item. |
|
Post Details Page |
EPPDF_VIEW_TOPIC |
Start a new discussion or edit an existing discussion for this content item. See Starting and Viewing Discussions, Post Details Page section. |
|
Edit a Post Page |
EPPDF_REPLY_TOPIC |
Edit an existing discussion. See Starting and Viewing Discussions, Edit a Post Page and Add a Reply Page section. |
|
Add a Reply Page |
EPPDF_REPLY_TOPIC |
Respond to a discussion. See Starting and Viewing Discussions, Edit a Post Page and Add a Reply Page section. |
Based on the type of content you select, you must either upload attachments, enter URL information, or create the document using text or HTML.
This table describes the types of content you can add:
|
Content Type |
Description |
|---|---|
|
File attachment |
Upload a file to the file storage (record based BLOB or the web server). |
|
Text or HTML |
Create a document using either text or HTML. |
|
Image attachment |
Upload a file attachment image to the web server and enable it to render as an image. |
|
Image URL |
Enter the URL of an already web-enabled image. |
|
Web site URL |
Enter the URL of a web site. |
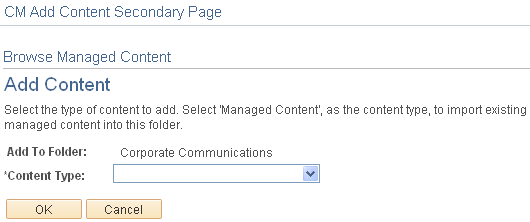
Use the Browse Managed Content - Add Content page (EPPCM_ADDCONT_SEC) to specify the type of content you want to add to a folder in managed content.
Navigation:
Click a folder title and click the Add Content button on the Browse Managed Content page.
This example illustrates the fields and controls on the Browse Managed Content - Add Content page. You can find definitions for the fields and controls later on this page.
Field or Control |
Description |
|---|---|
Add To Folder |
Displays the name of the folder that the content is being added to. |
Content Type |
Select a content type. The available options are:
|
OK |
After you select a content type and click this button, a Content Attachment Properties page appears based on the content type you selected. |
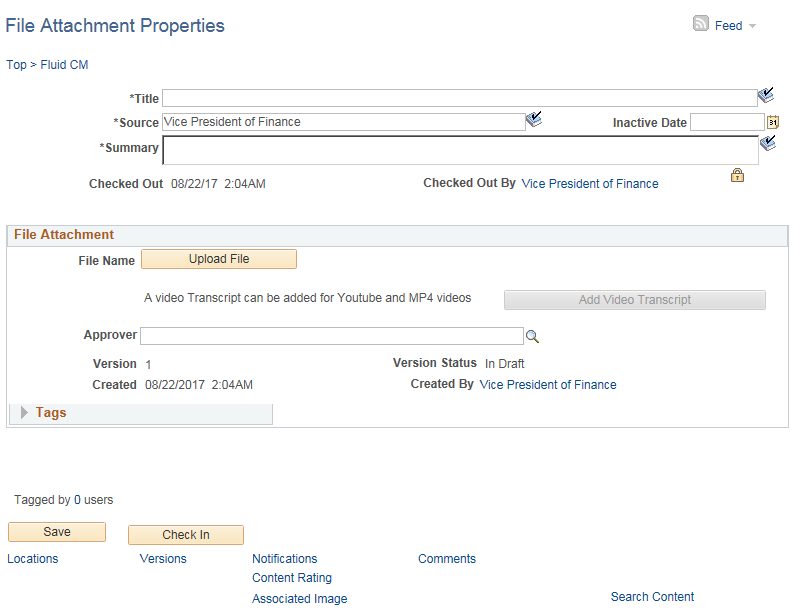
Use the Content Attachment Properties page (EPPCM_CONT_MAIN) to enter content properties such as title, summary, and content location to submit content for publication and to maintain comments or discussions specific to that piece of content, among other functions.
Navigation:
Click a folder title and click the Add Content button on the Browse Managed Content page.
Select a content type from the drop-down list and click the OK button.
Note: The name that appears on this page depends on the content type that you selected on the Browse Managed Content - Add Content page.
File Attachment Properties Page
Field or Control |
Description |
|---|---|
Feed |
Click to open the feed contain this item, if available. See Publishing PeopleSoft Interaction Hub Content as a Feed. |
Inactive Date |
Displays the inactive date based on the default inactive date of the folder. Content with an inactive date previous to the current date does not appear in the content list of the Browse Content or the My Content pages. However, inactive content is still accessible from the Maintain Content search page. Content that is archived and published elsewhere is still visible from where it is published. The publishing feature such as News Publication or Manage Navigation uses the expiration date to control when the content no longer appears. |
Check Out |
Displays the date and time when the content was last checked out. |
Check Out By |
Displays the user name who checked out the content. Click the name link to access the Instant Message page, where you can send a instant message to the person who checked out the content. |
Upload File |
Click to open a new browser window where you can select a file to upload. Note: Uploaded files are saved automatically. When the folder properties are set to auto-approved, the Version Status field indicates that new content is approved when it is added. |
Add Video Transcript |
Click to add video transcripts for the uploaded video. Note: The Video Transcript button is enabled only for MP4 videos and youtube URLs. |
Approver |
Select the ID of the user who is assigned to approve the content. After this field is populated and the content is checked in, the Submit for Approval button appears. Approvers are folder members with the approval privilege. Note: Only one approver can be assigned and only one level of approval is built in. If you need more levels of approval, you can increment the version as each version has its own approval cycle. Approvers are only available for content that is created with the Require Approval option selected. |
Version Status and Version |
System assigns a status of In Draft and the version number 1 for new content. Note: When the folder properties are set to auto-approved, the Version Status field indicates that new content is approved when it is added. |
Tag |
Click to expand and access the content properties to view or edit tags. See Publishing PeopleSoft Interaction Hub Content as a Feed. |
Save |
Click to add content to managed content. After you click this button, the content status is set to checked out and the Cancel Check Out button appears. |
Check in |
Click to unlock the content item and make it accessible to authorized folder members for review or edit. Note: The Check In and Cancel Check Out buttons are replaced with the Check Out and Submit For Approval buttons. |
Locations |
Click to move this content item to a different folder or add it to multiple folders, as well as view all the locations for the content. Note: When using the Managed Content feature, the Locations page shows all the locations for all the feature types where the content exists. The Location page for all other feature types will show only the locations for the current feature type. |
Versions |
Click to access the File Attachment Properties - Content Versions page, where you can review, delete, or check out different versions of a specific content item. |
Notifications |
Click to create a list of interested parties or to send email notifications of saved content to the list of interested parties. |
Comments |
Click to add additional comments about this content item. Note: Comments are auto-generated for created versions. Comments can be added or updated only to the current version for the content. |
Search Content |
Click to search for existing content items. |
Start Discussions |
Click the Start Discussions link to begin a discussion topic. Note: Discussion topics stay with the content item. They cannot be accessed outside of the Content Properties page. |
View Discussions |
If a discussion topic already exists, click to view, edit, or enter a response to it. |
Data Attributes |
Click to assign attributes that control who can access this content. This link appears only if portal administrators have enabled this feature. |
Return to Browse Managed Content |
After you have completed attaching a file, click this link to return to the Browse Managed Content page. |
Adding Image Attachment
This example shows the Image Attachment Properties page with the Image Attachment option selected in the Browse Managed Content - Add Content page:
This example illustrates the fields and controls on the Image Attachment Properties page with the Image Attachment option selected in the Browse Managed Content - Add Content page. You can find definitions for the fields and controls later on this page.
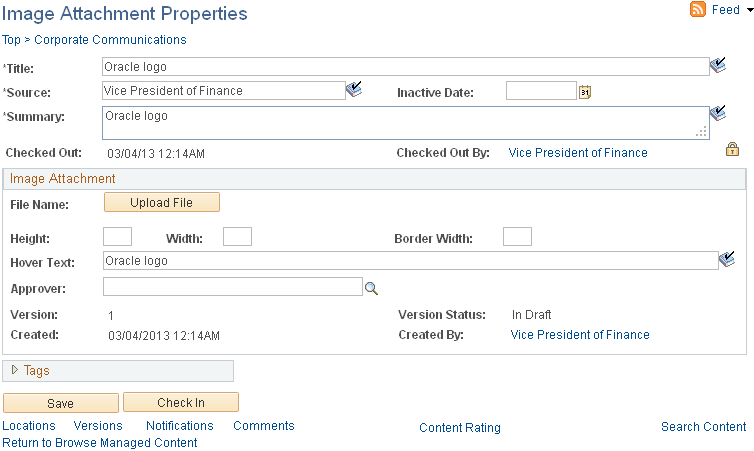
Use the Image Attachment Properties page to add new image contents to Managed Content folders.
Field or Control |
Description |
|---|---|
Height |
Use this property to specify the height of the image. This property takes a numeric value. The unit of measurement is pixels. |
Width |
Use this property to specify the width of the image. This property takes a numeric value. The unit of measurement is pixels. |
Border Width |
Specify the width of lines in the border. This property takes a numeric value. The unit of measurement is pixels. |
Hover Text |
Enter the text or mouse-over text that displays additional or supplemental information about the image. |
Adding Image URL
This example shows the Image URL Properties page with the Image URL option selected in the Browse Managed Content - Add Content page:
This example illustrates the fields and controls on the Image URL Properties page with the Image URL option selected in the Browse Managed Content - Add Content page. You can find definitions for the fields and controls later on this page.
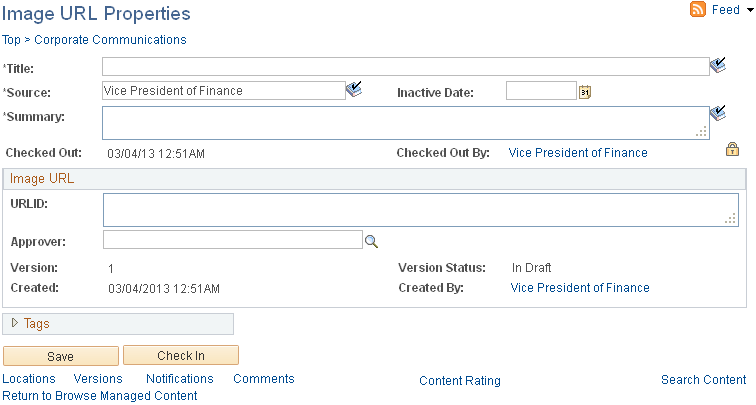
Use the Image URL Properties page to add new image URL contents to Managed Content folders.
Field or Control |
Description |
|---|---|
URL |
Enter any HTTP-accessible URL as the new image URL for the content folder. |
Adding Text or HTML
This example shows the Text or HTML Properties page with the Text or HTML option selected in the Browse Managed Content - Add Content page:
This example illustrates the fields and controls on the Text or HTML Properties page with the Text or HTML option selected in the Browse Managed Content - Add Content page. You can find definitions for the fields and controls later on this page.
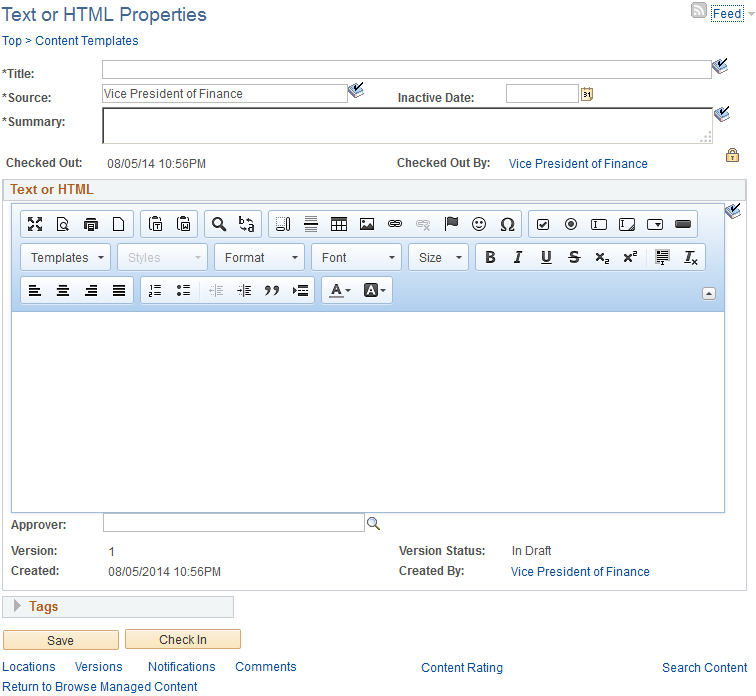
Use the Text or HTML Properties page to add text or HTML contents to Managed Content folders.
Field or Control |
Description |
|---|---|
Text or HTML |
Enter the text or HTML code that you want to use as the source for the content folder. |
Templates |
Click this to select a template. Templates that are created and saved in the Content Templates folder are displayed in the Templates list. |
Adding Web Site URL
This example shows the Web Site URL Properties page with the Web Site URL option selected in the Browse Managed Content - Add Content page:
This example illustrates the fields and controls on the Web Site URL Properties page with the Web Site URL option selected in the Browse Managed Content - Add Content page. You can find definitions for the fields and controls later on this page.
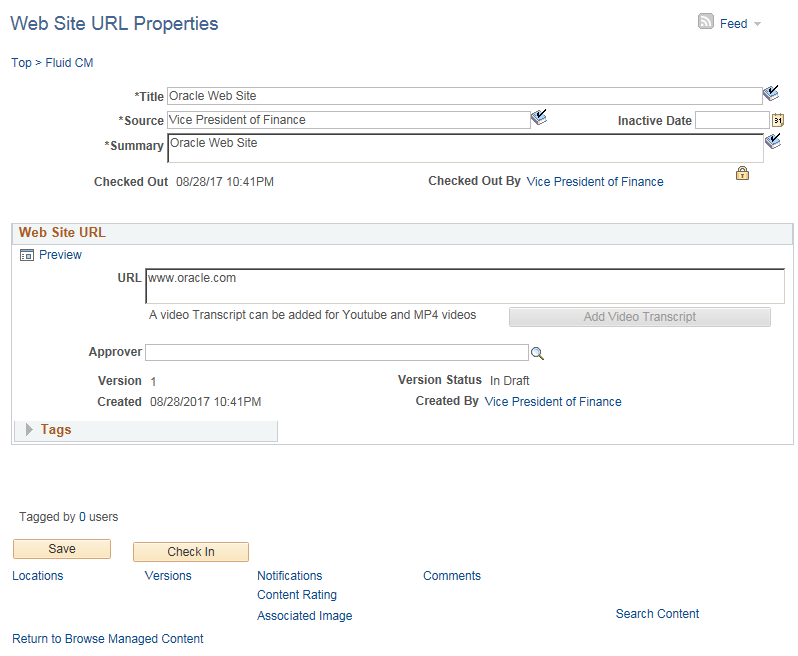
Field or Control |
Description |
|---|---|
URL |
Enter any HTTP-accessible URL as the new content URL for the managed content folder. Note: If you provide a URL for youtube or MP4 video, then Add Video Transcript button is enabled, wherein you can add video transcripts for the uploaded video. |