Managing the Theme Builder Guided Process
A Theme Builder Guided Process is now available to enable you to create and update Branding Themes using a simple three-step guided process. You can apply new color schemes to both fluid and classic homepages as well as content pages. You can also mark a theme as a portal default or assign themes to specific user attributes like roles, permission lists, etc.
The Theme Builder enables you to update the styling of the following elements using an easy-to-use interface:
Company logo.
Homepage background color.
Banner color and other elements like the Back button color and text color.
Note: For more information regarding the PeopleSoft Fluid User Interface, see PeopleTools: Applications User's Guide, Working With PeopleSoft Fluid User Interface.
The Theme Builder Guided Process involves the following three steps:
Define Theme
Assign Theme
Review and Publish
This document will take you through the pages involved in these steps.
The following terminology may be of use to understand the branding process:
Macro Set: A PeopleTools 8.55 feature that allows users to update styling of fluid pages and fluid like header on classic pages.
Unpublished Theme: A Theme definition (new or existing) that was left midway in the Theme Builder after clicking the Save button on the first step and not clicking the Publish button.
Default Macro Set: This is the Oracle delivered Macro Set (PT_DEFAULT_MACROSET_855).
Note: The enhancements related to the Theme Builder Guided Process are made available to the PeopleSoft Interaction Hub release 9.1. These enhancements use the Macroset definitions and Activity Guide Framework delivered in PeopleTools 8.55.
For more information on Macro Sets, see PeopleTools: Portal Technology, Administering System Branding.
To use the Theme Builder, it is important that you have the right roles. The two roles described below helps you access and work with the process:
Theme Builder User (PAPP_THEME_BUILDER_USER) – This role has access to the Theme Builder Guided Process. When a user with this role publishes a change, this triggers an email to the Theme Builder Administrator for approval.
Theme Builder Administrator (PAPP_THEME_BUILDER_ADMIN) – This role grants access to Theme Builder Guided Process, Theme Builder Installation and Theme Builder Advanced Settings. This role approves the Theme changes submitted by a Theme Builder User.
|
Page Name |
Definition Name |
Usage |
|---|---|---|
|
PAPP_EPPBR_AGSRCH_FL_GBL (this is the cref for the tile) |
Tap this tile to access the Themes Builder page to update an existing theme or create a new theme. |
|
|
EPPBR_BRANDING_FL |
To view all the Themes defined in the system. |
|
|
EPPBR_AG_DEFTHM_FL |
To specify the values for basic theme attributes. |
|
|
EPPBR_AGASGNTHM_FL |
To turn on the Portal Default or assign themes to user attributes like Permission lists, Roles, etc. |
|
|
EPPBR_AGPUBLISH_FL |
To apply the Theme changes to the current system only and create ADS files to update clustered systems. |
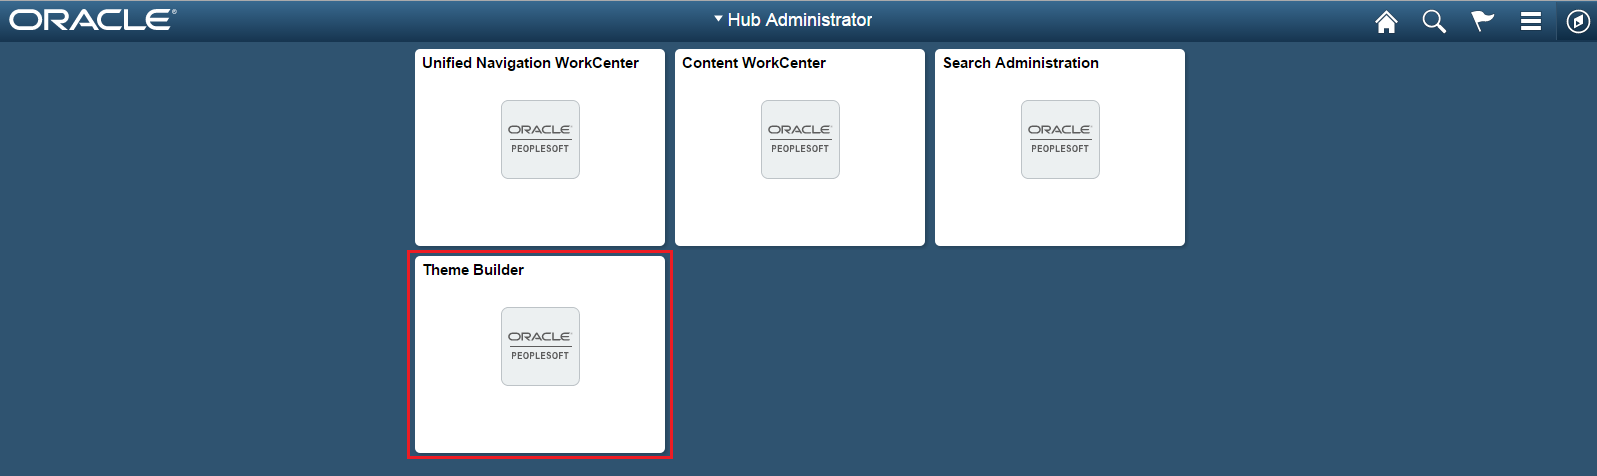
Use the Theme Builder tile (PAPP_EPPBR_AGSRCH_FL_GBL) to access the Theme Builder page from where the user can either update an existing theme or create a new theme.
Navigation:
The Theme Builder tile is available in the Hub Administrator folder. You can add this tile to any of the Homepages using the Personalize function.
This example illustrates the Hub Administrator landing page with the Theme Builder Tile.
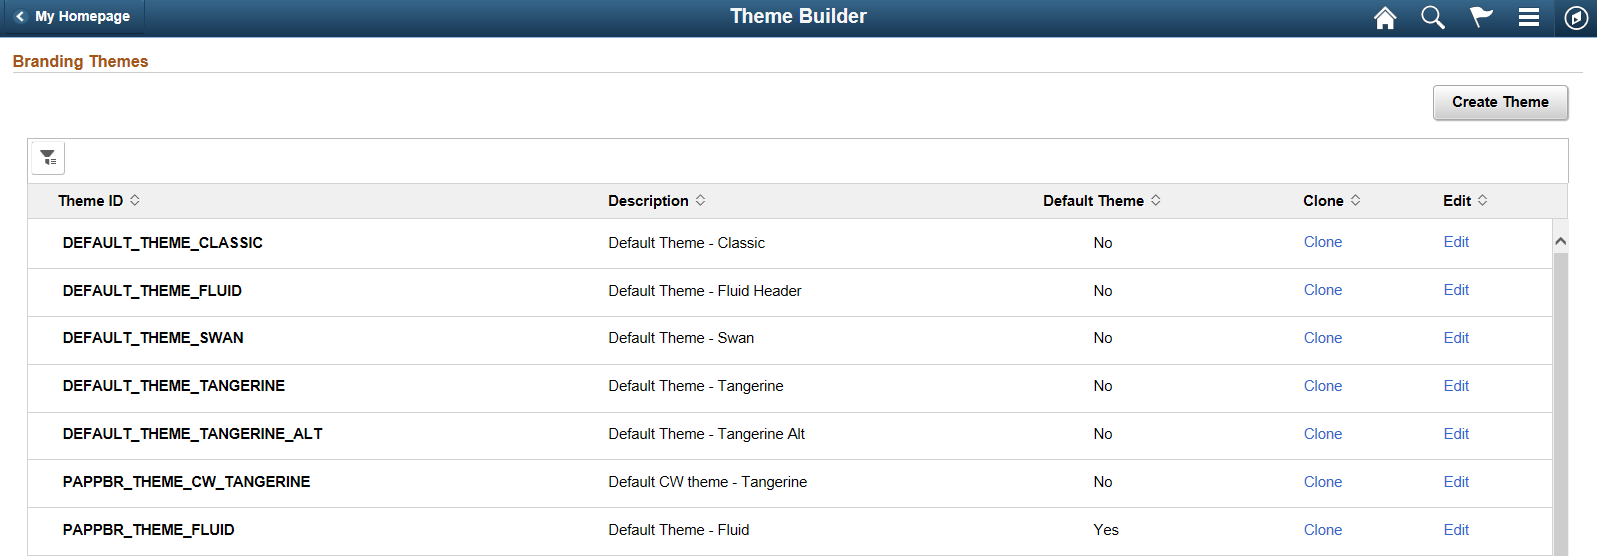
Use the Theme Builder page (EPPBR_BRANDING_FL) to view all the Branding Themes defined in the system. You can tap one of the themes to select it or tap the Create Theme button to create a new theme.
Navigation:
Tap the Theme Builder tile to access the Theme Builder page.
This example illustrates the fields and controls on the Theme Builder page. You can find definitions for the fields and controls later on this page.
Field or Control |
Description |
|---|---|
Create Theme |
Use the Create Theme button to create a new theme. Tap the Create Theme button. You can specify the name and description of the new theme and tap the Continue button. The Theme Builder gets launched with the defaults based on the default Macroset. |
Theme ID |
Displays all the themes defined in the system. |
Default Theme |
Displays if a theme is set as the default in the system. |
Clone |
Use the Clone link to clone any existing theme. Tap the Clone link next to theme you wish to clone. The Clone Theme modal window opens. There you can specify the name and description of the new theme. |
Edit |
Tap the Edit link next to a theme to make any changes to it. The Theme Builder gets launched to help you change the values of the attributes of the theme. |
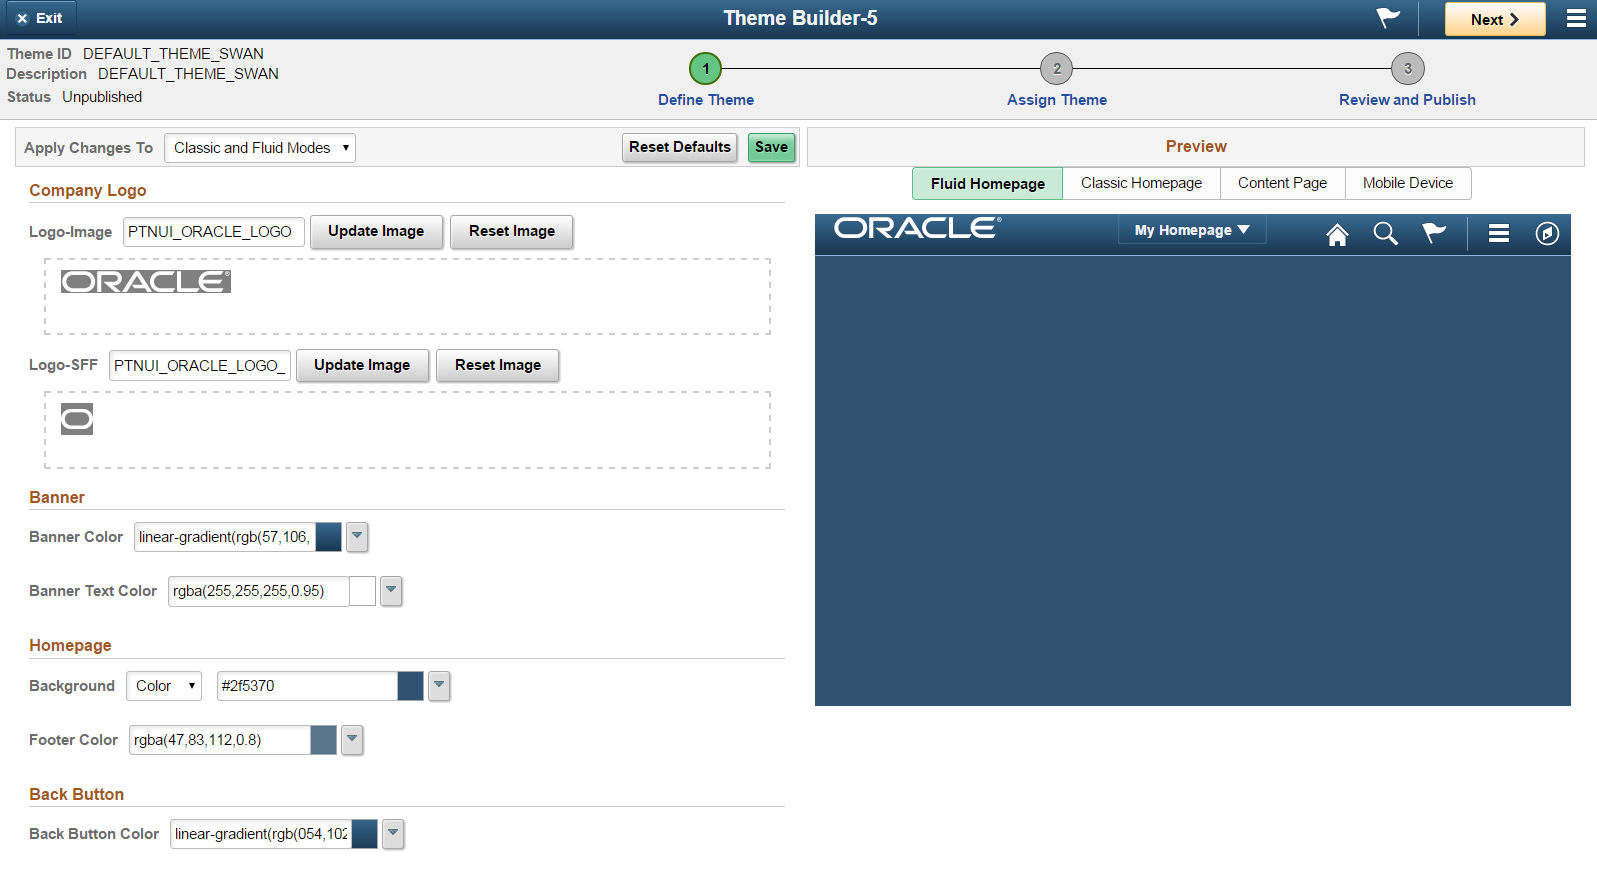
Use the Define Theme page (EPPBR_AG_DEFTHM_FL) to specify values for basic theme attributes.
Navigation:
Tap the Branding tile to access the Branding Themes page. Tap the Create Theme button or the Edit link next to a Theme to navigate to the Define Theme page.
This example illustrates the fields and controls on the Define Theme page. You can find definitions for the fields and controls later on this page.
Field or Control |
Description |
|---|---|
Apply Changes To |
Select the modes to which you wish to apply the changes. The options include:
Note: The Apply Changes To field is displayed only when you select a theme that has a classic header. |
Reset Defaults |
Tap this button to reset the theme to the default values. |
Save |
Tap this button to save the changes to the theme. |
Logo-Image |
Tap the Update Image button to change the image. If you tap the Reset Image button, then the image set as the default loads. |
Banner Color and Banner Text Color |
You can tap the drop-down button next to these fields to choose the color for the Banner and Banner text using a color picker. |
Background |
Select the image to set as the background. |
Footer Color |
You can tap the drop-down button next to these fields to choose the color for the Footer using a color picker. |
Back Button Color |
You can tap the drop-down button next to these fields to choose the color for the Back button using a color picker. |
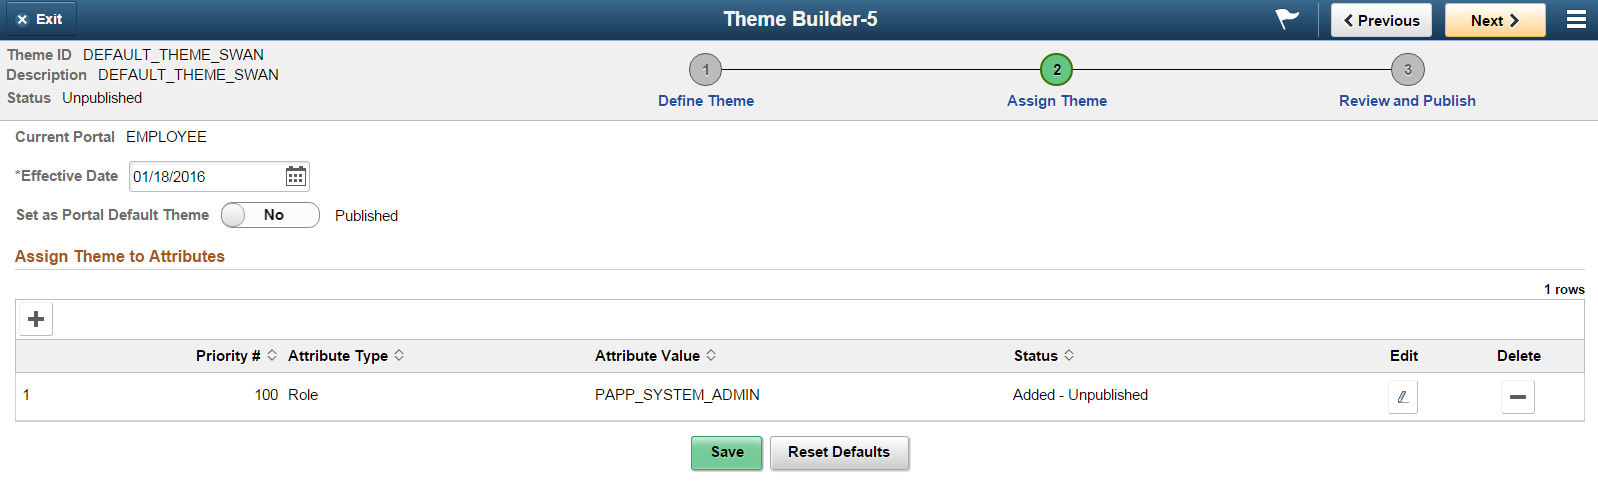
Use the Assign Theme page (EPPBR_AGASGNTHM_FL) to turn on the Portal Default or assign themes to user attributes like Permission lists, Roles, etc.
Navigation:
Tap step 2, Assign Theme, at the top of the page to navigate to the Assign Theme page in the guided process.
This example illustrates the fields and controls on the Assign Theme page. You can find definitions for the fields and controls later on this page.
Field or Control |
Description |
|---|---|
Effective Date |
Enter the data from which you want the theme changes to take effect. |
Set as Portal Default Theme |
If you want to set the current theme as the portal default, choose the option Yes. |
Add button |
Tap the Add button to open the Assign Theme to Attribute modal window. Here you can select an attribute type, value and priority. Click the Review Priorities of Current Theme Assignments in the System heading to view the current theme assignments in the system. |
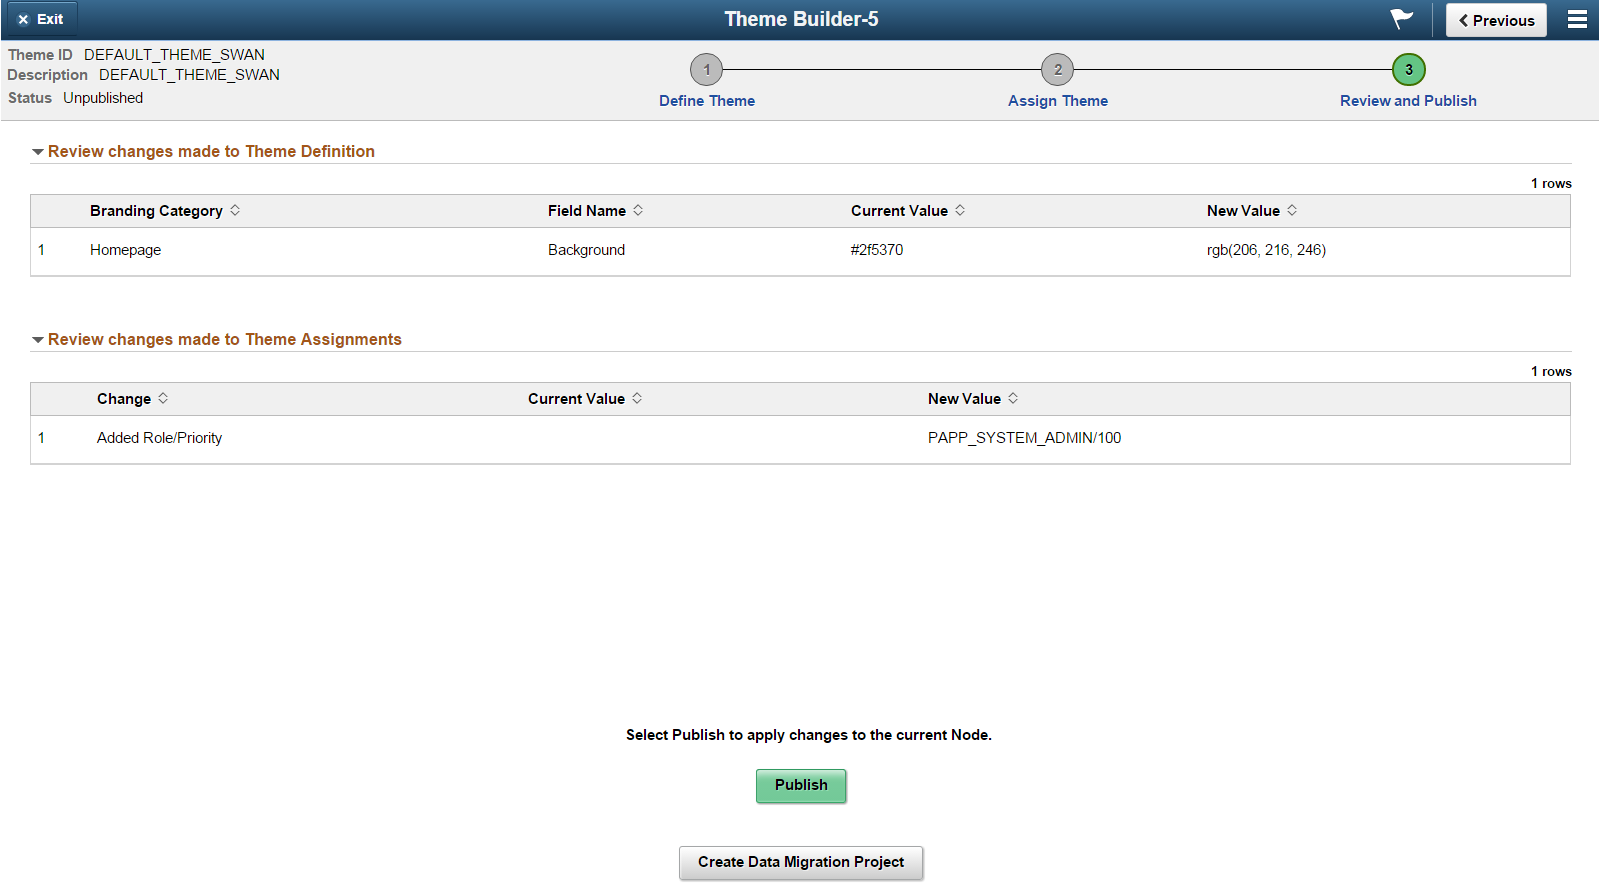
Use the Review and Publish page (EPPBR_AGPUBLISH_FL) to apply the Theme changes to the current system only and create ADS files to update clustered systems.
Navigation:
Tap step 3, Review and Publish, at the top of the page to navigate to the Review and Publish page in the guided process.
This example illustrates the fields and controls on the Review and Publish page. You can find definitions for the fields and controls later on this page.
Field or Control |
Description |
|---|---|
Publish |
Tap the Publish button to apply the theme changes to the current system only. |
Create Data Migration Project |
Tap this button to create a Data Migration Workbench project that includes the selected theme definitions. Tapping this button opens the Create Data Migration Project page (PTBR_CREATE_ADS), which enables you to create a Data Migration Workbench project to migrate theme data to another system. Note: A Data Migration Project Workbench project is also referred to as an Application Data Set (ADS). |
Note: Please remember to clear cache after publishing all Theme changes.