Setting Up Events
To set up events, use the Headcount increase setup panel (LMS_ENTRIES_EVENT_GBL), Incentive event setup panel (LMS_INCENT_EVENT_GBL), Salary Increase event setup (LMS_INCREASE_EVENT_GBL), Headcount decrease event setup (LMS_LEAVES_EVENT_GBL), Promotion event setup panel (LMS_PROMO_EVENT_GBL), Seniority Setup panel (LMS_SENIOR_EVENT_GBL), Working Schedule event setup (LMS_SCHEDULE_EVENT_GBL), Proration setup panel (LMS_PRORATION_GBL), and Hours rate setup panel (LMS_HOURS_RATE_GBL) components.
This section discusses how to set up events.
Understanding Events
An event is an action (or a set of actions) applied to a group of workers. Events are the building blocks of your scenarios. You define and reuse events in many scenarios as long as the scenarios apply to the same set of time periods. Use delivered events to:
Simulate a headcount increase.
Add workers to any group (by job code or position) to simulate hiring or to study the effects of proposed organizational changes.
Simulate future awards.
This simulation enables you to see the effect of awarding a lump sum amount at a specific point in time. The incentive event is simplistic here because the Variable Compensation module offers a more complex simulation. The Variable Compensation module enables you to perform different scenarios to determine the maximum, target, and minimum awards for a group of workers based on a given plan of specific business rules.
Simulate a compensation increase event.
Simulate a headcount decrease.
Simulate a promotion.
A promotion is defined as a move from one Job Code to another Job Code.
Simulate seniority.
This simulation shows the effect of seniority increases.
Define a working schedule.
A working schedules event determines the effect of changing the working schedule for a group of workers.
Define proration rules.
Define hours rates.
|
Page Name |
Definition Name |
Usage |
|---|---|---|
|
LMS_ENTRIES |
Define a Headcount Increase event. |
|
|
Additional Simulation Parameters Page |
LMS_ENTRIES_SEC |
Define additional parameters if the selected job code or position has compensation packages containing pay components expressed either in points or in a weekly frequency. Define the standard hours per standard work period or the points value and currency required by the calculation process for correctly handling the conversion of those pay components. |
|
LMS_INCENTIVES |
Set up a future award for a group. |
|
|
LMS_INCREASE |
Define a compensation increase event. |
|
|
LMS_LEAVES |
Define a headcount decrease event. |
|
|
LMS_PROMOTION |
Simulate promotions for all people in a group. |
|
|
Seniority Setup panel or Seniority Page |
LMS_SENIORITY |
Define a seniority event. |
|
LMS_WRK_SCHEDULE |
Define work weeks for the calculations. |
|
|
LMS_PRORATION |
Define the proration schemes. |
|
|
LMS_HOURS_RATE |
Define the overtime rates used for simulating the working schedules event. Use this page only for the Salary Forecasting calculation process. |
Use the Headcount increase setup panel or Headcount Increases page (LMS_ENTRIES) to define a Headcount Increase event.
Navigation:
Field or Control |
Description |
|---|---|
Headcount Increase Type |
Select how you want the calculations to consider the increase: Avg Amnt (average amount): When you select Avg Amnt, these fields appear: Average Amount, Currency, Frequency. Enter a free compensation amount, which is multiplied by the number of people selected. Use this type of headcount increase to perform an estimated simulation. JobCode: Select this option and the SetID and Forecasted Job fields appear. Use this option to add many people with the same job code. The calculation uses the compensation package defined for the specified job code and multiplies it by the number of people selected for the simulation. Note: Only those job codes that are not associated with a matrix are available. Position: Select this option and the Forecasted Positions field appears. The calculation uses the compensation package defined for the job code associated with the specified position and multiplies it by the number of people selected for the simulation. |
Structure Effect |
Refer to the Understanding Technical Details topic for the definition of the structure effect. To measure the structure effect, assign your headcount increase to a group. |
Number of People |
Enter the number that represents the headcount increase. |
Simulation Parameters |
Click to enter additional simulation parameters for the calculation process. |
Average Amount |
When Headcount Increase Type is Avg Amnt, specify the average amount of the salaries for all people added, based on the frequency specified. For example, five new people get 5000.00 EUR (1000.00 EUR each) every other week, so the frequency is bi-weekly. You would enter 1000 in the Avg Amnt field. |
Currency |
When Headcount Increase Type is Avg Amnt, select the currency that the calculation process uses. |
Frequency |
When Headcount Increase Type is Avg Amnt, specify how often the new people are to be paid. During the calculation process, the frequency is converted to match the elementary period type. For example, the elementary period type is monthly, and you enter five new people who get 1000.00 EUR weekly. The system calculates 5000.00 EUR weekly, and then converts it to a monthly frequency using the frequency annualization factor. The monthly figure is 20000.00 EUR. The calculation process adds 20000.00 EUR every month, starting with the triggering period defined for this event. Frequency values come from the Frequency table. |
SetID |
When Headcount Increase Type is JobCode, specify the setID for the job code for the new hires. These values come from the SetID table. |
Forecasted Job |
When Headcount Increase Type is JobCode, specify a forecasted job for the new hires. Each job code must have its own event. These values come from the Job Code table. |
Forecasted Positions |
When Headcount Increase Type is Position, specify a forecasted position for the new hires. |
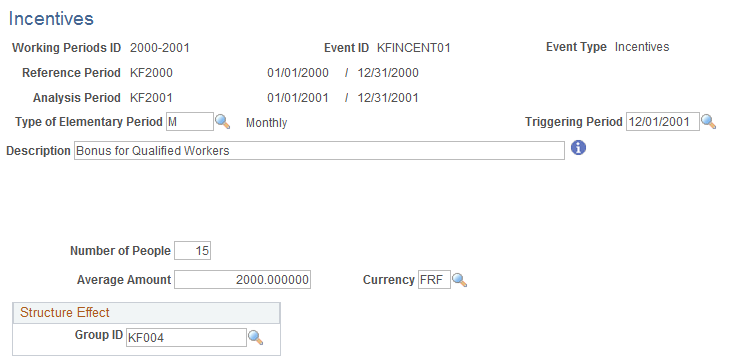
Use the Incentive event setup panel or Incentives page (LMS_INCENTIVES) to set up a future award for a group.
Navigation:
This example illustrates the fields and controls on the Incentives page.
Field or Control |
Description |
|---|---|
Number of People |
Enter the number of people who receive a lump sum incentive award. |
Average Amount |
Enter the average amount each person is to receive. For example, if you select 5 for the number of people and 500 for the average amount, the calculation adds 5 times 500.00 EUR, or 2500.00 EUR, to the triggering period. |
Structure Effect |
Enter the Group ID to receive this award. Refer to the Understanding Technical Details topic for information about the structure effect. |
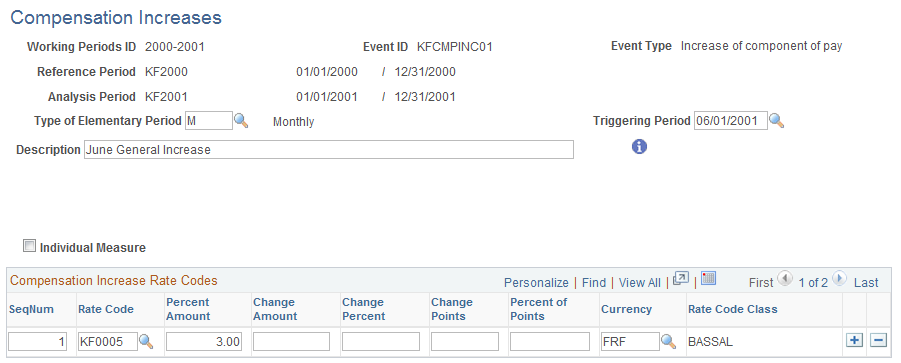
Use the Salary Increase event setup or Compensation Increases page (LMS_INCREASE) to define a compensation increase event.
Navigation:
This example illustrates the fields and controls on the Compensation Increases page.
Field or Control |
Description |
|---|---|
Individual Measure |
Select if the increase is an individual measure. This check box relates to La Masse Salariale method of analysis. It classifies compensation increases into three categories: general increases (applies to the overall simulated population); increases by category (a category being a subset of the overall simulated population); and individual measure (the compensation increase is an increase for an individual). To simulate general increases, deselect this check box. |
Compensation Increase Rate Codes |
Define the rate codes to be increased. All people in a group with a compensation package containing specified compensation rate codes receive the increase that is specified on this page as of the triggering period of this event. Select the way to change a person's compensation for a given rate code from these choices: Percent Amount, Change Amount, Change Percent, Change Points, Percent of Points, Currency, and Rate Code Class. Specify any components of pay and any increases. Depending on the component type, fill in the fields as follows. (Fields not related to certain component types are unavailable for selection.) If the component type is flat amount or hourly, enter either a Percent Amount or a Change Amount. If the component type is percentage, enter only a Change Percent. If the component type is points, enter either a Percent of Points or a Change Points. |
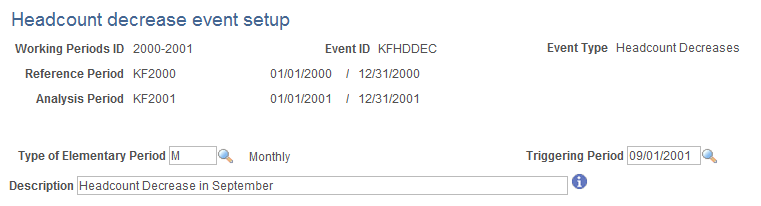
Use the Headcount decrease event setup or Headcount Decreases page (LMS_LEAVES) to define a headcount decrease event.
Navigation:
This example illustrates the fields and controls on the Headcount decrease event setup page.
Field or Control |
Description |
|---|---|
Description |
Enter a description of the headcount decrease event. Specify the group to which this event applies on the Scenario Definition page. For example, if five workers retire as of the date specified by the triggering period, create a group that includes those five workers. At the scenario level, attach this group to the headcount decrease event. |
Use the Promotion event setup panel or Promotions page (LMS_PROMOTION) to simulate promotions for all people in a group.
Navigation:
This example illustrates the fields and controls on the Promotions page.

Field or Control |
Description |
|---|---|
From |
Enter values in the SetID and Job Code fields for a group's current position. |
To |
Enter values in the SetID and Job Code fields for a group's promoted position. |
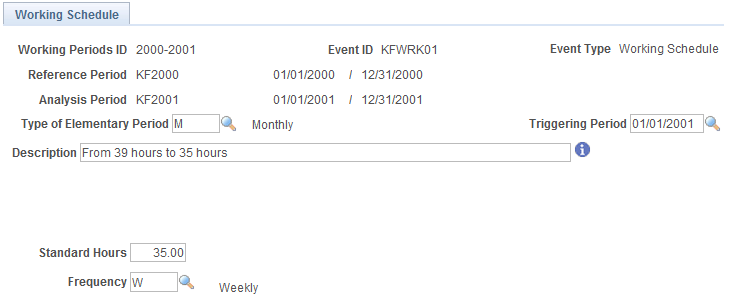
Use the Working Schedule page (LMS_WRK_SCHEDULE) to define work weeks for the calculations.
Navigation:
This example illustrates the fields and controls on the Working Schedule page.
Field or Control |
Description |
|---|---|
Standard Hours |
Enter the number of standard hours per frequency period. For example, 35 hours is standard hours for a weekly frequency. To simulate the effect of a group of people moving from 39 to 35 hours, enter the target frequency (35 hours a week) in this field. The group of people that will change its working schedule is defined at the scenario level. |
Frequency |
Enter the frequency of the standard hours that you select. |
Use the Proration setup panel page (LMS_PRORATION) to define the proration schemes.
Navigation:
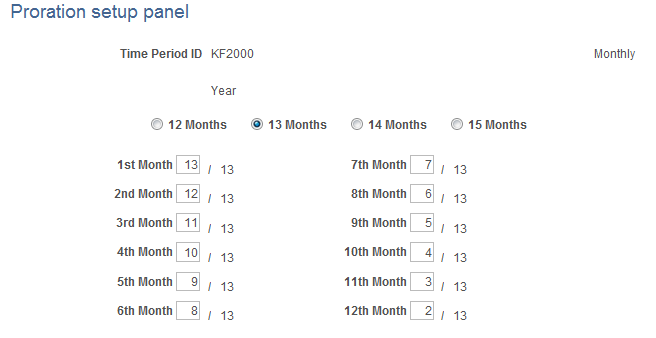
This example illustrates the fields and controls on the Proration setup panel page.
Field or Control |
Description |
|---|---|
Time Period ID |
The system displays the Time Period ID that you entered. |
Period Type |
The system displays a period type of either Monthly or Semi-Monthly. |
Type of Elementary Period |
Depending on the combination of period type and type of elementary period that you selected, the system displays fields that enable you to rate how to pay per elementary period. |
12 Months |
Select to weigh each month equally. |
13 Months |
Select to weigh one month out of a year twice. |
14 Months |
Select to weigh one month out of a year three times. |
15 Months |
Select to weigh one month out of a year four times. The system calculates all the ratios, but you can modify them. For instance, if you select 13 Months, you could weight December twice (default calculation) or half-weight June and December. In this case, you would overwrite the default ratios. |
Use the Hours rate setup panel page (LMS_HOURS_RATE) to define the overtime rates used for simulating the working schedules event.
Use this page only for the Salary Forecasting calculation process.
Navigation:
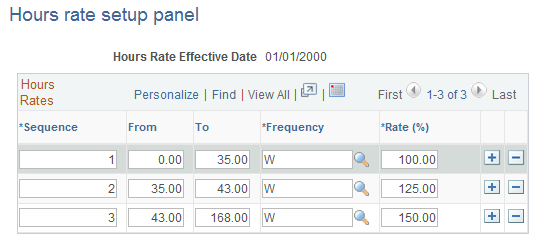
This example illustrates the fields and controls on the Hours rate setup panel page.
Field or Control |
Description |
|---|---|
Hours Rate Effective Date |
Enter the date these rates are effective. |
Sequence |
These numbers represent the sequence of counting hours. They are automatically generated. |
From and To |
Enter the first and last number in the range of hours. The first sequence must begin with 0. |
Frequency |
Enter the valid frequency for this range of hours. |
Rate (%) |
Enter the percentage rate for each sequence. |