Setting Up Geographical Areas and Market Pay Matrices
To set up geographical areas and matrices, use the Define Geographical Areas (GEOGRAPHY_TBL) and Define Configurable Matrices (WCS_LK_TBL_DEFN) components.
These topics provide an overview and discuss setting up geographical areas and market pay matrices.
|
Page Name |
Definition Name |
Usage |
|---|---|---|
|
GEOGRAPHY_TBL |
Define geographical areas by city, state, province, and country. Use these areas to organize market pay data. |
|
|
WCS_LK_TBL_DEFN |
Set up a market pay matrix definition. |
|
|
WCS_LK_TBL_INPUTS |
Define inputs for market pay surveys. |
|
|
WCS_LK_TBL_OUTPUTS |
Define outputs for market pay surveys. |
|
|
WCS_LK_TBL_KEYS |
Specify the search keys to be used to match worker data used in market pay surveys. |
|
|
Load Configurable Matrix Keys Page |
WCS_LK_TBL_KEY_SEC |
Automatically load search keys for specific sources using a prompt table. |
|
WCS_LK_TBL_DATA |
View or enter values for the output data. |
|
|
WCS_LK_TBL_VIEW |
View the matrix as of the last saved version. |
The PeopleSoft application delivers these matrices:
MARKET_PAY
WFR_SURVEY_DATA
The system uses this matrix if you import salary data from the Workforce Rewards application.
You can set up additional configurable matrices to include market pay survey data.
Note: If you have maintained survey matches in PeopleSoft, you can continue to do so by selecting the delivered Market Pay matrix or by creating a new matrix with fields such as Survey Provider and Survey Job Code. These fields enable you to create ad hoc survey participation reports at any time. You create the reports based on the requirements of your survey providers.
Use the Define Geographical Areas page (GEOGRAPHY_TBL) to define geographical areas by city, state, province, and country.
Use these areas to organize market pay data.
Navigation:
This example illustrates the fields and controls on the Define Geographical Areas page. You can find definitions for the fields and controls later on this page.
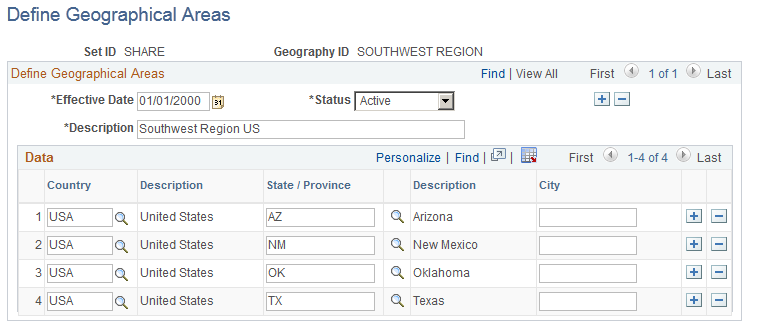
You can enter a geography as broad as an individual country, or you may target a specific country, state, province, or city. You can have one or more rows of country, state, province, or city data. However, you cannot list the same combination of country, state, province, or city within the same geographical area.
Warning! Use care when listing the same combination of country, state, province, or city in different geographies, as this may result in conflicting information when combined with worker data.
Field or Control |
Description |
|---|---|
Effective Date |
You may change geographic definitions. |
Status |
Select Active or Inactive. |
Description |
Enter your company-defined name. |
Country and State / Province |
Select a value from the available listing. |
City |
Enter the name of the specific city. The spelling is not validated so you must enter the name with capitalization and punctuation. |
Use the Matrix Definition page (WCS_LK_TBL_DEFN) to set up a market pay matrix definition.
Navigation:
This example illustrates the fields and controls on the Matrix Definition page. You can find definitions for the fields and controls later on this page.

Field or Control |
Description |
|---|---|
Effective Date |
Enter a date that is equal to or less than the date you want to link it to one or more job codes. |
Status |
Select Active. The default value for all configurable matrices is Inactive. You must change the status to Active in order to use the matrix. |
Matrix Type |
Select MARKETPAY. |
Use the Inputs page (WCS_LK_TBL_INPUTS) to define inputs for market pay surveys.
Navigation:
This example illustrates the fields and controls on the Inputs page. You can find definitions for the fields and controls later on this page.
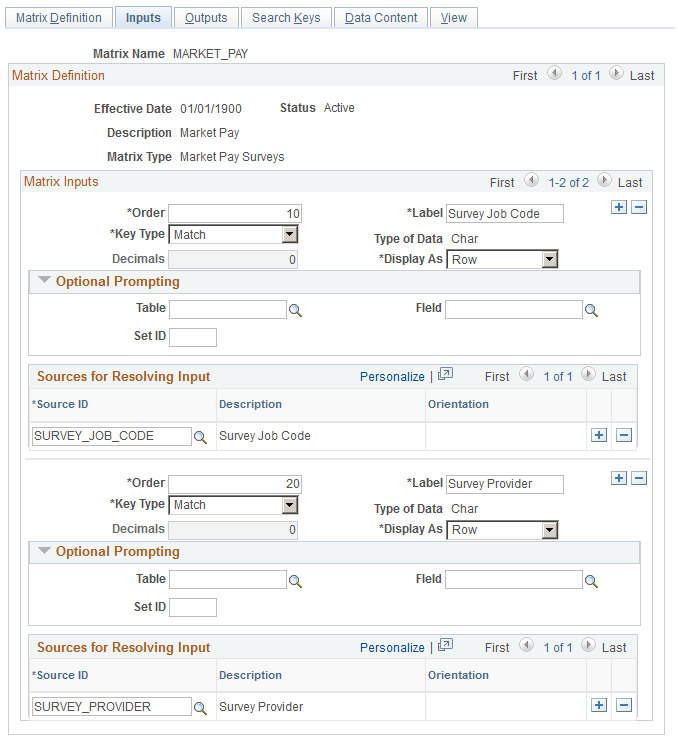
Optional Prompting
If you specify GEOGAREA as the source ID, you can enter prompt values in this group box. Enter GEOGRAPHY_TBL as the table and GEOGRAPHY_ID as the field. There is no automatic validation of key values for geographical areas.
Sources for Resolving Input
Field or Control |
Description |
|---|---|
Source ID |
Select the source for the market pay data. The maximum number of inputs for each matrix is 15. Common types of inputs include:
|
Use the Outputs page (WCS_LK_TBL_OUTPUTS) to define outputs for market pay surveys.
Navigation:
This example illustrates the fields and controls on the Outputs page. You can find definitions for the fields and controls later on this page.
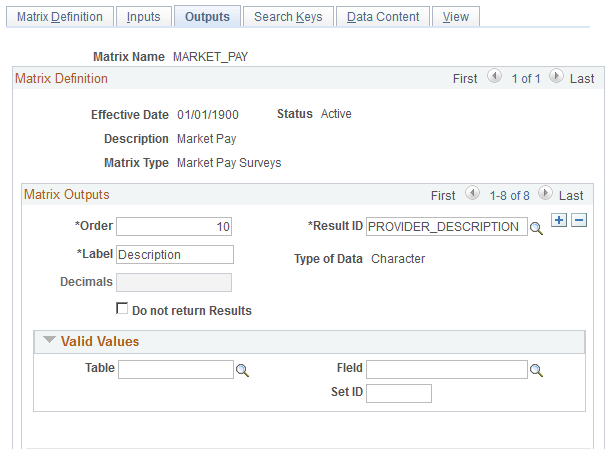
Field or Control |
Description |
|---|---|
Result ID |
Select an output for the market pay matrix. Typical outputs include currency, base, variable, and total compensation. You can have a maximum of 30 outputs for each matrix. These system-delivered values have default names, however, you can edit them to the label that best suits your business. |
Use the Search Keys page (WCS_LK_TBL_KEYS) to specify the search keys to be used to match worker data used in market pay surveys.
Navigation:
This example illustrates the fields and controls on the Search Keys page. You can find definitions for the fields and controls later on this page.
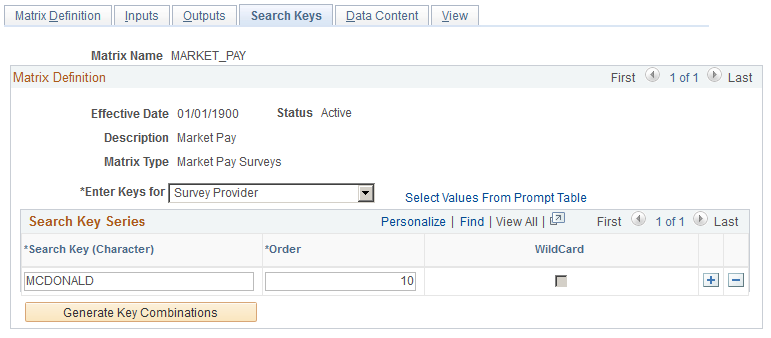
Use this page to enter the key values against which worker data is matched. Suitable search keys for a market pay matrix are Geographical Area or Survey Provider.
Note: You can create a matrix without specifying any search keys and output data values. For example, you might want to define a template for a matrix and then load values from other sources such as a flat file. However, if you change the status of the matrix to Active and you have not defined any search criteria or values, you receive a warning.
Use the Data Content page (WCS_LK_TBL_DATA) to view or enter values for the output data.
Navigation:
This example illustrates the fields and controls on the Data Content page. You can find definitions for the fields and controls later on this page.
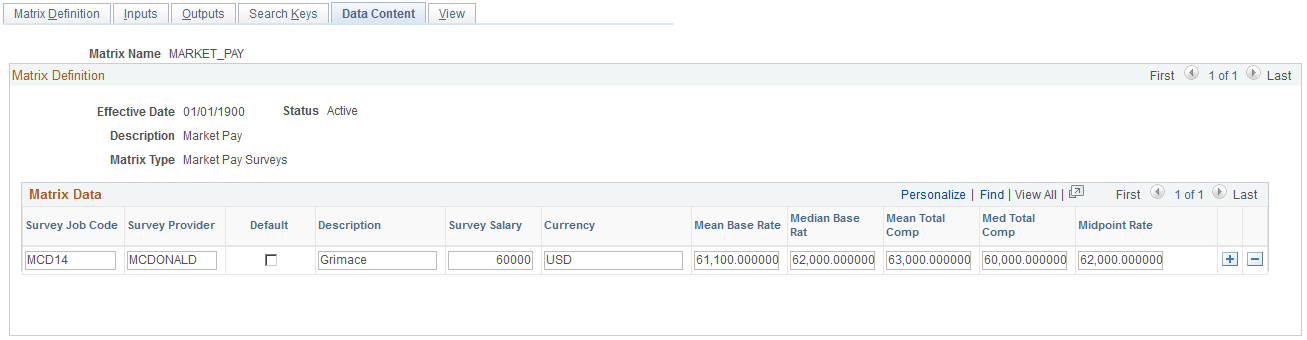
Use this page to view input and output fields. You may leave the data values blank for the loading of market pay data from a file or Workforce Rewards. You may also enter the data manually.
Use the View page (WCS_LK_TBL_VIEW) to view the matrix as of the last saved version.
Navigation:
This example illustrates the fields and controls on the View page. You can find definitions for the fields and controls later on this page.
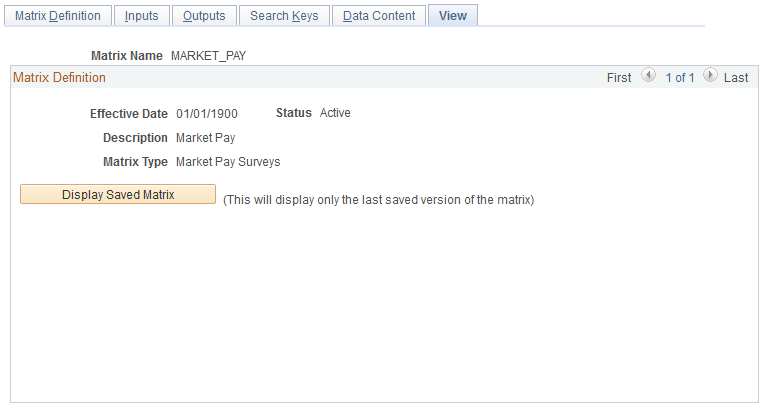
After you have entered all data content for outputs, you must save the matrix. You can view the matrix on this page only after you have saved it.
When you click the Display Saved Matrix button, the results generated are from the last saved version of the matrix.
Important! This page displays only the last saved version of the matrix.