
 Understanding Consolidations
This chapter provides an overview of consolidations and discusses how to:
Set up earnings consolidations.
Set up hours consolidations.
Consolidate contributions.
Understanding ConsolidationsThis section provides overviews of:
The periodic consolidation process.
Functions.
Data sources.
Multiple jobs considerations for consolidating hours.
Continuous consolidation history maintenance.
The Periodic Consolidation ProcessA pension calculation can use vast amounts of historical payroll data. Earnings, hours, and contribution histories can cover twenty years or more. If every calculation involved looking up each paycheck an employee received over their entire period of employment, you would have to keep all that data available indefinitely rather than eventually archiving it. This would also require extensive processing time.
A more efficient way to deal with this data is to use a periodic consolidation process. This gathers the paycheck data and stores yearly or monthly totals. Using consolidations, you can archive the raw payroll data and still have the relevant information available during calculations.
Consolidations produce monthly or annual payroll accumulations. In order to set up consolidation rules, you need to understand how they fit into pension plan processing.
As employees are paid, you need to update the consolidated data. You do this through periodic processing.
When you run a calculation, the system uses the most recent consolidation data. If your consolidations are not up to date, the calculation does not use the most recent payroll information.
New payroll information is available for consolidation after each payroll run. At a minimum, you should regularly process consolidations after the last pay run of each consolidation period.
The “process through” date associated with each consolidation period tells you when the data was last updated. If the process through date is earlier than the period end date, you do not yet have final data for the period.
By separating the consolidation process from the rest of the pension calculation, you can schedule this time-consuming operation for a convenient, off-peak time.
Generally, you process consolidations for similar employees at the same time. For example, you might process all weekly-paid employees together.
See Also
FunctionsThere are two functions that always require the consolidated earnings function: final average earnings and cash balance accounts. Social security calculations can also be based on consolidated earnings—or, if you choose, on a final average earnings amount. Consolidated hours can also be based on consolidated earnings if you provide an earnings-to-hours divisor.
Service is the only function that uses consolidated hours.
Employee accounts is the only function that uses consolidated contributions.
The three consolidation functions, consolidated earnings, consolidated hours, and consolidated contributions, calculate periodic payroll accumulations.
Consolidated earnings and consolidated hours calculate this information in three stages:
Actual hours, earnings, or contributions from payroll.
Amounts after generating any hours or earnings.
Final amounts after any other adjustments.
Consolidated earnings has one additional result: the partial period fraction. This indicates the portion of the consolidation period that an employee works. For example, if you consolidate earnings using calendar years and an employee terminates on April 1, the employee only worked 25 percent of the year and the partial period fraction is .25.
To see the details of an employee’s consolidation history, select Pension, Pension Information, Update Employee Plan Data. This component includes pages showing the detailed consolidated data.
Data SourcesThe consolidations functions get all the earnings, hours, and contributions data from PeopleSoft Enterprise payroll tables. If you are running a standalone version of Pension Administration, you have to bring your payroll data into the PeopleSoft Enterprise tables before running the consolidation.
If you use PeopleSoft to track multiple concurrent jobs and you have the Single Job Environment check box cleared, the consolidation functions do not distinguish earnings, hours, or contributions based on job. The other calculation functions only use data for the first job; however, the consolidation functions incorporate the data for all jobs.
Following are the payroll tables that provide data to each of the three consolidation functions. When you populate these tables, whether during the initial data conversion or to bring data into a standalone system, be sure to populate all of the indicated tables. Consolidations do not work unless an employee has data in every table. If the data is unavailable, create a row with zeros in all of the numeric fields.
|
Consolidated Earnings |
Consolidated Hours |
Consolidated Contributions |
|
PAY_EARNINGS |
PAY_EARNINGS |
PAY_DEDUCTIONS |
|
PAY_OTH_EARNS |
PAY_OTH_EARNS |
|
|
PAY_SPCL_EARNS |
PAY_SPCL_EARNS |
|
|
PAY_CHECK |
PAY_CHECK |
|
|
W2_AMOUNTS |
W2_AMOUNTS |
|
|
EARNINGS_BAL |
|
|
Pension Administration includes a periodic process to copy payroll data into pension history tables. This enables you to purge data from the payroll tables while still leaving the necessary information available for pension processing.
The consolidation process always uses data from the payroll tables if it is available. If the payroll tables do not have data for a period, the consolidation process looks for data in the pension archive versions of the tables. If you enter an override in the pages where you maintain consolidated data, the process does not look at either table for the period.
If you reconsolidate after purging data from the payroll tables, data for the reconsolidation comes from the pension archive tables. The pension archive table names are similar to the payroll source table names, and they have the prefix PA_HST_.
|
Payroll Source Table |
Pension Archive Table |
|
PAY_EARNINGS |
PA_HST_PAY_EARN |
|
PAY_OTH_EARNS |
PA_HST_OTH_EARN |
|
PAY_SPCL_EARNS |
PA_HST_SPL_EARN |
|
PAY_CHECK |
PA_HST_PAY_CHK |
|
W2_AMOUNTS |
PA_HST_W2_AMTS |
|
EARNINGS_BAL |
PA_HST_EARN_BAL |
|
PAY_DEDUCTIONS |
PA_HST_PAY_DED |
You also use the pension archive tables if you load historical payroll data at the time of the initial Pension Administration implementation. If you use Application Designer to look at the pension archive tables, you can see which fields the system copies.
Multiple Jobs Considerations for Consolidating HoursTo process multiple jobs for consolidating hours, on the Plan Implementation page you must clear the Single Job Environment check box. Only jobs for which an employee is eligible within the specified plan are considered for consolidations, unless you use the W-2 option. Most job consolidations are processed one job at a time. The results of each job’s consolidations are then added for each calculation period.
Hours consolidations based on consolidated earnings are treated differently when processing multiple jobs. In this case, the system divides the consolidated earnings by the rate in the first primary job record that it finds.
See Also
Establishing Earnings Parameters
Continuous Consolidation History MaintenanceAn employee’s consolidation history must not be interrupted. If an employee leaves the organization and is later rehired, you could end up with gaps in the consolidation history. This could also happen if an employee transfers to another job and becomes ineligible for a particular plan but then transfers back and becomes eligible again.
If there are such gaps in the consolidation history, you cannot calculate a pension benefit. Therefore, you must set up the consolidation rules to prevent these gaps. You do this by specifying consolidation definitions used specifically during periods of ineligibility. You associate different definitions with eligible and ineligible periods, using the Function Result page.
If you use the same definition for eligible and ineligible periods, you have zero earnings and hours for the periods between a termination and a rehire. If, however, an employee transfers to a different job within the organization, there may be earnings or hours from that ineligible job. For this reason, you should instead create definitions specifically for the ineligible periods. Configure these definitions so that they always produce zero earnings and hours. To do this, base the definitions on actual payroll earnings or payroll hours and specify a “dummy” earnings code that has no associated earnings or hours.
For consolidated hours, you have another alternative. You can use the same consolidated hours definition for eligible and ineligible periods, but configure the service definition to suppress service during periods of ineligibility, regardless of whether there are consolidated hours.
Setting Up Earnings ConsolidationsTo set up earnings consolidation, use the Earnings Consolidation (EARNINGS) component. This section provides an overview of earnings consolidations, lists the pages used to set up earnings consolidations, and discusses how to:
Establish earnings parameters.
Set earnings accumulation limits and adjustments.
Establish earnings generation methods.
Establish earnings adjustments.
Understanding Earnings Consolidations You use the Consolidated Earnings component to set up the rules for earnings consolidations.
To process an earnings consolidation:
Determine the accumulation period and the actual earnings for the period.
Generate earnings if necessary.
Adjust hire periods if necessary.
Adjust any termination periods preceding a rehire.
Add any additional earnings.
Apply any minimums or maximums.
Calculate the partial period fraction.
Note. The consolidation process adjusts termination periods only if an employee has been rehired. It does not adjust final termination periods; functions using consolidated data have other parameters for handling final periods.
The core functions that need consolidated earnings use the final adjusted earnings amount produced by step six. However, the system also stores the intermediate amounts produced by steps one and two and the fraction produced by step seven. These intermediate amounts are informational only; they display on the Earnings History page but are not used in the calculation.
Pages Used to Set Up Earnings Consolidations
|
Page Name |
Object Name |
Navigation |
Usage |
|
PA_CONS_EARN_PARMS |
Set Up HRMS, Product Related, Pension, Components, Earnings Consolidation, Earnings Parameters |
Establish the accumulation period, and identify the earnings data to include in the periodic totals. |
|
|
PA_CONS_EARN_ACCUM |
Set Up HRMS, Product Related, Pension, Components, Earnings Consolidation, Earnings Accumulation |
Set limits and adjustments. |
|
|
PA_CONS_EARN_GEN |
Set Up HRMS, Product Related, Pension, Components, Earnings Consolidation, Generate Earnings |
Establish generation conditions and methods. |
|
|
PA_CONS_EARN_BRK |
Set Up HRMS, Product Related, Pension, Components, Earnings Consolidation, Earnings Adjustments |
|
Establishing Earnings ParametersAccess the Earnings Parameters page.
|
Copy |
Consolidated earnings definitions can be quite complex. This is a shortcut you can use to copy a similar definition. Establish the first definition, click the Copy button, enter a new name and description, and the system clones the original definition using the new name. Then make whatever minor adjustments you need to the new definition. If you have to make major adjustments, consider creating the new definition from scratch instead of copying an existing definition. |
Setting Up the Accumulation Period
|
Period |
The consolidation process produces periodic earnings totals to provide a period-by-period earnings history. Enter the appropriate period, selecting from the following options: Calendar Month, Calendar Year, Plan Year, Employee’s Anniversary Year, and Other Year. If you select Other Year, specify the start month and start day of that year. Use a number (1-12) to represent the month. The day is usually the first of the month. Depending on the function that uses this definition, there are certain restrictions:
|
Allocating Earnings to Periods
|
Accumulate Based On |
If you base earnings on either of the following, your earnings data is already aligned with your consolidation period: Earnings Balance Table or Payroll W2 Accumulator (you select these options in the Earnings Based On field, described below). If you base earnings on compensation rate, there are no earnings periods to align. In these cases, you can ignore the Accumulate Based On group box. If you base earnings on pay period data, you need to align your payroll dates with your consolidation dates. Specify the period into which earnings fall by selecting an Accumulate Based On option:
|
Indicating the Earnings Basis
Consolidated earnings are based on either actual earnings as recorded in your PeopleSoft Enterprise Payroll system or compensation rate as recorded in your PeopleSoft Enterprise Human Resources system.
|
Earnings Based On |
In the Earnings Based On group box, choose one of the following types:
Note. When you use Earnings Balance Tables or Payroll W2 Accumulator, you must allocate earnings based on Earned Date. |
Multiple Jobs Considerations for the Earnings Based On Group Box
If you use the multiple jobs functionality, the system selects the jobs used for earnings consolidations in one of two ways: If you select Payroll W2 Accumulator as the method of accumulation, consolidations use the W-2 amounts without regard to the job. In all other cases, consolidation only includes the jobs that make an employee eligible for the plan.
Selecting and Adjusting Earnings Amounts
|
Payroll Earnings |
If your consolidated earnings use any of the payroll-based earnings types, use the Payroll Earnings group box to specify the earnings or balance types to use:
Build the list of earnings or balance types in the scrolling region of the Earnings Based On group box. |
|
Bal/Earn Code |
Specify a code for the plan you select. |
|
Pct of Earnings |
For each Bal/Earn Code you specify, you can adjust the earnings by a specified percentage. For example, you can use 100 percent of regular earnings and 50 percent of overtime earnings. If you exclude earnings, you can exclude 50 percent of overtime earnings. |
|
Accumulation Limit Amount |
You can limit the amount of earnings for an earnings code by entering the limit here. Do not use this field to implement 401(a)(17) limits. Set up those limits on separate 401(a)(17) pages, and apply them in the Final Average Earnings or Cash Balance Accounts function. |
Setting Up Compensation Rate Options
If you base your earnings data wholly or partially on compensation rate, you need to specify how to use the rate. Rate information comes from the employees' job records.
|
Actual Rates |
If you select this option, each compensation rate in effect during a period is prorated for the portion of the period it was effective. All these prorated rates are added to calculate the earnings for the period. For example, if Lewis’s annual rate is 40,000 USD on January 1 and 44,000 USD starting April 1, the system takes three months at the first rate (10,000 USD) and nine months at the second rate (33,000 USD), for a final amount of 43,000 USD. |
|
Round Method |
You can round the effective dates of rate changes by specifying a round method, which you define. |
|
Compensation Rate Effective On |
If you do not use the actual rates, complete the Compensation Rate Effective On options. Use the scrolling region in this box to list one or more dates when the compensation rates are in effect. |
|
Current Period/Prior Period |
Select an option: Current Period to check the compensation rate during the current period or Prior Period to check it during the prior period. |
|
Month |
Enter the month that the compensation rate becomes effective. |
|
Day |
Enter the day that the compensation rate becomes effective. |
|
Multiply By |
Especially if you incorporate rates from multiple dates, you need to indicate how to weigh each rate. Enter a factor for each rate in the Multiplied By field. For example, you could use half of an employee’s January 1 rate and half of the employee's July 1 rate. You can set up a factor as a constant value or an alias that you create. If you leave this field blank, the system uses a factor of 1.0. |
Example of Setting Up Compensation Rates
When you consolidate earnings that are based on both payroll and earnings and the compensation rate, the system adds the earnings data (as specified in the Payroll Earnings group box) and the compensation data (as specified in the Compensation Rate Effective On group box).
Suppose you consolidate monthly but pay employees every two weeks. Let’s see what happens when you use a 50/50 blend of payroll earnings and compensation rate for an employee earning 60,000 USD per year.
For the compensation rate portion, the employee's earnings are 5,000 USD per month. Take 50 percent of that and each consolidation period has 2,500 USD from the compensation rate source.
For the payroll portion, there are ten months when the employee gets 4,600 USD and two months when the employee gets 6,800 USD (these numbers are rounded rather than exact). Take 50 percent of these numbers and you get ten months at 2,300 USD and two months at 3,400 USD.
Add the 2,500 USD (from the 50 percent of the rate portion) to each of these amounts, and you end up with ten months at 4,800 USD and two months at 5,900 USD.
Compare the blended method to using just payroll earnings or just the compensation rate:
Using only payroll earnings, there are 10 months at 4,600 USD and two months at 6,800 USD.
Using only the compensation rate, there are 12 months at 5,000 USD.
Using a 50/50 blend of the two, there are 10 months at 4,800 USD and 2 months at 5,900 USD.
By blending the payroll earnings and the compensation rate, you can reduce the discrepancy between the months when the employee receives two paychecks and the months when the employee receives three paychecks.
Note that in this example we assume that payroll data is allocated by either paycheck date or payroll end date. Allocating based on earned date is somewhat different. That method spreads earnings more evenly among consolidation periods. It does not necessarily make sense to blend payroll earnings and compensation rate when you allocate the payroll data by earned date. This could make sense, however, if employee earnings vary substantially from period to period due to bonuses or commissions.
Setting Earnings Accumulation Limits and AdjustmentsAccess the Earnings Accumulation page.
Limits and Adjustments
The limits and adjustments apply to all complete consolidation periods, whether full or partial. The system does not apply limits and adjustments before the period end date, so you do not specify this information for most final periods. If you consolidate based on compensation rate, you can also specify statuses for which an employee should not be credited with earnings.
|
Minimum Earnings |
To limit the total earnings per period, enter a minimum earnings amount. |
|
Maximum Earnings |
To limit the total earnings per period, enter a maximum earnings amount. |
|
Plus Additional Amount |
If you want to add earnings to the period total (subject to a maximum that you set), enter that amount in the Plus Additional Amount field. To subtract earnings, enter a negative number in this field. You can set up all of these fields as either constants or aliases that you create. |
Exclude Categories
If your consolidation is based on the annual compensation rate rather than actual earnings, you need a way to recognize periods of time when an employee should not receive any earnings credit. For example, if an employee who earns 36,000 USD per year goes on leave for a month, you need to exclude one month’s worth of earnings to reduce the consolidated earnings for the period to 33,000 USD. Use the Exclude Categories group box to enter codes for which you ignore earnings.
Note. The Exclude Categories information only applies when you base the earnings consolidation at least partially on compensation rate.
|
Category |
Enter each category of action and reason codes for which you ignore earnings. Use the categories you set up on the HR Action/Reason Categories page. The system does not credit an employee with earnings until the next relevant action and reason event in the employee’s job record—in this case, a return from leave. However, the system only recognizes this action as “relevant” if you reference it elsewhere in the consolidated earnings definition. To ensure that the system recognizes the return from leave action (and thus stops excluding earnings), include that action in the Include Category on the Consolidate Earnings - Earnings Adjustments page. |
See Also
Creating Action and Reason Categories
Establishing Earnings Generation MethodsAccess the Generate Earnings page.
Establishing Conditions for Earnings Generation
|
Action/Reasons for Generation |
You use the fields in this group box to generate earnings based on employee status or other criteria. |
|
Category |
You can generate earnings based on employee status or on other criteria. Use the Category field to identify the HR action and reason code categories that require generated earnings. You can insert additional rows if necessary. |
|
Custom Statement Name |
To indicate other conditions for earnings generation, you have to first set up a custom statement outlining those conditions. Enter the name of the custom statement in the Custom Statement Name field. If the custom statement conditions are met, the system generates earnings for all periods being processed. This means that during a delete-and-rebuild consolidation, which processes several periods at once, the system might generate earnings for all periods. Warning! Do not generate based on custom statements unless you permanently disable the delete-and-rebuild consolidation mode. If an employee has multiple action-and-reason events that generate earnings for a single period—for example, a military leave and then a disability leave—the events are processed in chronological order. If your generation method replaces earnings for the entire period, earnings generated for the final event replace earnings generated for earlier events. |
See Creating Action and Reason Categories.
Ending Earnings Generation
If you generate earnings based on an HR action and reason category, the system uses an employee’s action and reason history to determine when to stop the generation. The system continues to generate earnings for the employee until the next relevant action and reason event in the employee’s job record. For example, if Belinda goes on leave at the end of 2002 and returns from leave at the beginning of 2004, the system generates earnings for three years: 2002, 2003, and 2004.
The system only recognizes a return from leave action as “relevant” if you reference it elsewhere in the consolidated earnings definition. To ensure that the system recognizes the return from leave action (and thus stops generating earnings), include that action in the Include Category on the Earnings Adjustments page.
If you generate earnings based on custom statement criteria, the system generates earnings for all the periods that are processed. If the statement is no longer true during the next processing period, the system does not generate earnings at that time.
Multiple Jobs Considerations for Earnings Consolidations
When you process multiple jobs, the system generates earnings for each job as needed, then adds the results to create a total generated earnings amount for each computation period.
|
Generation Method |
For each earnings generation condition that you set up, select a generation method:
Most of the methods replace all the earnings for the period. Only the Replace with Compensation Rate method can generate earnings for the period of time during which an employee actually meets the generation conditions. For example, Belinda went on leave at the end of 2002 and returned at the beginning of 2004. If you select Replace with Compensation Rate, the system generates earnings for the time she was on leave and adds those earnings to her actual 2002 and 2004 earnings. With any other method, the system overwrites the actual earnings from early 2002 and late 2004 with the generated earnings for those periods. |
Establishing Earnings AdjustmentsAccess the Earnings Adjustments page.
Using the Partial Period Fraction
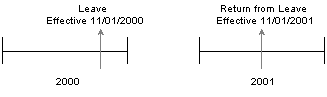
The partial period fraction indicates what portion of a consolidation period an employee actually works. For example, if you consolidate using calendar years and an employee terminates on October 1, 2000, the employee has a partial period fraction of .75 for the 2000 consolidation period. If the employee is rehired the following May 1, the 2001 period has a partial period fraction of .66.
The system determines the partial period fraction by breaking the period into included and excluded segments. These segments are, in turn, based on the employee’s action and reason history. For example, assume that leaves of absence are in your exclude category and returns from leave are in your include category. Jasmine has the following action and reason history:
Sample action and reason history
The system always determines the partial period fraction by counting the included days, not the included months. Because 305 days of the 366 days in 2000 are included, the 2000 fraction is 305/366, or .8330. In 2001, 184 days out of the 365 days are included, and the fraction is .50414.
This example assumes that the leave status continues into the next period. The rules can instead be set up so that the exclude status stops when the consolidation period ends. In that case, Jasmine’s 2001 partial period fraction is 1.0, even though she is still on leave for the first part of the period.
Configuring Include and Exclude Categories
The two types of exclude segments already discussed, generation action and reason codes and “exclude category” action and reason codes (for excluding earnings when you consolidate based on compensation rate), can continue beyond the end of a consolidation period until the next include segment starts.
|
Single Partial Period |
In the Single Partial Period group box, enter the Include Category and Exclude Category. |
|
Include Category |
Enter an Include Category with all the action and reason codes that start an include period, including those that end the generated earnings exclude segments and the compensation rate exclude segments. |
|
Exclude Category |
Enter an Exclude Category for other action and reason codes that start an exclude segment that stops no later than the end of the consolidation period. |
|
Continuous Partial Period |
In the Continuous Partial Period group box, enter an Exclude Category for action and reason codes that start an exclude segment that continues until the next “include” action and reason. Note. Make sure that no action and reason code combination appears in more than one consolidated earnings category. For example, if you generate earnings during maternity leaves and military leaves, do not include either of those leave types in either of the partial period exclude categories. |
Multiple Jobs Considerations for Continuous Partial Period
A partial period for an employee with multiple jobs is calculated by subtracting the number of days the employee is inactive in the specified accumulation period from the total number of days in an accumulation period. The difference is then divided by the total number of days in the accumulation period.
Adjusting Hire and Termination Periods
|
Termination and Hire/Rehire |
Use the Termination and Hire/Rehire group boxes to set up adjustments for hire and termination periods. In calculating the partial period fraction, hire actions are treated as “include” actions, and termination actions are treated as “exclude” actions. The consolidation process adjusts a termination period only after a subsequent rehire. For example, if Quentin terminates in 2004, the 2004 consolidation period is his last. If he is rehired in 2006, the system adjusts the 2004 period, creates a zero-earnings 2005 period, and creates a 2006 period. Because the 2006 period includes the rehire action, it incorporates the hire period adjustment method you specify. |
|
HR Action/Reason Category |
Before you set up adjustments for hire and termination periods, you first must indicate how to recognize these periods. Enter the HR action and reason categories that indicate hire termination periods in the HR Action/Reason Category fields in the Termination and Hire/Rehire group boxes. |
|
Adjustment Method |
For each action and reason category that you set up, select an adjustment method for adjusting the earnings for the resulting partial period:
|
Multiple Jobs Considerations for Adjustment Method
Multiple jobs are generally consolidated one job at a time. Rates and earnings are computed by job, so there is no confusion about the earnings and rates that are used.
Note. When you use the multiple jobs functionality, the system applies minimum and maximum adjustments to the total consolidated earnings of all jobs.
Setting Up Hours ConsolidationsTo set up hours consolidations including Hours Parameters, Hours Accumulation, Generate Hours, and Define Hours Adjustment, use the Hours Consolidation (HOURS) component.
To set up the rules for hours consolidations, select Set Up HRMS, Product Related, Pension, Components, Hours Consolidation.
To consolidate hours:
Determine the accumulation period and the actual hours for the period.
Generate hours if necessary.
Adjust hire periods if necessary.
Adjust any termination periods preceding a rehire. Note that termination periods are only adjusted if an employee is rehired. Final termination periods are not adjusted by the consolidation process; functions using consolidated data use other parameters for handling the final period.
Add any additional hours.
Apply any minimums or maximums.
Note. There is no partial period fraction for consolidated hours. Instead, there is a flag that identifies a partial period without specifying the portion of the period worked.
The Service function gets consolidated hours from the final adjusted amount produced after step six. However, the system also stores the intermediate amounts produced by steps one and two. These intermediate amounts are informational only. They appear on the Review Consolidation Results - Hours History page, but they are not referenced in the calculation.
Pages Used to Set Up Hours Consolidations
|
Page Name |
Object Name |
Navigation |
Usage |
|
PA_CONS_HOUR_PARMS |
Set Up HRMS, Product Related, Pension, Components, Hours Consolidation, Hours Parameters |
Establish the accumulation period, and identify the hours data to include in the periodic totals. |
|
|
PA_CONS_HOUR_ACCUM |
Set Up HRMS, Product Related, Pension, Components, Hours Consolidation, Hours Accumulation |
Set up earnings-to-hours conversion methods, and set limits and adjustments. The system does not apply limits and adjustments until after the period end date, so final periods do not have these adjustments. |
|
|
PA_CONS_HOUR_GEN |
Set Up HRMS, Product Related, Pension, Components, Hours Consolidation, Generate Hours |
Set up conditions and methods for generating hours. |
|
|
PA_CONS_HOUR_ADJ |
Set Up HRMS, Product Related, Pension, Components, Hours Consolidation, Define Hours Adjustments |
Establish the criteria for determining whether a period is a partial period. Set up parameters for adjusting hire and termination periods. |
Establishing Hours ParametersAccess the Hours Parameters page.
|
Copy |
Consolidated hours definitions can be quite complex. This is a shortcut you can use to copy a similar definition. Establish the first definition, click the Copy button, enter a new name and description, and the system clones the original definition using the new name. You can then make whatever minor adjustments you need to the new definition. If you have to make major adjustments, consider creating the new definition from scratch instead of copying an existing definition. |
Setting Up the Accumulation Period
|
Accumulation Period |
The consolidation process produces periodic hours totals, which provide a period-by-period hours history. Enter the appropriate accumulation period:
The accumulation period must align with the accumulation period for the Hours Counting Service definition where you use your consolidated hours. Because the service definition does not support the Other Year option, you do not use that option in your consolidated hours definition—unless you make modifications. |
|
First Period is Anniv. Year |
For computation periods other than an anniversary year, an employee’s first period is usually a short period. If your service definition gives employees the benefit of a full year for the first period, selectFirst Period is Anniv. Year. If you do this, your adjusted first period overlaps the second period. For example, if the usual computation period is a calendar year, an employee hired on March 5, 2000 has the following computation periods: The first period is March 5, 2000 to March 4, 2001, and the second period is January 1, 2001 to December 31, 2001. Note. If you select this option, be sure to also select it in your Service definition in order to keep your hours and service periods aligned. |
Indicating the Hours Basis
|
Hours Based On |
The hours used for consolidation are based on information from your payroll system. Specify which hours to use in the Type field:
|
Note. Pension Consolidated Earnings and Payroll W2 are used for earnings, not hours. Options for converting earnings to hours are on the Hours Accumulation page.
Multiple Jobs Considerations for the Hours Based On Group Box
If you use the multiple jobs functionality and the consolidated hours are based on pension consolidated earnings or the payroll W-2, the earnings consolidations need to be converted to hours consolidations. For multiple jobs processing, the primary job rate at the beginning of the accumulation period is used to “back into” the hours.
Allocating Hours to Periods
|
Accumulate Based On |
If you base your hours on Pension Consolidated Earnings, Earnings Balance Table, or Payroll W2, your hours data is already aligned with your consolidation period and you can ignore the Accumulate Based On field. If you base your hours on pay period data—that is, you base hours on Payroll Hours or Payroll Special Accumulator—you need to align your payroll dates with your consolidation dates. Select the period into which earnings fall by selecting a value for Accumulate Based On:
|
Indicating Included Hours
|
Payroll Hours |
If you base your hours on actual payroll hours, complete the Payroll Hours section of this page. Select one of the following:
|
|
Earn Code |
Enter the earnings codes associated with the pensionable hours. You can insert additional rows as necessary. |
|
Pct of Hours |
You can adjust the number of hours for an earnings code by entering an adjustment percentage. For example, you can use 100 percent of regular hours and 50 percent of overtime hours. If you select Total Bal/Pay Minus to list excluded hours, you can specify 50 here to exclude 50 percent of the overtime hours. |
|
Limit Hours To |
If you specify a number here, the number of hours for the associated earnings code cannot exceed that number. |
Setting Up Hours AccumulationAccess the Hours Accumulation page.
Using the Earnings to Hours Divisor
|
Earnings to Hours Divisor |
If you base your hours consolidation on any of the earnings options, you can convert the earnings to hours with simple division. Select one of these options to indicate the divisor:
|
Setting Limits and Adjustments
All of the fields listed here can be either constants or aliases that you create.
|
Plus Additional Amount |
If you want to add hours to the period total (subject to any maximum you set), enter these hours here. To subtract hours, enter a negative number. |
|
Minimum Hours |
To limit the total hours per period, enter the minimum number of hours. Also enter Maximum Hours. |
|
Maximum Hours |
To limit the total hours per period, enter the maximum number of hours. Also enter Minimum Hours. |
Setting Up Hours GenerationAccess the Generate Hours page.
Setting Up Actions and Reasons for Hours Generation
|
Category |
Use the Category field to identify the HR action and reason code categories that require generated hours. You can insert additional rows as necessary. |
|
Custom Statement |
To indicate other conditions for hours generation, you first have to set up a custom statement specifying these conditions. Enter the name of the custom statement in this field. If the custom statement conditions are met, the system generates hours for all periods that it processes. This means that during a delete-and-rebuild consolidation, which processes several periods at once, the system might generate hours for all periods. If a single period contains multiple reasons for generation—for example, a military leave early in the year and a disability leave later that year—they are processed in chronological order. Hours generated for the final reason replace hours generated for earlier reasons. |
See Using Custom Statements and Spouse Eligibility Statements.
If you generate hours based on an HR action and reason category, the system uses an employee’s action and reason history to determine when to stop generating hours. The system continues to generate hours for the employee until the next relevant action and reason event in the employee’s job record. For example, if Liam goes on leave at the end of 2002 and returns at the beginning of 2004, the system generates hours for three years: 2002, 2003, and 2004.
The system only recognizes a return-from-leave action as “relevant” if you reference it elsewhere in the consolidated hours definition. To ensure that the system recognizes the return-from-leave action (and thus stops generating hours), include that action in the Single Partial Period HR Action/Reason Category field on the Define Hours Adjustments page.
If you generate hours based on custom statement criteria, the system generates hours for all periods that are processed. If the statement is no longer true during your next period processing, then the system does not generate hours for that period.
|
Generation Method |
For each hours generation condition that you set up, select a generation method:
All of these methods replace all the hours for the period. For example, consider Liam, who went on leave at the end of 2002 and returned at the beginning of 2004. If you generate hours during his leave, the system overwrites the actual hours from early 2002 and late 2004 with the generated hours for those periods. |
Defining Hours Adjustments Access the Define Hours Adjustments page.
Unlike Consolidated Earnings, the Consolidated Hours function does not produce a partial period fraction. It does, however, produce a partial period flag to identify partial periods. This flag is used during hours generation if the generation method is Complete.
Defining Partial Periods
|
Single Partial Period |
In the Single Partial Period group box, identify the action and reason categories that indicate partial periods. |
|
HR Action/Reason Category |
Enter an HR Action/Reason Category with all the action and reason codes that indicate a partial period. For example, you might include action and reason codes for leaves of absence and returns from leaves. This information is used to set a partial period flag for the period. There is only one field for single partial periods, so you have to create a single category with all the relevant action and reason combinations. The single partial period category should not include action and reason codes that appear in any other action and reason categories in this definition, including generation categories, exclude categories, and hire and termination categories. |
Using Termination and Hire/Rehire
|
Termination and Hire/Rehire |
Use the Termination and Hire/Rehire group boxes to set adjustments for hire and termination periods. |
|
HR Action/Reason Category |
Enter the HR action and reason categories that indicate hire and termination periods in the HR Action/Reason Category fields of the Termination and Hire/Rehire group boxes. |
|
Adjustment Method |
The consolidation process only adjusts a termination period after a subsequent rehire. For example, if Quentin terminates in 2004, the 2004 consolidation period is his last. If he is rehired in 2006, the system then adjusts the 2004 period, creates a zero-hours 2005 period, and creates a 2006 period. Because the 2006 period includes the rehire action, it incorporates the hire period adjustment method you specify. For each action and reason category you enter, select an Adjustment Method for adjusting the hours for the resulting partial period:
|
Note. Be sure to use the same methods here for handling hire and termination periods here that you use in your Service definition.
Consolidating ContributionsTo consolidate contributions, use the Contributions Consolidation (CONTRIBUTIONS) component.
This section provides an overview of contributions consolidation and lists the page used to generate contributions consolidation.
Understanding Contributions Consolidation
When employees contribute toward their pensions, you need to keep track of the amounts they contribute. Because contributions are deducted from employee paychecks, contributions are recorded in the payroll system. Use the Consolidated Contributions page to gather this information and produce annual or monthly totals. The Employee Accounts function can then use this consolidated data to keep track of total contributions and interest.
Page Used to Consolidate Contributions
|
Page Name |
Object Name |
Navigation |
Usage |
|
PA_CONS_DED_PARMS |
Set Up HRMS, Product Related, Pension, Components, Contributions Consolidation, Consolidated Contributions |
Produce annual or monthly totals of consolidated contributions. |
Setting Up Consolidated ContributionsAccess the Consolidated Contributions page.
Defining Deduction Code
|
Plan Type and Plan |
Enter the plan type and plan under which you set up the deduction. For regular pension deductions, you use plan types 82-89 and 8A-8Z. When you set up consolidations to track service buyback or service purchase payments, you use a “general” deduction rather than a plan-specific deduction. In that case, the plan type is 00 - General, and you do not enter a plan. |
|
Deduction Code |
Enter the code that is used to identify payroll deductions. |
|
Deduction Classification |
Enter the value, After-Tax, Before-Tax, Nontaxable, PTax Benor Taxable, that goes with the deduction code. The deduction code must already exist and must already be associated with the indicated plan on the Benefit Plan table. If you have both before- and after-tax contributions, create separate consolidated contributions definitions (and function results) for each. |
Accumulation Period
|
Accumulation Period |
Consolidated contributions are subtotaled by accumulation period. Use one of the following options to indicate the type of accumulation period: Calendar Year, Employee’s Anniversary Year, Plan Year, Calendar Month, orOther Year. This accumulation period must align with the accumulation period for the Employee Accounts definition where you use your consolidated hours. Because the service definition does not support the Employee’s Anniversary Year and Other Year options, do not use these options unless you make modifications. |
|
Start Month/Day |
If you select Other Year, you also need to specify the Start Month and Start Day of that year. Use a number (1-12) to represent the month. |
Accumulate Based On
Because contribution data comes from payroll, you need to align your payroll dates with your consolidation periods. Select the period into which earnings fall into by selecting an Accumulate Based On option.
|
Earned Date |
Select this option to divide total contributions for the pay period evenly among days in the period to produce daily contribution amounts. For example, a contribution deducted from a paycheck that covers the one-week period June 26–July 2 includes pay from both June and July. It is prorated so that 5/7 of the earnings falls in the June period and 2/7 of the earnings falls in July. Note. Proration by day always includes all days in a consolidation period, not just work days. |
|
Payroll End Date |
Select this option to put contributions into the period containing the last day of the pay period. |
|
Pay Check Date |
Select this option to put contributions into the period containing the date printed on the paycheck. |
See Also