Performing Par Location Counts Using The PeopleSoft Fluid User Interface for Mobile Devices
This topic discusses how to perform par location counts using mobile devices.
|
Page Name |
Definition Name |
Usage |
|---|---|---|
|
MIN_CART_CT_SEH_FL |
Define Par Count search criteria. |
|
|
MIN_CART_COUNT_FL |
Enter Par Count page information. |
|
|
MIN_OPTION_SCF |
Define or modify processing and display options for par location counts. |
Use the Par Count - Fluid Search page to define Par Count search criteria.
Navigation:
This example illustrates the fields and controls on the Par Count- Fluid Search Page. You can find definitions for the fields and controls later on this page.
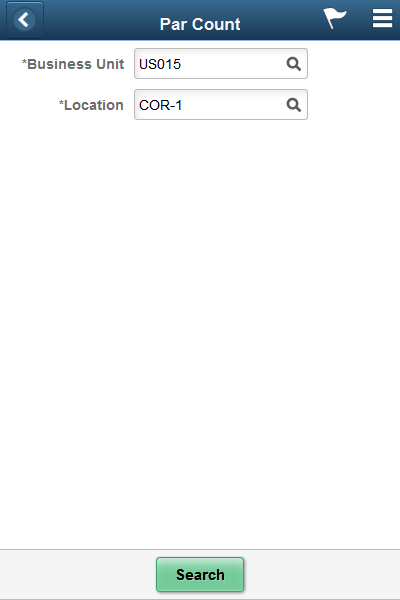
Use your mobile device to count par locations within a PeopleSoft Inventory business unit.
Field or Control |
Description |
|---|---|
Business Unit |
Enter the PeopleSoft Inventory business unit where the item stock is located. A default value displays in this field based on your user login ID. This is a required field. |
Location |
Scan or enter the PeopleSoft Inventory par location. This is a required field. |
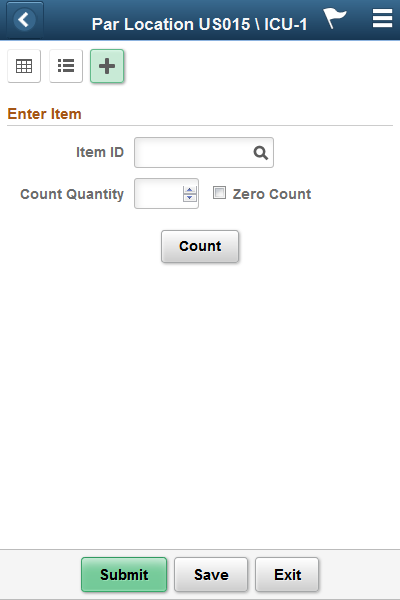
Use the Par Count page to enter item counts for a par location.
Navigation:
This example illustrates the fields and controls on the Par Location Count Page. You can find definitions for the fields and controls later on this page.
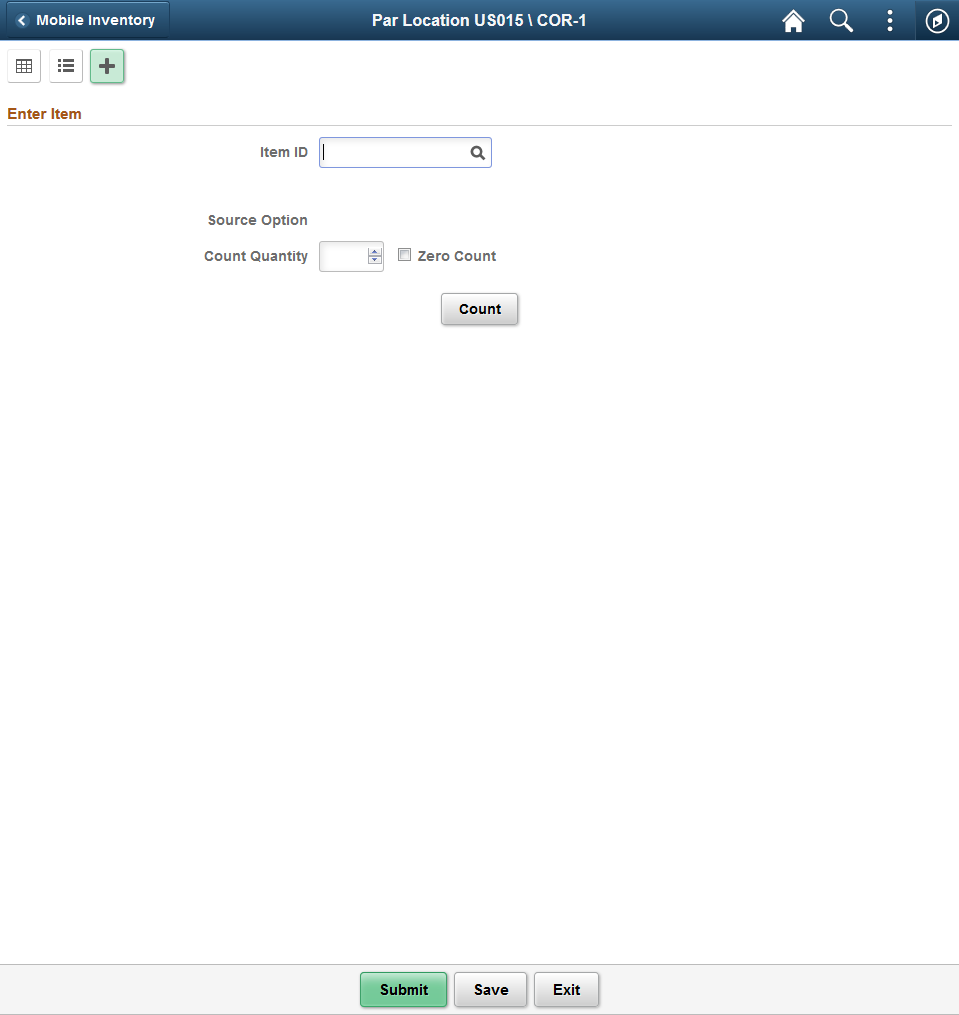
This example illustrates the fields and controls on the Par Count — Fluid Page as seen on a tablet.
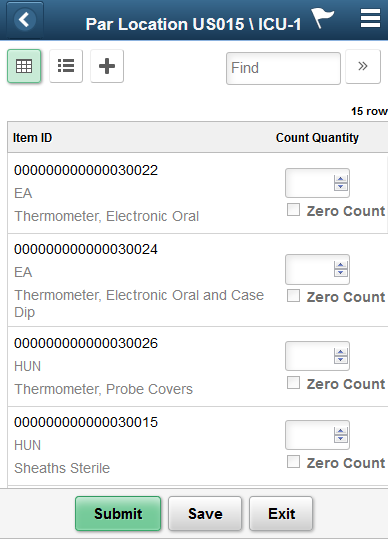
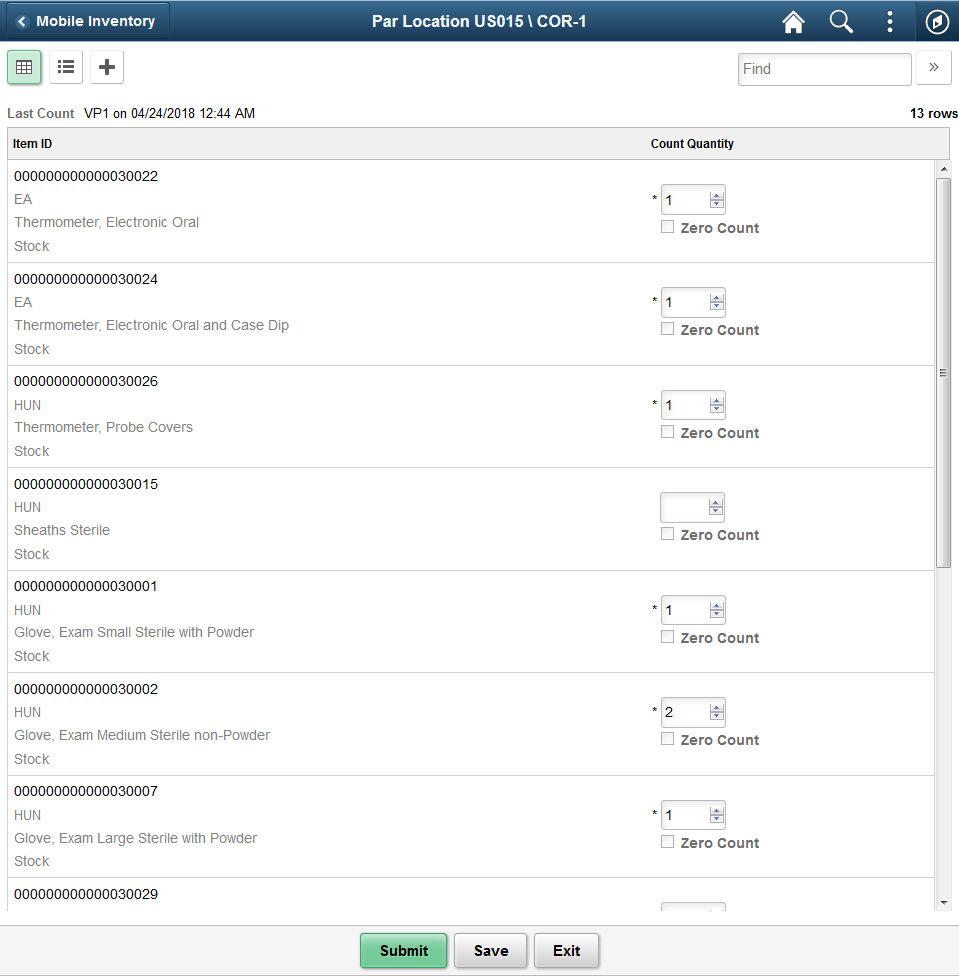
This example illustrates the fields and controls on the Par Location Count - Grid View Page.
This example illustrates the fields and controls on the Par Location Count - Grid View Fluid Page as seen on a tablet.
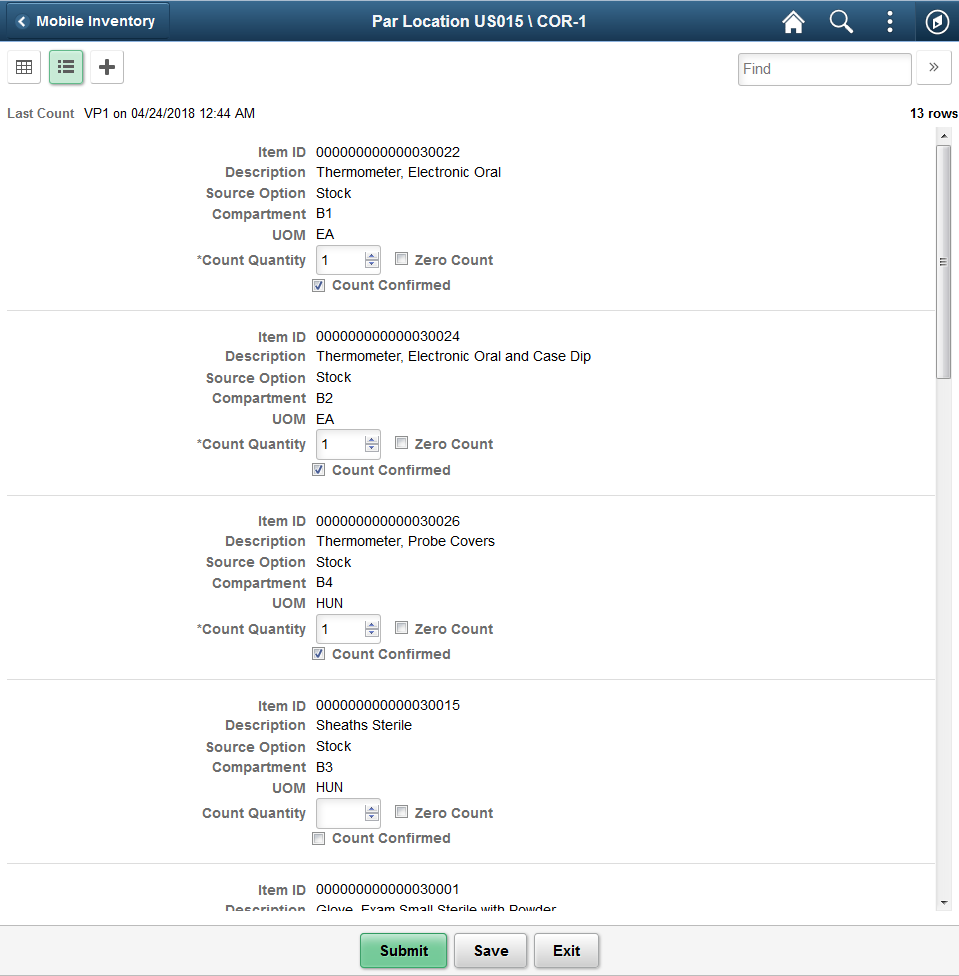
This example illustrates the fields and controls on the Par Location Count - List View Fluid.
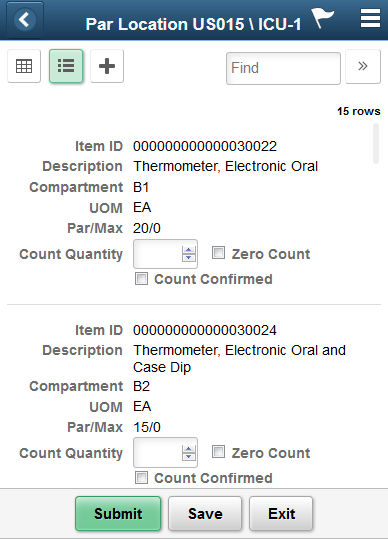
This example illustrates the fields and controls on the Par Location Count - List View Fluid as seen on a tablet.
Field or Control |
Description |
|---|---|
|
Displays the counting event or group ID in a grid. |
|
Displays the counting event or group ID in a list. |
|
Enter counting event or group ID as individual items. |


Field or Control |
Description |
|---|---|
Item ID |
Scan or enter the PeopleSoft Inventory item ID to be counted. You can use the Lookup icon to locate items that are available in the count ID for this location. After you enter the item, the system displays the item description, count information, and the Count button. After entering an alternate identifier in this field, the system may change the value depending on the option selected in the Alternate Item Display field on the Options page for the task flow. |
Count Quantity |
Enter the item count. Note: If the Par Count Quantity exceeds 9999999, the system displays a warning message. |
Zero Count |
Select this check box if the item count is zero. |
Count |
Click to count the item entered. |
Prior Entry |
Displays item information entered. |
Modify |
Click to modify the item information entered. |
Submit |
Click to save the component. |
Save |
Click to complete an interim save to the par location. Note: The system displays a receipt created message at the top of the page briefly when saved. |
Exit |
Click to return to the previous page. |
Use the Par Location Count - Display Options page to define or modify processing and display options for par location counts.
Navigation:
This example illustrates the fields and controls on the Par Location Count - Display Options Fluid Page. You can find definitions for the fields and controls later on this page.
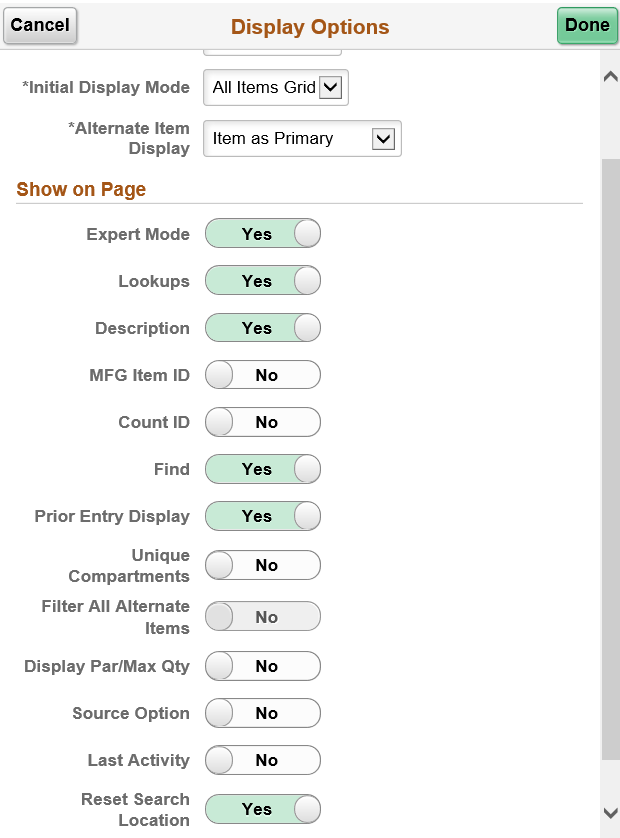
Use this page to change processing and display options for par location counts. The settings on this page are as set on the Installation Options - Mobile Inventory or the User Preferences - Mobile Inventory page for the task flow. Most fields can be changed for the session.
Field or Control |
Description |
|---|---|
Quantity Options |
Select an option to saved in the par location. The available options are :
|
Display Options |
Select an option to indicate which rows appear in grid view. The available options are :
|
Initial Display Mode |
Select a view to indicate how items display immediately after the search page. The available views are:
|
Alternate Item Display |
Select an option that indicates how an item, alternate item, or both are displayed when an alternate item is specified for the transaction. Options include: Alternate Only, Alternate as Primary, Item Only, and Item as Primary. |
Expert Mode |
Select to skip validation and display of Description and UOM fields during data entry in Single Item Enter mode. |
Lookups |
Select to provide Lookup icons for fields that are available for searches. |
Description |
Select to display item descriptions in the search results. To view the description, click the expand button next to the Item ID field on the Guided Count page after performing the search. |
MFG Item ID |
Select to display the Manufacture Item ID on the grid view or item entry page. |
Count ID |
Displays the numerical count value if header selected. |
Find |
Select to enable the Go or Search button. |
Prior Entry Display |
Select to enable the display of the last item counted. When you count or update an item count, the system provides the last item and count value in a table at the bottom of the count page. |
Unique Compartments |
Select to display one item per compartment only in Single Item Enter mode of the current Par Location. If a single item is present in multiple compartments, they do not display |
Filter All Alternate Items |
Select to search through all possible Alternate Items for a given item. |
Display Par/Max Quantity |
Select to display or hide an optimized or maximum quantity in Grid mode. |
Source Option |
Select to display the source against a line. The source options are Stock, non-Stock, and Stockless. |
Last Activity |
Select to display the last count date and time on the Par Location Count page. |
Reset Search Location |
Select to clear the Location field on the Par Count page. If you select the Submit or Exit buttons on the Par Location page, the Par Count page leaves the Location field blank. |