Maintaining Contact Information for Business Objects
These topics discuss how to:
Access contact information.
Maintain contact information.
Select existing addresses.
Update address detail.
Update phone detail.
Update email detail.
|
Page Name |
Definition Name |
Usage |
|---|---|---|
|
Person - Contact Info |
RD_PRSN_ADDR_BOOKS |
Access contact information for a person, worker, or contact. |
|
Company - Contact Info |
RD_COMP_ADDR_BOOK |
Access contact information for a company. |
|
Site - Contact Info |
RD_SITE_ADDR_BOOK |
Access contact information for a site. |
|
Company - Address Book Person - Address Book Site - Address Book |
ABE_DETAIL |
Maintain contact information entries for a person, company, or site. |
|
ABE_ADD_LOOKUP_SEC |
Select an existing address to use or modify as the address for a company, person, or site. |
|
|
Company - Update Address Person - Update Address Site - Update Address |
RD_ADDR_DETAIL |
Update address detail. |
|
Company - Update Phone Person - Update Phone Site - Update Phone |
RD_PHONE_DETAIL |
Update phone detail. |
|
Company - Update Email Person - Update Email Site - Update Email |
RD_EMAIL_DETAIL |
Update email detail. |
Use the Contact Info page (RD_PRSN_ADDR_BOOKS), (RD_COMP_ADDR_BOOK), or (RD_SITE_ADDR_BOOK) to access contact information for a person, worker, or contact for a company, site, or person.
Navigation:
Click the Company link.
Click the Site link.
This example illustrates the fields and controls on the Company - Contact Info page. You can find definitions for the fields and controls later on this page.
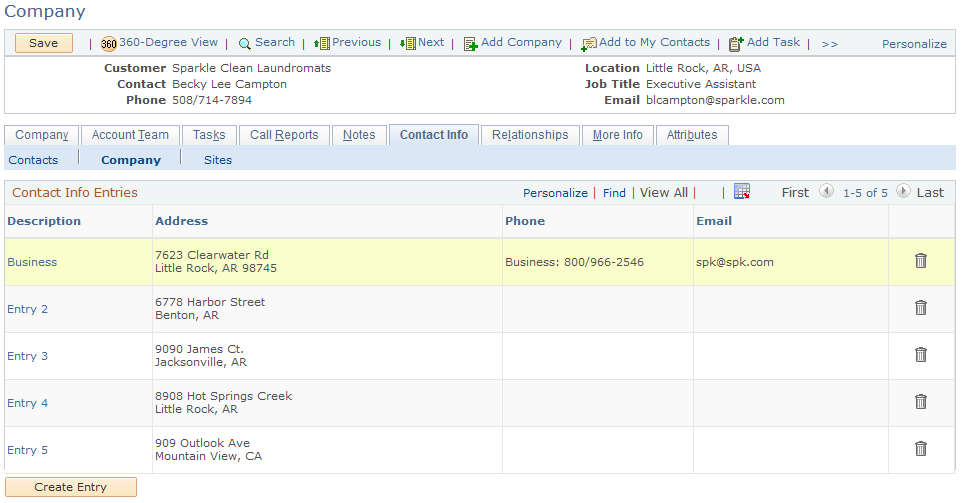
Different links appear below the Contact Info tab, depending on the type of business object you are accessing. For companies or persons with the Consumer role, the Contacts and Sites links enable you to view and update the contact information of contacts and sites that are associated with the business object. For sites, you can view and update the contact information of contacts that are associated with the business object. For persons with the Contact role, you can view only the contact's own contact information.
See Configuring Address Books.
Contact Info Entries
Field or Control |
Description |
|---|---|
Description |
Click a description to edit the contact information that is in the entry. |
Create Entry |
Click to add a new contact information entry. |
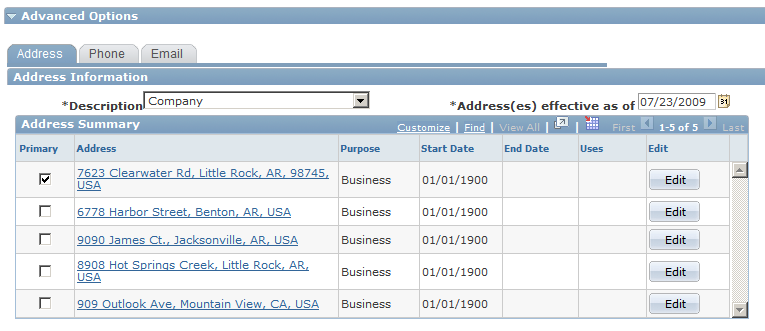
Advanced Options
Use the advanced options section to designate a contact method as primary for the business object and to edit information about the contact method.
This example illustrates the fields and controls on the Contact Info page - Advanced Options section. You can find definitions for the fields and controls later on this page.
Field or Control |
Description |
|---|---|
Edit |
Click this button to access a page where you can edit the contact method and change its start and end dates. |
Use the Address Book page (ABE_DETAIL) to maintain contact information entries for a person, company, or site.
Navigation:
Click a Description link in the Contact Info Entries grid on the Contact Info page for a company, person, or site.
Click the Create Entry button on the Contact Info page for a company, person, or site.
This example illustrates the fields and controls on the Address Book page. You can find definitions for the fields and controls later on this page.
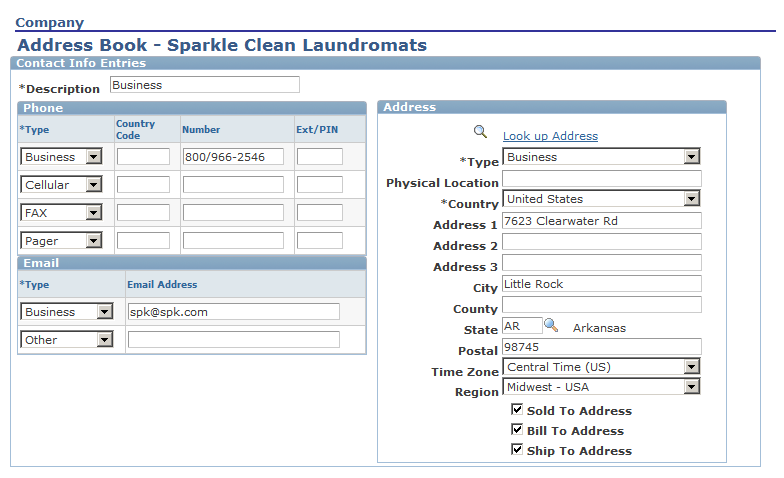
Note: Phone, Email, and Address are examples of contact methods When you remove a contact method, its end date is set to the current date, thereby inactivating the contact method. This occurs only if the contact method is not in any other active Contact Info entry on the component. After you inactivate a contact method, the only way to reactivate it is by changing the start and end dates that are available within the Contact Info Advanced Options section.
If your CRM installation includes Order Capture, the Sold To, Bill To, and Ship To check boxes appear and you can select one or more of these options to apply to the address.
Use the Address Search Result List page (ABE_ADD_LOOKUP_SEC) to select an existing address to use or modify as the address for a company, person, or site.
Navigation:
Click the Look Up Address link on the Contact Info page for a company, person, or site.
This example illustrates the fields and controls on the Address Search Result List page. You can find definitions for the fields and controls later on this page.
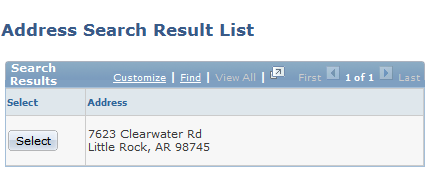
Select a listed address.
Use the Update Address page (RD_ADDR_DETAIL) to update address details for a company, person, or site.
Navigation:
Expand the Advanced Options section on the Contact Info page for a company, person, or site.
Select the Address tab and click the Edit button next to any listed address.
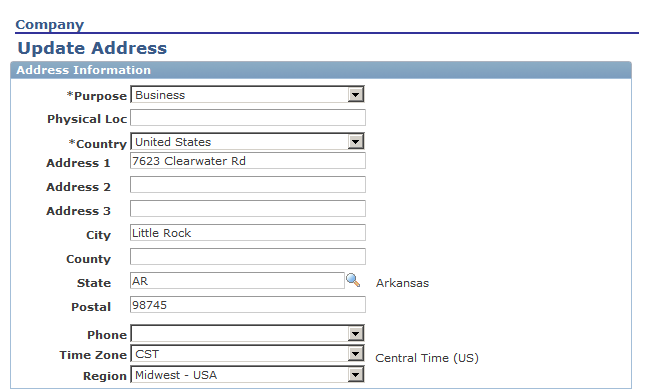
This example illustrates the fields and controls on the Update Address page (1 of 2). You can find definitions for the fields and controls later on this page.
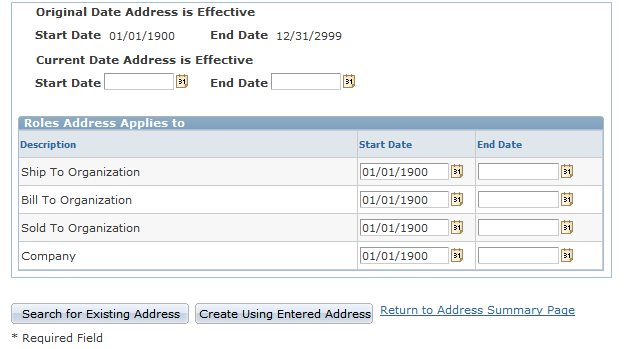
This example illustrates the fields and controls on the Update Address page (2 of 2). You can find definitions for the fields and controls later on this page.
Field or Control |
Description |
|---|---|
Search for Existing Address |
Click to search the existing addresses for a company. The system returns addresses that match the address information that you enter in the Address Information page region. |
Create Using Entered Address |
Click to create the address by using the information that you enter. |
Address Effective Dates and Applications
Enter the start date and end date that the address is effective.
Roles Address Applies to
This region lists all the roles that are assigned to the business object. By default, the address applies to all the business object roles. You can enter a start date and end date for each role to inactivate the address that is defined for the role.
Use the Update Phone page (RD_PHONE_DETAIL) to update phone details for a company, person, or site
Navigation:
Expand the Advanced Options section on the Contact Info page for a company, person, or site.
Select the Phone tab and click the Edit button next to any listed.
This example illustrates the fields and controls on the Update Phone page. You can find definitions for the fields and controls later on this page.
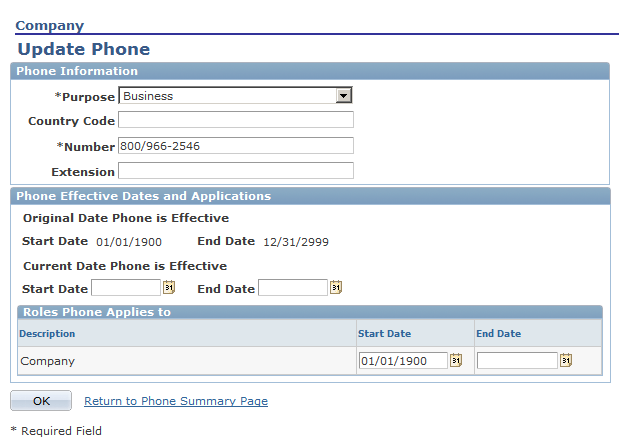
Phone Effective Dates and Applications
Enter the start date and end date on which the phone number is effective.
Roles Phone Applies to
This region lists all the roles that are assigned to the business object. By default, the phone number applies to all the business object roles. You can enter a start date and end date for each role to inactivate the phone for the role.
Use the Update Email page (RD_EMAIL_DETAIL) to update email detail.
Navigation:
Expand the Advanced Options section, select the Email tab, and click the Edit button next to any listed email address.
This example illustrates the fields and controls on the Update Email page. You can find definitions for the fields and controls later on this page.
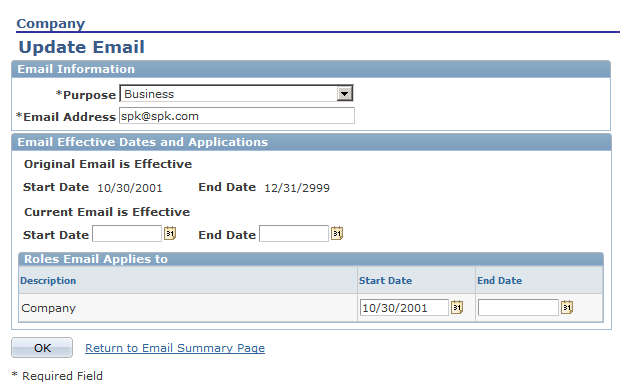
Email Effective Dates and Applications
Enter the start date and end date that the email is effective.
Roles Email Applies to
This region lists all the roles that are assigned to the business object. By default, the email applies to all the business object roles. You can enter a start date and end date for each role to inactivate the email for the role.