Defining PeopleSoft MCF Agents for a Third Party
To define PeopleSoft MCF agents for a third party, use the (MCF_TP_AGENT_CMP) component. This section discusses how to define PeopleSoft MCF Agents for a third party.
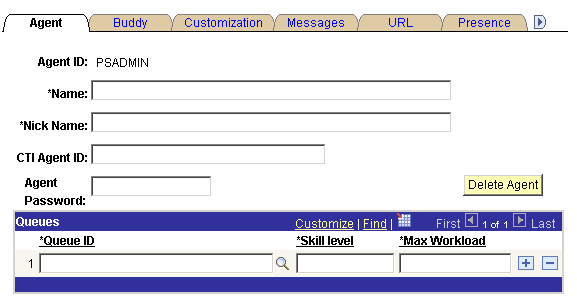
Access the Agent page using the following navigation path:
This example illustrates the fields and controls on the Agent page. You can find definitions for the fields and controls later on this page.
Field or Control |
Description |
|---|---|
Agent ID |
Specifies the agent ID. |
Name |
Enter the full name of this agent in (lastname,firstname) format. The agent name appears in other agents' buddy lists. |
Nick Name |
Enter a short name for this agent. The agent nickname identifies this agent in chat sessions and logs. |
CTI Agent ID |
Enter a CTI agent ID for a CTI agent. |
Agent Password |
Enter a password for the agent. |
Queue ID |
Enter the ID of a queue to which this agent is assigned. Each agent may be assigned to more than one queue. An agent can log on to only one queue at a time from the MultiChannel Console. |
Skill |
Select the skill level of this agent for the tasks assigned for this queue. This field is required. This option is used by third parties for task assignment. Third parties define skill levels based on business needs, requirements, policy, and so on. |
Maximum Workload |
Select the maximum load that this agent can be assigned before tasks are held or assigned to other agents. This field is required. This option is used by third parties for task assignment. Third parties define maximum workload based on business needs, requirements, policy, and so on. |
Note: Do not delete a queue from an agent's list unless that agent has no open accepted tasks on that queue.
Access the Buddy page using the following navigation path:
This example illustrates the fields and controls on the Buddy page. You can find definitions for the fields and controls later on this page.
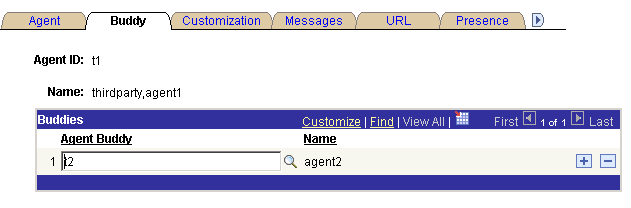
The agent's buddy list facilitates collaborative chat and chat conferencing.
Field or Control |
Description |
|---|---|
Agent Buddy |
Select another agent with whom this agent can have a chat session or can ask to conference onto another chat. |
Name |
Displays the buddy agent's nickname. The name appears in the buddy list on the MultiChannel Console or agent chat window. |
An agent's presence as shown in the buddy list on the MultiChannel Console or on the Invite Agent list on the chat console indicates the agent's availability for chat or conference.
Access the Customization page using the following navigation path:
This example illustrates the fields and controls on the Customization page. You can find definitions for the fields and controls later on this page.
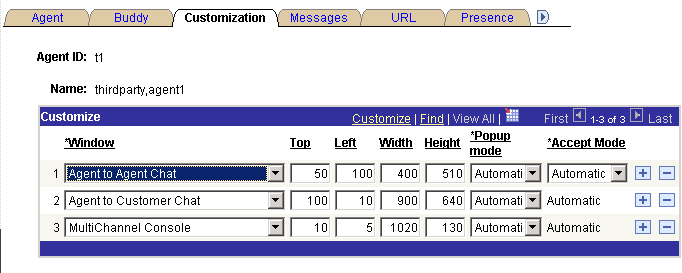
Set the initial agent window placement and size by specifying parameters on this page. An agent may resize and move the windows.
Field or Control |
Description |
|---|---|
Window |
Select the window to which the specified configuration applies. Select from:
|
Top and Left |
Enter the distance in pixels from the top and left edge of the screen when the window first appears. |
Width and Height |
Enter the width and height, in pixels, of the window when it first appears. |
Popup Mode |
Select from: Automatic: The window appears automatically. For customer-initiated chat or tasks initiated from the EnQueue built-in function, the task is automatically accepted as well. For agent-initiated chat, the agent can elect not to accept the task; in effect, the agent can preview the task. If this is the desired behavior, select Manual from the Accept Mode drop-down list box. If you want agent-to-agent tasks to function like customer-initiated tasks, select Automatic from the Accept Mode drop-down list box. Manual: The window does not appear until the agent clicks the task on the agent MultiChannel Console. For customer-initiated chat or tasks initiated from the EnQueue() built-in function, clicking the task means that the task is automatically accepted as well. For agent-initiated chat, the behavior depends on the setting for the Accept Mode field. |
Accept Mode |
Select from: Automatic: Agent-to-agent chats are automatically accepted without requiring the agent to click the icon. Manual: Agent-to-agent chats require the agent to click the icon. Accept mode affects only collaborative chat. |
Access the Messages page using the following navigation path:
This example illustrates the fields and controls on the Messages page. You can find definitions for the fields and controls later on this page.
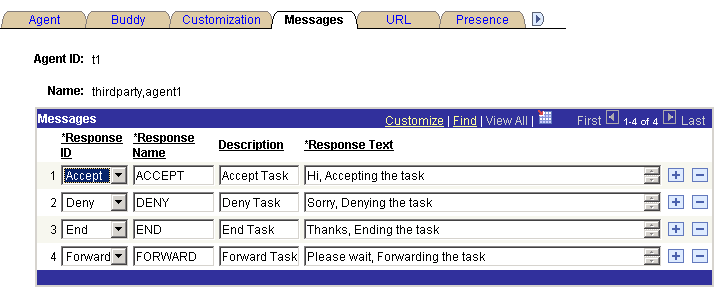
An agent can create personalized responses in addition to the system responses defined for each queue.
Field or Control |
Description |
|---|---|
Response ID |
Responses, except those identified as Other, are linked to specific events. These responses, except for those identified Other, are always sent on these events from this agent. If an agent does not have a customized response for a specific event, it is read from a default response set in the Message Catalog. The response text set here overrides the default text set in the Message Catalog. Select from:
|
Response Name |
This name appears in the agent's template response drop-down list box. |
Response Text |
Enter the response text to appear in the chat window. |
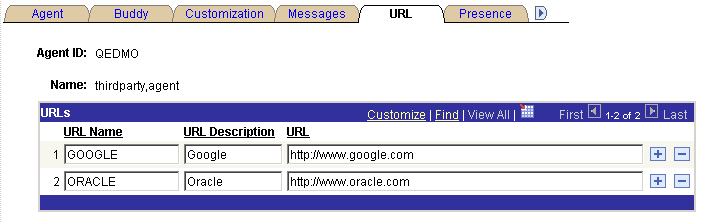
This page defines URLs that this agent can send to a client browser. Access the URL page using the following navigation path:
This example illustrates the fields and controls on the URL page. You can find definitions for the fields and controls later on this page.
Field or Control |
Description |
|---|---|
URL Name |
The URL name appears in the agent's URL drop-down list box. |
URL Description |
This description appears only on this page, to further describe this URL or, for example, its reason for inclusion. |
URL |
Enter the URL. The URL must include the protocol (http://) and any required parameters. All URLs defined for the agent are downloaded when the agent launches the agent chat console by accepting a customer chat. These URLs are not available in collaborative chat. If you send a PeopleSoft Pure Internet Architecture URL, be sure that the recipient has permissions to access that portal, node, or page. |
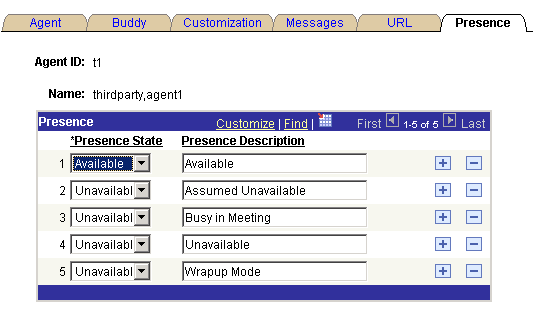
Each agent can customize the presence description displayed when the agent is available or unavailable. The queue server only understands the presence state, available or unavailable, but you can enter more specific presence descriptions when displaying or logging an agent's presence. If you do not enter presence descriptions, default values are used.
Access the Presence page using the following navigation path:
This example illustrates the fields and controls on the Presence page. You can find definitions for the fields and controls later on this page.
Field or Control |
Description |
|---|---|
Presence State |
Select Available or Unavailable. |
Presence Description |
Enter a description for each agent state. The description appears in logs of agent activity and when agent presence is displayed. Note: An available state has only one presence description, Available. For an unavailable state, you can enter any presence description, such as tea break, coffee break, lunch, and so on. |
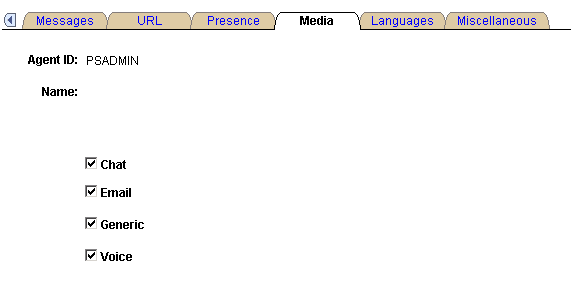
The media page defines the capability of each agent to perform a task. Access the Media page using the following navigation path:
This example illustrates the fields and controls on the Media page. You can find definitions for the fields and controls later on this page.
Field or Control |
Description |
|---|---|
Chat |
Select this check box if the agent has a capability to chat. |
|
Select this check box if the agent has a capability to email. |
|
Generic |
Select this check box if the agent has a capability to perform a generic task. |
Voice |
Select this check box if the agent has a capability to perform a voice task. |
Access the Languages page using the following navigation path:
This example illustrates the fields and controls on the Languages page.
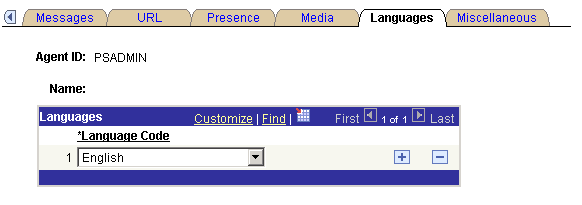
Enter the languages that each agent is qualified to support.
The agent is assigned only tasks that have been enqueued with a language code in the agent's language list. For the EnQueue built-in function, the language code is specified as a parameter. For the InitChat built-in function, the language code is determined by the user profile of the initiator.
If you do not enter a language code for a new agent, the default value is English.
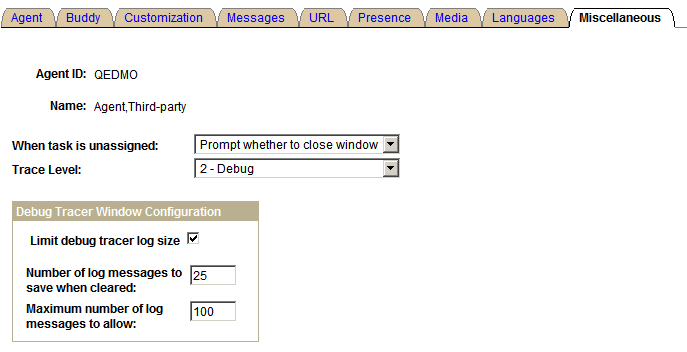
Access the Miscellaneous page using the following navigation path:
This example illustrates the fields and controls on the Miscellaneous page. You can find definitions for the fields and controls later on this page.
Field or Control |
Description |
|---|---|
When task is unassigned |
Select from the following options the action that occurs when a task assigned to an agent is unassigned:
|
Field or Control |
Description |
|---|---|
Trace Level |
Select from the following log trace levels:
|
Limit debug tracer log size |
This check box is enabled when the value entered for Trace Level is not 0. Select this check box to enable the agent to clear the tracer log based on Number of log messages to save when cleared and Maximum number of log messages to allow. If the check box is cleared, the tracer log will not be cleared and the Number of log messages to save when cleared and Maximum number of log messages to allow fields will be disabled. |
Number of log messages to save when cleared |
Specify the minimum number of recent tracer log messages that should be maintained in the tracer window. |
Maximum number of log messages to allow |
Specify the maximum number of tracer log messages that will be maintained in the tracer window. |
Note: Number of log messages to save when cleared and Maximum number of log messages to allow fields are required if the Limit debug tracer log size check box is selected.