Managing Action Item Lists
This topic discusses managing action item lists and assigning action item list participants and privileges.
|
Page Name |
Definition Name |
Usage |
|---|---|---|
|
EPPAI_BROWSE |
View and manage action item lists. |
|
|
EPPAI_LIST_INFO |
View or define the Action Item List and notification properties. |
|
|
EPPAI_LIST_PRIV |
Assign privilege sets to members of the list. |
Use the My Action Item Lists page (EPPAI_BROWSE) to view and manage action item lists.
Navigation:
My Content, My Action Item Lists
The following example illustrates the My Action Item Lists page. Access the My Action Item Lists page (My Content, My Action Item Lists) as shown in the below image.
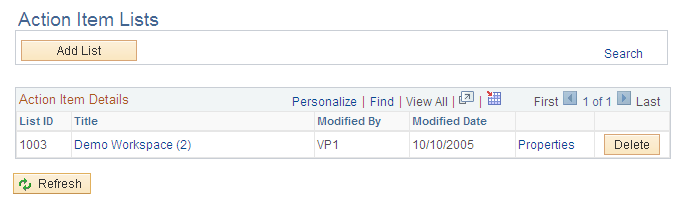
Use the My Action Item Lists page to access the action item lists of which you are a member.
If you have permission to create an action item list, the Add List button appears on the page. If you are the administrator of a list, the Properties link is available and you can edit the list properties and security. The Delete button is available only to administrators as well.
Field or Control |
Description |
|---|---|
Add List |
Click to create a new action item list. Note: This button appears only for those users who have create list privileges. |
Display Active Lists or Display Inactive Lists |
If you have created lists that have been set to a status of inactive, the system displays a drop-down list box on the page the enables you to display either active lists or all inactive lists that you have created. |
Search |
Click to access the Search Action Items page where you can retrieve action items based on the search criteria that you enter. |
Title |
Click the list title to view the individual action items that are associated with the list. |
Properties |
Click to view the List Properties page on which you can define properties for the list. Note: This button appears only for those users who have edit list privileges. |
Delete |
Click to delete the list. Note: This button appears only for those users who have delete list privileges. |
Use the List Properties page (EPPAI_LIST_INFO) to view or define the Action Item List and notification properties.
Navigation:
Click the Properties link on the My Action Item Lists page.
Click the Add List button on the My Action Item Lists page.
The following example illustrates the List Properties page.
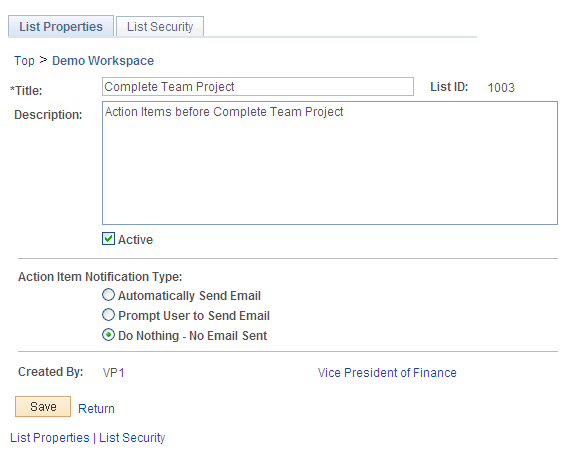
Use the List Properties page to define properties for the action item list.
Field or Control |
Description |
|---|---|
Title |
The name of the list. |
List ID |
After the list is saved, the system generates and displays a unique number to identify the list. |
Description |
A description for the list. |
Created By |
The system displays the user ID and a link to the profile of the list creator. Click the link to display the member's profile page. If Resource Finder is enabled, the system displays the Resource Finder profile. |
Active |
Select this option to make the list active and have the list appear in the portal or site. If this option is cleared, the list is not be available to users. |
Action Item Notification Type |
Specify how email notifications should be sent to members of the list any time an action item associated with the list is changed or created and saved. The text of the email describes any changes made to the action item and contains a link to the Action Item Details page. The available options are:
|
Return |
Displays the My Action Item Lists page. |
Publish as Pagelet |
Displays the List Properties - Publish Pagelet Wizard Definition page on whichyou can publish the pagelet to the homepage. |
Use the List Security page (EPPAI_LIST_PRIV) to assign privilege sets to members of the list.
Navigation:
Select List Security on the List Properties page.
Click a Privileges link on the Administer Action Item Lists page.
The following example illustrates the List Security page.
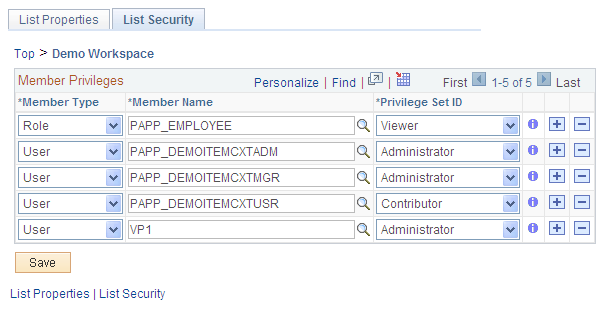
Use the List Security page to assign privilege sets for list members. Members and privilege sets are assigned at the action item list level. Privilege sets maintain security for accessing and managing action item lists as well as viewing, editing, and deleting action items.
Note: If a user who does not have security access to the list is assigned an action item from that list, she or he is able to view the Action Item Details page, but she or he does not have access to the list.
Field or Control |
Description |
|---|---|
Member Type |
Select the type of participant you want to add to the action item list. Available values include:
|
Member Name |
Specify the user ID or role name for the list member. |
Privilege Set ID |
Select a privilege level you want to assign to the member. Delivered values are:
|
|
Click to view additional information about the actions that the privilege set enables the member to use. |
