Establishing Time Periods
To set up time periods, use the Daily Time Period (TL_FIXED_DAY_PNLGR), Weekly (TL_FIXED_WEEK_PNLG), Monthly (TL_FIXED_MNTH_PNLG), Complex (TL_COMPLEX_PNLGRP), and Repeating (TL_REPEAT_PNLGRP) components.
This section discusses how to set up daily, weekly, monthly, complex and repeating time periods.
|
Page Name |
Definition Name |
Usage |
|---|---|---|
|
TL_FIXED_DAY_PNL |
Establish a fixed day-type period when building time period calendars. |
|
|
TL_FIXED_WEEK_PNL |
Establish weekly periods of time when building time period calendars. |
|
|
TL_FIXED_MNTH_PNL |
Establish monthly periods of time when building a time period calendar. |
|
|
TL_COMPLEX_PNL |
Establish complex periods of time when building a time period calendar. Use this page for periods that cannot be defined by other period definitions. |
|
|
TL_REPEATING_PNL |
Establish repeating periods of time when building a time period calendar. |
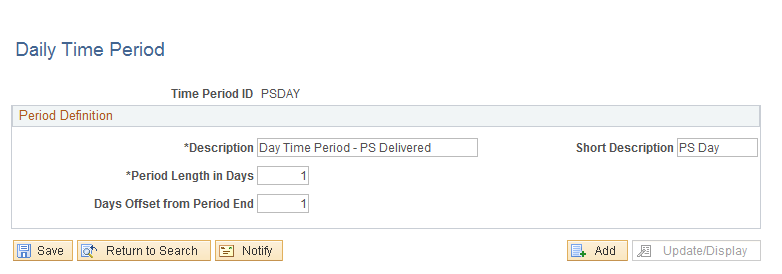
Use the Daily Time Period page (TL_FIXED_DAY_PNL) to establish a fixed day-type period when building time period calendars.
Navigation:
This example illustrates the fields and controls on the Daily Time Period page. You can find definitions for the fields and controls later on this page
Field or Control |
Description |
|---|---|
Days Offset from Period End |
Enter the number of offset days. Offset days are used to derive the start date of the next period instance with respect to the end date of previous instance. Offsets can be positive or negative. The default for offset days is 1. Note: The only day-type periods you can enter on the Workgroup and Maintain Time Reporter Data page are those with offset days = 1. |
Example: Positive Offset Days
If the offset is a positive number, the next period instance starts after that number of offset days, as the following table illustrates.
|
Offset Days Number |
Original End Date of the First Period |
New Instance Start Date for Next Period |
|---|---|---|
|
1 |
January 24, 2006 |
January 25, 2006 |
|
2 |
January 24, 2006 |
January 26, 2006 |
Example: Negative Offset Days
If the offset is a negative number, the system counts backwards from the end of the earlier period instance by the number of offset days to determine the start of the next period instance. Any two consecutive period instances will overlap if the offset is negative. The absolute value of offset days cannot be equal to or greater than the period length. In other words, when the offset days number is negative, the next period cannot start on or before the current period.
To avoid creating a period with an offset equal to or greater than the period length, observe the following rule: The maximum number of negative offset days cannot exceed the period length minus two. The following table illustrates the results of using this rule. Note that if the offset is −6, it exceeds the maximum number of offset days and the system creates a new period identical to the prior period.
|
Offset Days Number |
Begin and End Dates of the First Period |
Begin and End Dates of the Next Period |
|---|---|---|
|
−6 |
January 3 - January 9, 2006 |
January 3 - January 9, 2006 |
|
−5 |
January 3 - January 9, 2006 |
January 4 – January 10, 2006 |
|
−4 |
January 3 - January 9, 2006 |
January 5 – January 11, 2006 |
|
−3 |
January 3 - January 9, 2006 |
January 6 – January 12, 2006 |
Example: Creating a Rolling Period with Negative Offset Days
The following page illustrates how to define the offset to create a 90-day, rolling period.
This example illustrates the fields and controls on the Daily Time Period page. You can find definitions for the fields and controls later on this page.
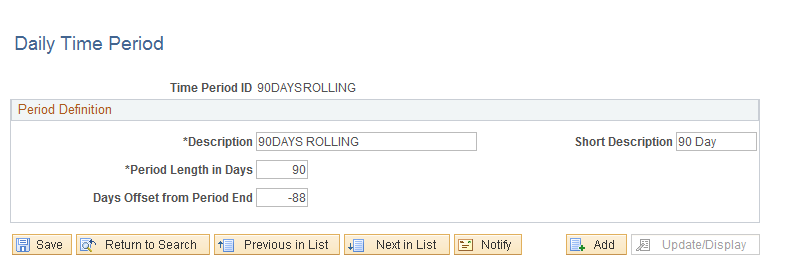
To create a rolling period, the negative offset (the value of the Start Offset from Period End field) should be two less than the length of the rolling period, which in this example would be 90 − 2 (-88). If you attempt to use -89, the system will generate the following error message: "Invalid Value for Offset." The system starts the new period by counting backwards from the day before the end date of the first period. If your first period instance were January 1, 2006 to March 30, 2006, the system would subtract 89 days, beginning from March 29, which would start the next period on January 1. To be a rolling period, the next instance of time should begin one day after the first period instance.
Use the Weekly Time Period page (TL_FIXED_WEEK_PNL) to establish weekly periods of time when building time period calendars.
Navigation:
This example illustrates the fields and controls on the Weekly Time Period page. You can find definitions for the fields and controls later on this page.

Enter the period length in weeks and select a start day for the week.
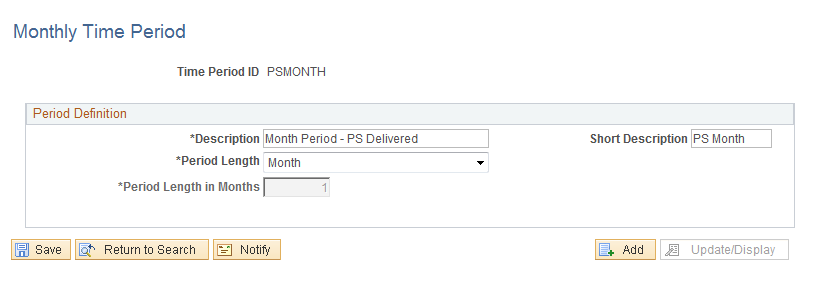
Use the Monthly Time Period page (TL_FIXED_MNTH_PNL) to establish monthly periods of time when building a time period calendar.
Navigation:
This example illustrates the fields and controls on the Monthly Time Period page. You can find definitions for the fields and controls later on this page.
Field or Control |
Description |
|---|---|
Semi-month |
Select semi-month for the period length to be 15 days. |
Semi-year |
Select semi-year for your period length to be 6 months. |
User Defined |
If you select User Defined, the Period Length in Months field becomes available. Enter the length of the period in months. The maximum number of months you can enter is 999, and the minimum number is 1. |
Note: When you define a type other than a user-defined month period, the system displays the number of days contained within the period.
Use the Complex Time Period page (TL_COMPLEX_PNL) to establish complex periods of time when building a time period calendar.
Navigation:
This example illustrates the fields and controls on the Complex Time Period page. You can find definitions for the fields and controls later on this page.
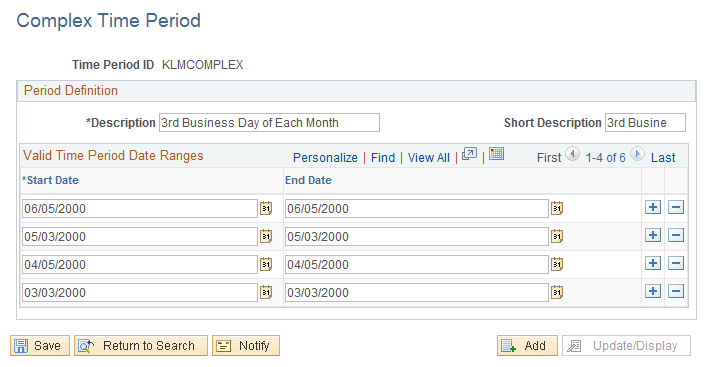
Use this page for periods that cannot be defined by other period definitions.
Use the fields on this page to enter a start and end date for the time period.
Note: Complex periods are not created through the standard calendar build process; instead, they are created manually when you define the period on this page.
Use the Repeating Time Period page (TL_REPEATING_PNL) to establish repeating periods of time when building a time period calendar.
Navigation:
This example illustrates the fields and controls on the Repeating Time Period page. You can find definitions for the fields and controls later on this page.
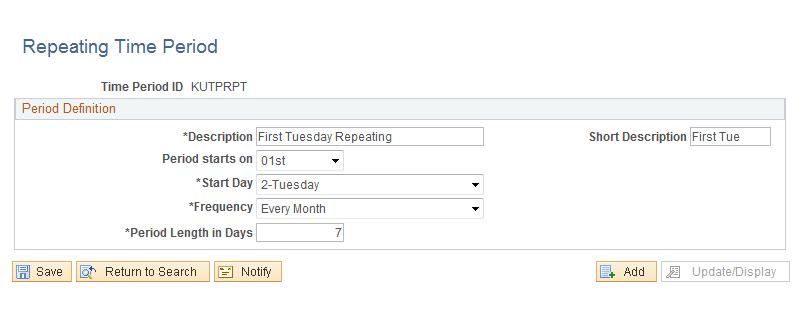
Field or Control |
Description |
|---|---|
Period starts on |
Repeating periods can be defined in any number of ways. To define a repeating period, follow these steps:
To ensure that you have the expected results, check the time period calendar by selecting the View Time Period Calendar page after building the period using the Build Time Period Calendar process. |
Period Length in Days |
Enter the number of days in your period. The maximum you can enter is 999. |