Aligning Employee Placement Plans with the New Organization Structure
These topics provide an overview of employee placement plans and discuss how to align employee placement plans with the new organization.
|
Page Name |
Definition Name |
Usage |
|---|---|---|
|
RC_IDO_EE_LIST_JPN |
Run a report that lists current information for employees. Use it to help plan future organizational changes. |
|
|
IDO_MASS_TRANS_JPN |
Transfer multiple employees from one department to another. |
|
|
IDO_XFR_TREE_JPN |
Transfer employees between departments using trees. |
|
|
IDO_CANDIDATE_JPN |
Specify a list of tamatsuki candidates. |
|
|
IDO_TAMATSUKI_JPN |
Assign tamatsuki candidates to posts. |
|
|
RC_IDO_TAM_CL_JPN |
Summarize the tamatsuki transfers that are planned. |
|
|
RC_IDO_TAM_JPN |
Copy data from the record IDO_TAMATSU_JPN to the record IDO_FUT_UPD_JPN. |
|
|
IDO_MAINT_JPN |
Maintain the Future Update record. |
Multiple ways exist to create employee placement plans. The first way is to use the Transfer Entry by Department page. With this method, you enter the placement by department. The second method is to use the Transfer Entry with Trees page. You see the current organization structure and placement, and you enter plans.
These methods are similar in that you create an Ido candidate listing, use the Transfer Entry by Department or Transfer Entry with Trees pages, and then use the Transfer Data Maintenance page, if required. You can then check, undo, and adjust placements using the Transfer Data Maintenance page.
The third method is the Tamatsuki Transfer method to enter placements. The Tamatsuki Transfer is an optional step. Using this method, you create an Ido candidate listing, use the Transfer Entry by Department or Transfer Entry with Trees pages, use the Tamatsuki Transfer Candidate Entry, Tamatsuki Transfer Entry, Tamatsuki Placement Check List, and Tamatsuki to Transfer Record pages, and then you use the Transfer Data Maintenance page, if required.
Security setup does not prevent users from transferring employees. Consequently, limit access to the Mass Employee Transfer page to trusted users only. Security access is invoked whenever a user clicks the View links on the Transfer Entry by Department and Transfer Entry by Tree pages.
Use the Ido Candidate Listing page (RC_IDO_EE_LIST_JPN) to run a report that lists current information for employees.
Use it to help plan future organizational changes.
Navigation:
This example illustrates the fields and controls on the Ido Candidate Listing page. You can find definitions for the fields and controls later on this page.
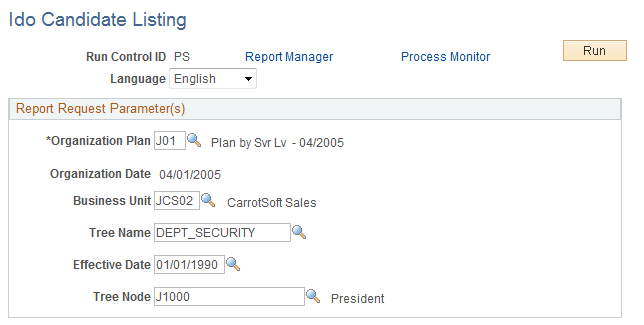
Use this page to run a report to determine which employees are subject to a reorganization or tamatsuki placement. The report is in comma delimited file (CSV) format so that you can open the file as a spreadsheet.
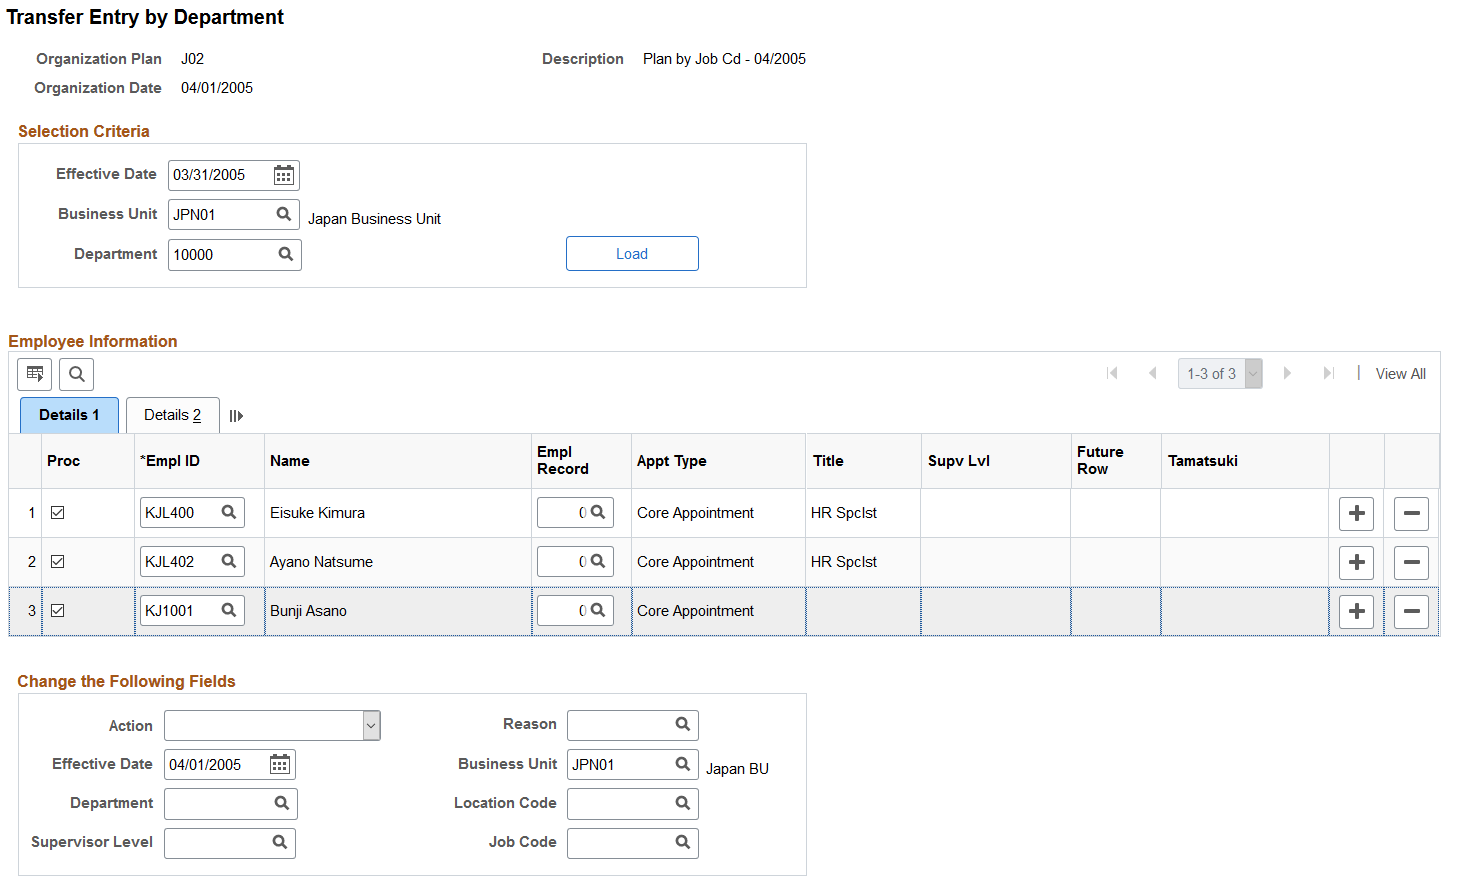
Use the Transfer Entry by Department page (IDO_MASS_TRANS_JPN) to transfer multiple employees from one department to another.
Navigation:
This example illustrates the fields and controls on the Transfer Entry by Department page. You can find definitions for the fields and controls later on this page.
Field or Control |
Description |
|---|---|
Load |
Click the Load button to list the employees for a particular business unit and department who are available for transfer to another department. |
Proc (Process) |
The Proc check box is selected by default. When it is selected, employees are transferred to another department or have other job-related information changed. The changes are applied when the page is saved. For example, department 100 is being closed. Half the employees in that department will be assigned to department 110, and the other half will be assigned to department 120. First, open this page and display all employees in department 100. Then enter a transfer to department 110 in the Change the Following Fields group box and deselect the Proc check box for those employees who should be transferred to department 120. After saving the page, enter a transfer for department 120, deselect the employees in department 110, reselect the employees to be transferred to department 120, and save the page again. |
Action |
Select the action to use for inserting a new Job row. |
Reason |
Select a code to specify why the value is being changed. |
Effective Date |
Enter a date to specify when the change becomes effective. |
Business Unit, Department, Location Code, Supervisor Level, and Job Code |
Enter values in these fields to specify new information for the employees selected. Note: These fields should be left blank if a user does not want to change the data for the employees. For example, if you want to move employees from department 100 to 110 but want them to keep their old job codes, you would leave the Jobcode field blank on the page. On the other hand, if you want to assign all the employees to job code J200 and change their departments, you would enter J200 in the Jobcode field. |
Use the Transfer Entry with Trees page (IDO_XFR_TREE_JPN) to transfer employees between departments using trees.
Navigation:
This example illustrates the fields and controls on the Transfer Entry with Trees page (1 of 2). You can find definitions for the fields and controls later on this page.
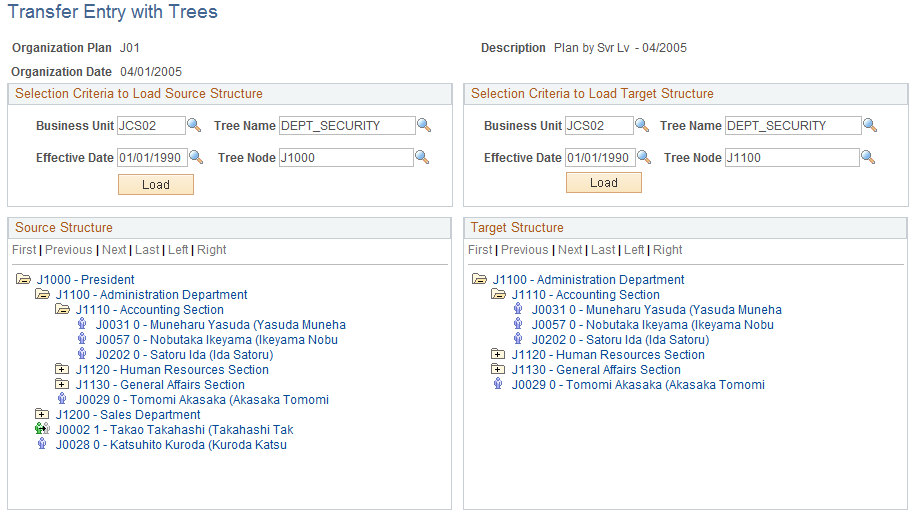
This example illustrates the fields and controls on the Transfer Entry with Trees page (2 of 2). You can find definitions for the fields and controls later on this page.

Note: Before using this page, consider and decide on each employee's transfer data, including locations, supervisor levels, job codes, and actions and reasons.
Enter values for the Business Unit, Tree Name, Effective Date,and Tree Node fields in both the Selection Criteria to Load Source Structure group box and the Selection Criteria to Load Target Structure group box. Click the respective Load buttons for each section.
To transfer entries by using trees:
Select an employee to be transferred from the Selection Criteria to Load Source Structure tree, and click the Department folder to list all employees in the department.
Click the employee's name to display information on the Details 1 and Details 2 grids.
View information in the Details 1 and Details 2 grids, as necessary.
Enter values in the Action and Reason fields.
The Location, Supervisor Level, and Jobcode fields are optional.
Click a new department for the employee in the Selection Criteria to Load Target Structure tree.
Use the Tamatsuki Transfer Candidates page (IDO_CANDIDATE_JPN) to specify a list of tamatsuki candidates.
Navigation:
This example illustrates the fields and controls on the Tamatsuki Transfer Candidates page. You can find definitions for the fields and controls later on this page.
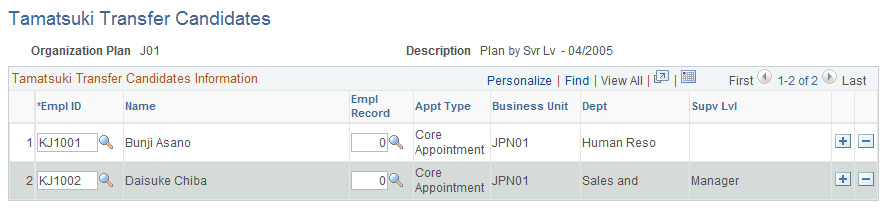
Enter employees who are potentially candidates for transfer using the Tamatsuki transfer method.
Note: Use this page to begin the Tamatsuki process. Select employee IDs that will appear on other pages that are part of the tamatsuki functionality.
Note: Once employees have been assigned as a tamatsuki transfer candidate, they cannot be transferred using the Transfer Entry by Department or Transfer Entry by Tree pages.
Use the Tamatsuki Transfer Entry page (IDO_TAMATSUKI_JPN) to assign tamatsuki candidates to posts.
Navigation:
This example illustrates the fields and controls on the Tamatsuki Transfer Entry page. You can find definitions for the fields and controls later on this page.
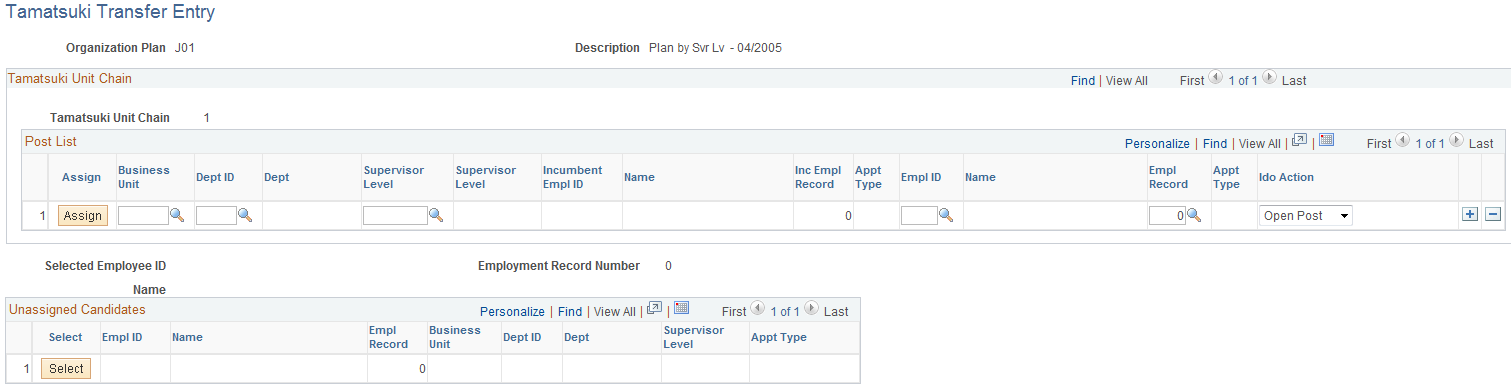
Note: When the user needs to change the middle of the Tamatsuki Chain (Unit), the user should delete the whole unit and enter information from the first row.
Post List
Field or Control |
Description |
|---|---|
Assign |
Use this button to assign the selected employee to the open post. When no one is selected from the unassigned candidate grid, the selected employee's post is entered on the first row. |
Business Unit |
This field can only be entered for the first row. The next rows are inserted automatically based on the selected employee's post. |
Dept ID |
This field can only be entered for the first row. The next rows are inserted automatically based on the selected employee's post. |
Supervisor Level |
This field can only be entered for the first row. The next rows are inserted automatically based on the selected employee's post. |
Ido Action |
Open Post is the default value when you insert a new row. When an employee is placed in an open post, the system automatically inserts a new row so that another employee can be assigned to the open (vacated) post. Possible values are:
|
Unassigned Candidates
Field or Control |
Description |
|---|---|
Select |
In the Unassigned Candidates group box, click the Select button next to the row of the employee that will be assigned to a post. The Selected Employee ID field shows the currently selected employee. |
Use the Tamatsuki Placement Check List page (RC_IDO_TAM_CL_JPN) to summarize the tamatsuki transfers that are planned.
Navigation:
This example illustrates the fields and controls on the Tamatsuki Placement Check List page. You can find definitions for the fields and controls later on this page.
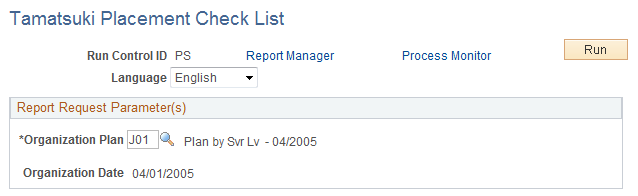
Use this report to confirm that placements align with the organizational plan and verify that candidates have been placed in the correct posts or that the posts have been assigned the correct candidates.
Use the Tamatsuki to Transfer Record page (RC_IDO_TAM_JPN) to copy data from the record IDO_TAMATSU_JPN to the record IDO_FUT_UPD_JPN.
Navigation:
This example illustrates the fields and controls on the Tamatsuki to Transfer Record page. You can find definitions for the fields and controls later on this page.
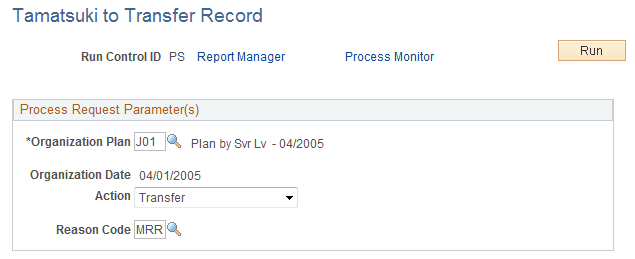
Tamatsuki data is tracked by the IDO_TAMATSU_JPN record. This process moves the data to the IDO_FUT_UPD_JPN record. The Mass Employee Transfer process takes the data from the IDO_FUT_UPD_JPN record and inserts it into the Job record.
Note: If the Tamatsuki to Transfer Record process is never run, the Mass Employee Transfer process will not insert the tamatsuki post changes into the Job record.
Use the Transfer Data Maintenance page (IDO_MAINT_JPN) to maintain the Future Update record.
Navigation:
This example illustrates the fields and controls on the Transfer Data Maintenance page. You can find definitions for the fields and controls later on this page.
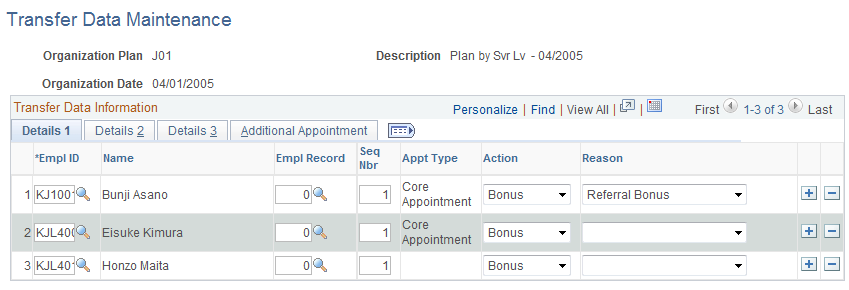
Note: Use caution in modifying information on this page because few validations are made here. The primary purpose of the page is to delete unwanted transfers. It is not intended for data entry that you make on other pages in the Tamatsuki process. If you perform actions beyond deleting rows on this page, be careful to validate your entries.