Uploading Fluid Life Event Documents
As an employee, while creating a life event, you can attach multiple documents at the same time based on customized classification. You can also view the uploaded documents and status using the Benefits Attachment Page.
This topic discusses how employees upload life event documents using fluid interface.
|
Page Name |
Definition Name |
Usage |
|---|---|---|
|
HR_ATT_CNFG |
Define attachment types as configuration ID. |
Use the Life Event Document Upload page (BEN_ATTACH_FL) to upload attachments required to support the life event you are creating. You can attach multiple documents at the same time based on different available classifications.
Navigation:
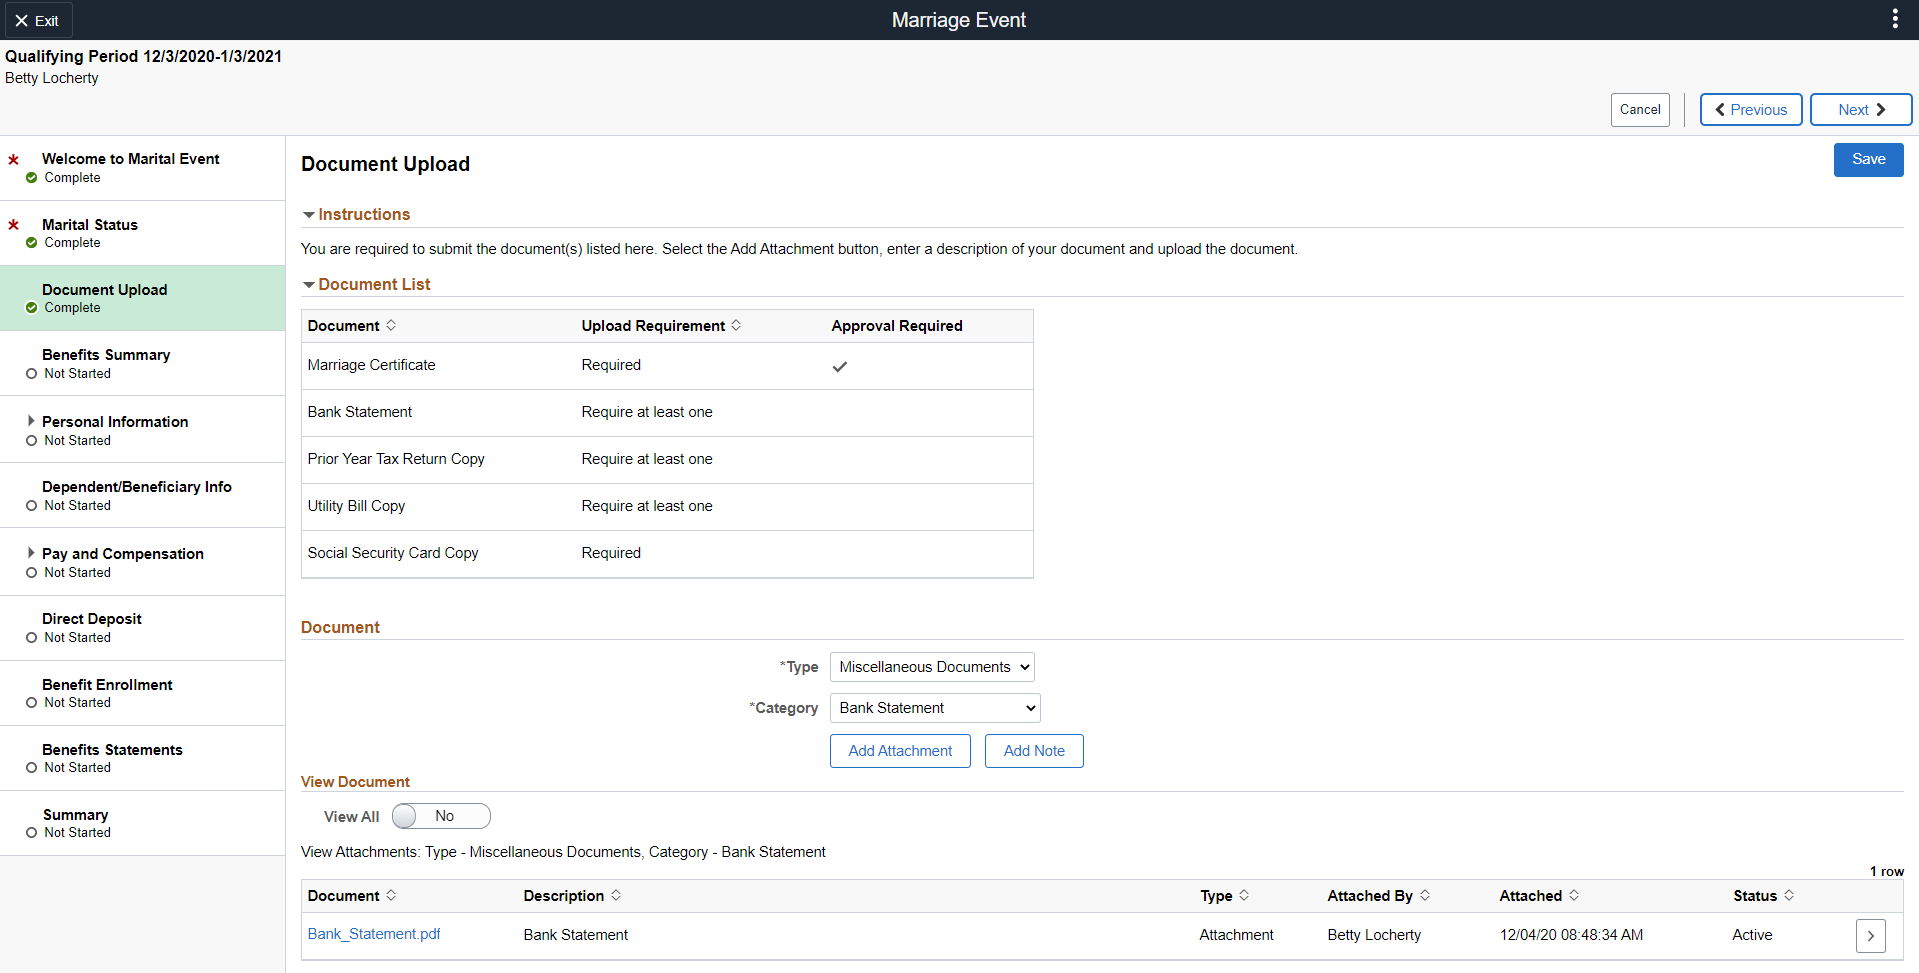
This example illustrates the Document Upload page.
Field or Control |
Description |
|---|---|
Qualifying Period |
Qualifying Period indicates the enrollment period begin date and enrollment period end date. Event Date is the enrollment period begin date. Enrollment period end date is calculated by adding the number of qualifying days to the event date. By default, the number of qualifying days is 31. This value is defined using the ‘Maximum Days to Notify’ field on the Life Event Rules Page. |
Document List
This section lists the type of documents required to support the selected life event. Administrators can customize the document types to be listed here.
Field or Control |
Description |
|---|---|
Document |
Indicates the documentation type. |
Upload Requirement |
Indicate the requirement for document upload under this category.
|
Approval Required |
Indicates if this document requires approval. The document uploaded for this type, will be send to the approver(s) based on the configured approval framework. |
Note: The system marks the Upload Document step as complete only when all the required documents are uploaded and all the documents that require approval are approved.
Document
Field or Control |
Description |
|---|---|
Type |
You can select the category to which your document belongs. Options are displayed based on the configuration done at the definition level. |
Category |
You can select the sub category to which the documents belong. For example, here, when we select ‘Miscellaneous Document’ as the Type, the field ‘ Category’ is displayed. You can select one of the options to specify the type of the document. Note: Options are displayed based on the configuration done at the definition level. |
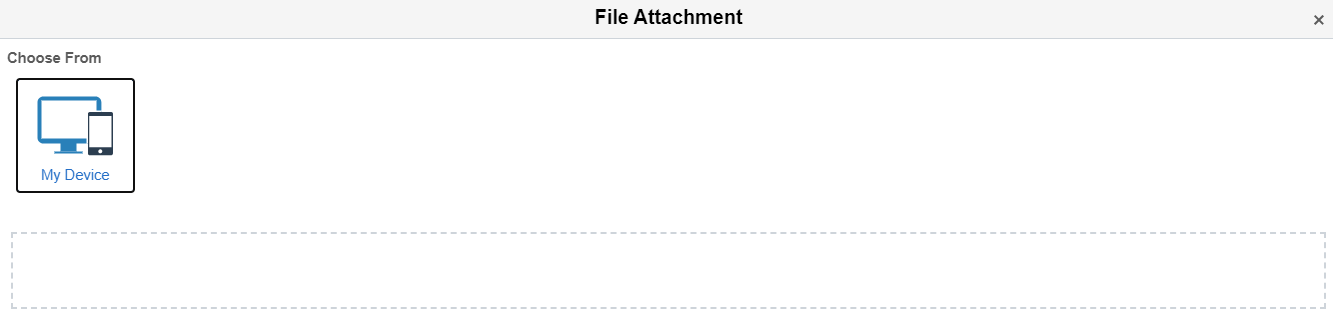
Add Attachment |
Use this button to open the File Attachment page. You can attach the document here. |
This example illustrates the File Attachment modal.
Field or Control |
Description |
|---|---|
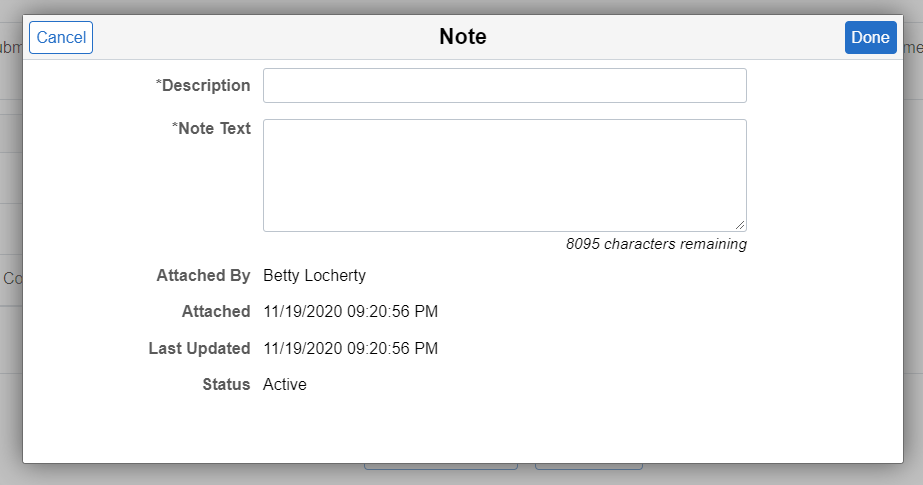
Add Note |
Use this button to open the Note modal window and add additional information regarding the attached file. |
This example illustrates the Note modal.
View Document
Field or Control |
Description |
|---|---|
View All |
Indicates whether you need to see all the attached documents or only the documents that belong to a specific type.
Based on the value in the ‘View All’ field, the documents are listed with details like description, Type, Attached By, Attached date, and Status of the approval. |
Note: If at least one of the attached document is in ‘Pending’ for approval status, the ‘Document Upload’ step shows ‘Visited’ status. The system automatically marks the step as Complete, when the document is approved.
To view more details on each attached document, click the corresponding row.
Alert
This example illustrates the Alert message when the Life Event Document is approved
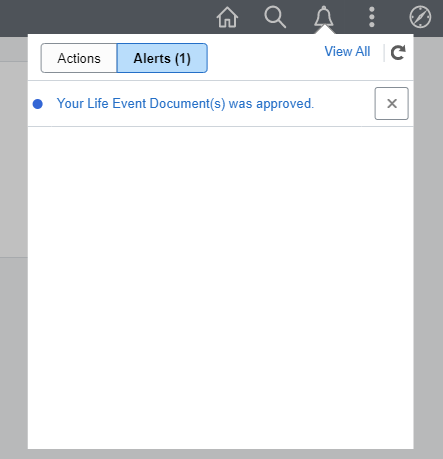
Click the link to open the Transaction Details page directly from the notification link.
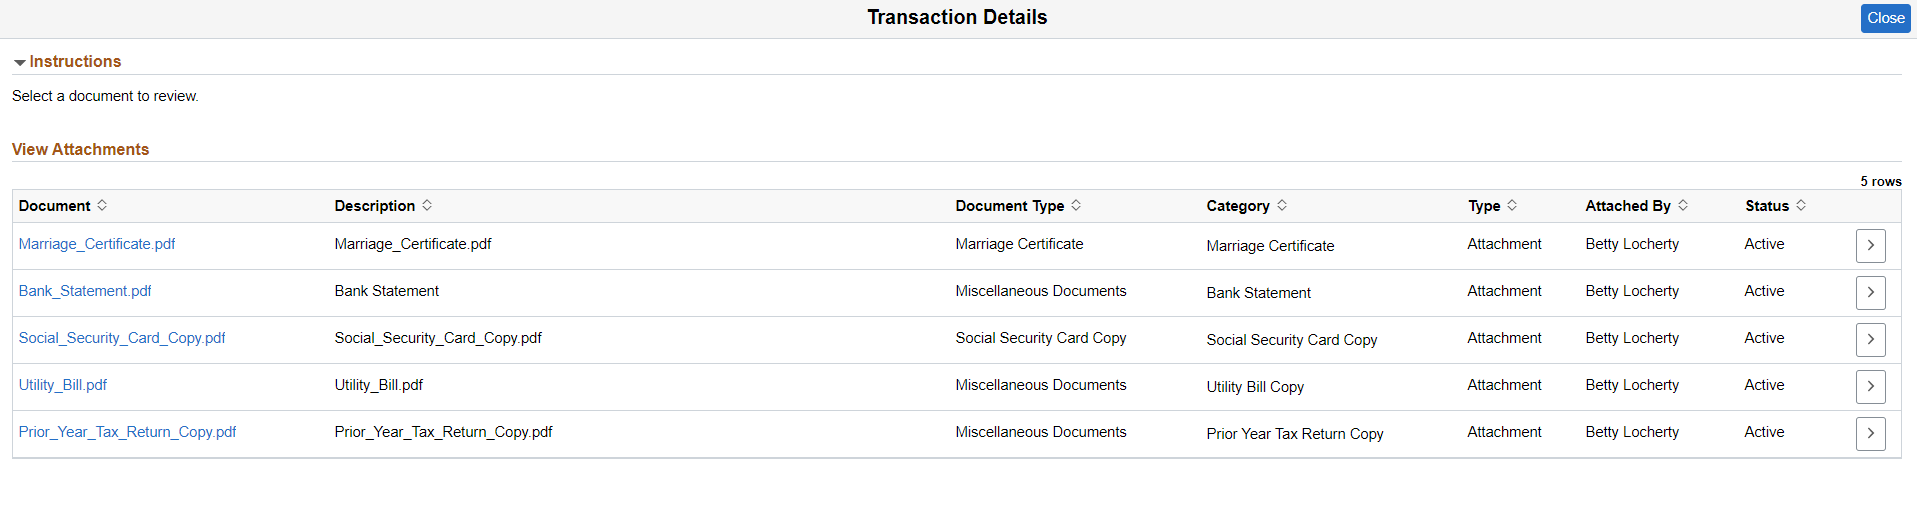
This example illustrates the Transaction Details page.
As an employee, you can use the Benefits Attachment page to review the uploaded documents and status.
Navigation:
Open the Benefits Attachment tile from Benefit Details Dashboard or Benefits Details Navigation collection.
This example illustrates the Benefit Details Dashboard with Benefit Attachment Tile

This example illustrates the Benefits Attachment page.
