Working with Self-Service Delegation
These topics discuss working with self-service delegation.
|
Page Name |
Definition Name |
Usage |
|---|---|---|
|
EODL_DLGRQST_DT_FL |
Enter delegation dates by specifying the From Date and To Date, which defines the delegation authority period for a transaction. By not specifying a To Date, users specify an open-ended delegation. |
|
|
EODL_PROXY_SEL_FL |
Select a delegate/proxy. |
|
|
EODL_TRANS_SEL_FL |
Select transactions for delegation. Users can select one or more transactions to delegate. |
|
|
EODL_DLGRQST_SM_FL |
Submit a delegation request. Users can review the details of a delegation request and then submit the delegation request. |
|
|
EODL_MY_PROXIES_PG |
Manage delegation requests you have initiated for others. |
|
|
EODL_DLGT_AUTH_PG |
Manage delegations requested of you by others |
Access Fluid Self-Service Delegations using the Delegations tile on the Self Service Fluid Homepage.
Delegations tile in the Self-Service Homepage
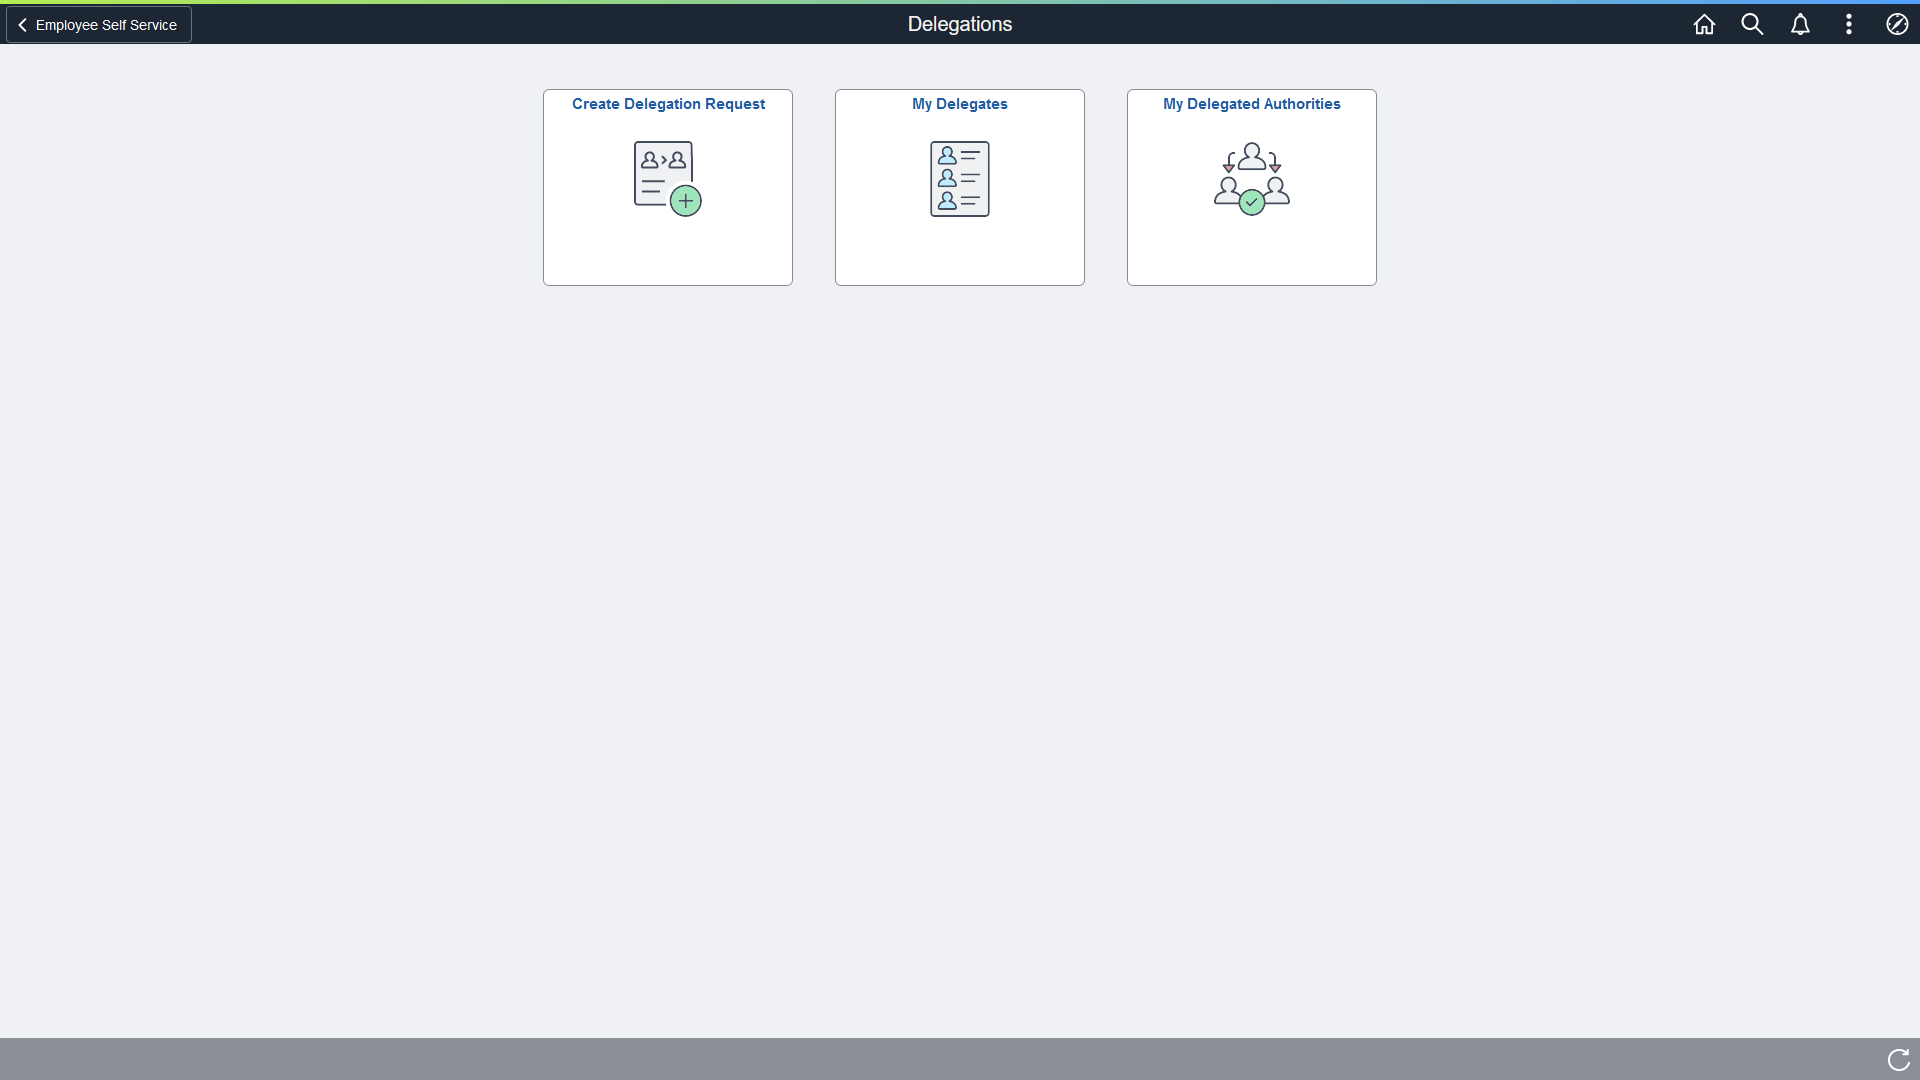
Select the Delegations tile to view a collection of Fluid Delegations tiles that correspond to various delegation transactions.
Collection of Fluid Delegations tiles
Use the Create Delegation Request - Delegation Dates page (EODL_DLGRQST_DT_FL) to enter delegation dates by specifying the From Date and To Date, which defines the delegation authority period for a transaction.
Navigation:
This example illustrates the fields and controls on the Create Delegation Request - Delegation Dates page.
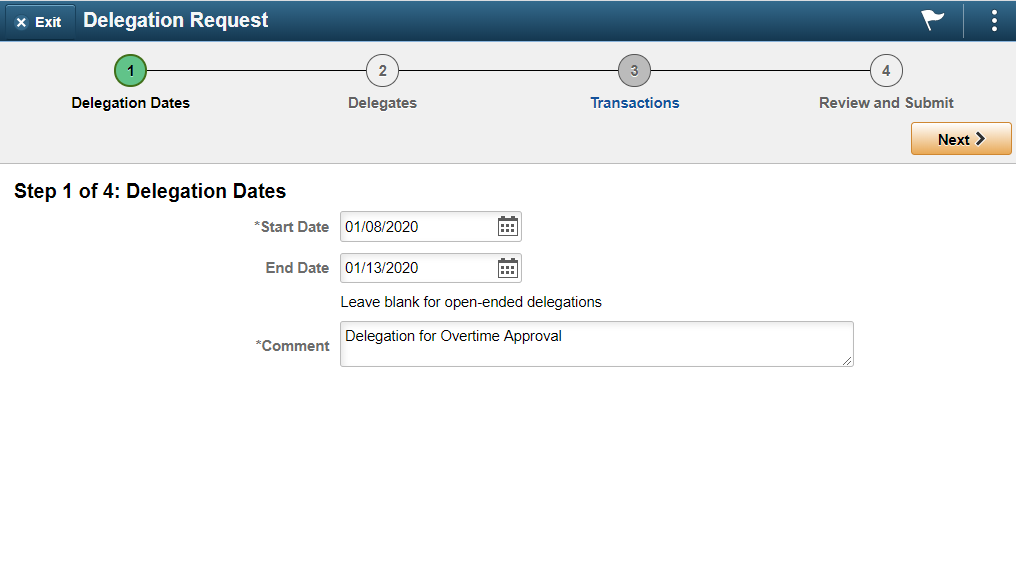
By not specifying a To Date, users specify an open-ended delegation.
Use the Create Delegation Request - Select Delegates page (EODL_PROXY_SEL_FL) to select a proxy/delegate.
Navigation:
Click the Next button on the Delegation Dates page.
This example illustrates the fields and controls on the Create Delegation Request - Select Delegates page.
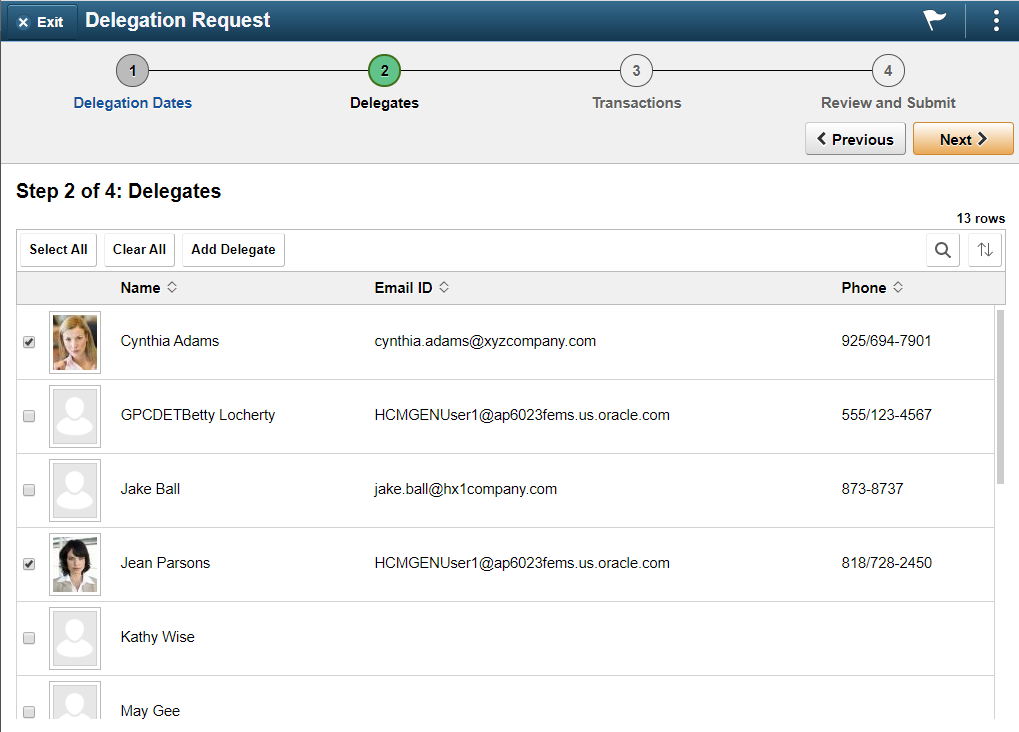
Users can select a delegate/proxy for transactions they are delegating. If the delegation administrator selects a specific hierarchy for the transaction on the Delegation Installation Settings page, the system displays valid delegates/proxies based on that selection, and users can select from this list. Valid delegates/proxies include persons who report directly or indirectly to the delegator, as well as all persons in the upward hierarchy—starting with the delegator's manager. If the delegation administrator selects the All Persons check box on the installation page, then the system displays the Search by Name link so that users can search for and select from any person in the system.
Use the Create Delegation Request - Transactions page (EODL_TRANS_SEL_FL) to select transactions for delegation.
Users can select one or more transactions to delegate.
Navigation:
Click the Next button on the Delegates page.
This example illustrates the fields and controls on the Create Delegation Request - Transactions page.
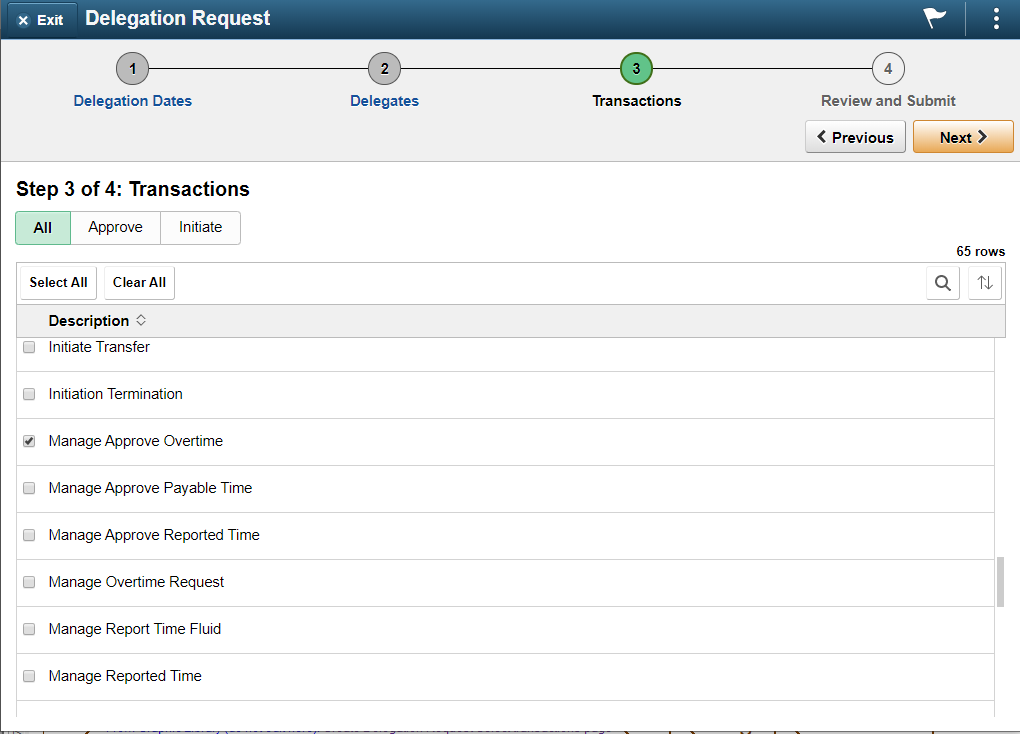
The system displays only the transactions that are configured for delegation initiation or approval on the Configure Delegation Transactions page and for which the delegator has component access.
Users can delegate one or multiple transactions to another person in a single delegation request. When a delegate/proxy receives a delegation request for multiple transactions, he or she must accept or reject the entire request. The delegator, however, can revoke single transactions from a multiple transaction request. When a delegator revokes one or more transactions from a multiple transaction request, the system pulls the revoked transactions out of the multiple transaction request and creates individual revoked entries in the Approval Framework. The remaining transactions stay in the multiple transaction request. If only one transaction remains after revoking, the system disbands the group and displays an individual rather than multiple delegation request. This functionality preserves the accuracy of the multiple transaction status.
Use the Create Delegation Request - Review and Submit page (EODL_DLGRQST_SM_FL) to review and submit a delegation request.
Users can review the details of a delegation request and then submit the delegation request.
Navigation:
Click the Next button on the Transactions page.
This example illustrates the fields and controls on the Create Delegation Request - Review and Submit page.
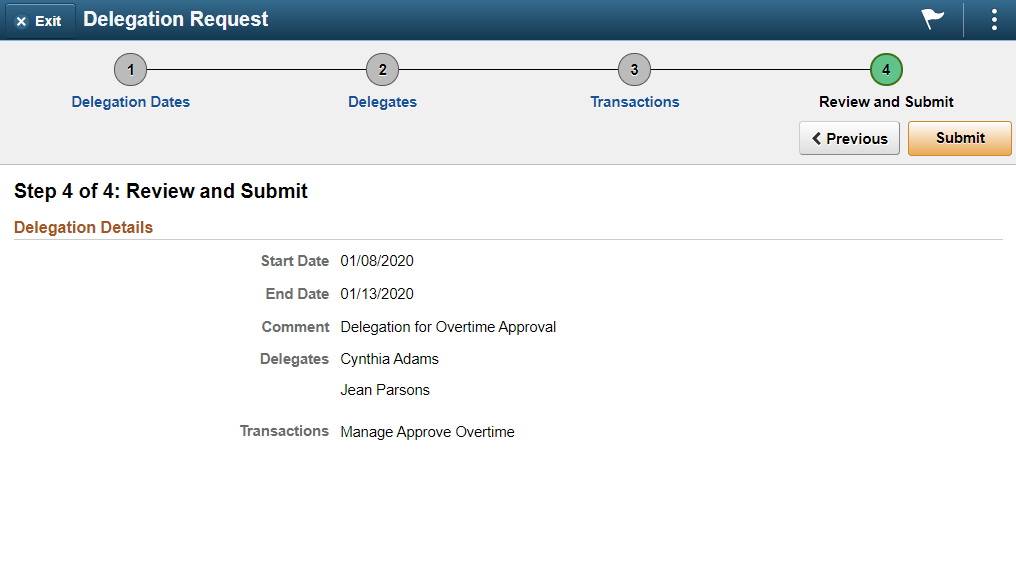
The system displays the delegation period, the selected delegate/proxy, and the selected transactions. When a transaction is set up with product specific delegation requirements on the Configure Delegation Transaction page, a link will appear after the transaction. When no information is entered in the Optional Parameters section of the Configure Delegation Transaction page, the link is not available. Select the product specific link for a transaction to have the system open the product specific component to continue the delegation request.
When users click the Submit button, the system automatically sends an email notification to the delegate/proxy to either accept or reject the delegation request if Approval Framework is set up.
Note: When a user adds a delegation request, the system checks for an Alternate User ID field value on the User Profile - Workflow page. The delegation request overrides the alternate user ID for transactions in the delegation request. If an alternate user ID exists and the dates of the delegation and alternate ID overlap, the system issues a warning message.
Use the My Delegates page (EODL_MY_PROXIES_PG) to manage delegation requests you have initiated for others.
Navigation:
This example illustrates the fields and controls on the My Delegates page.

|
Field or Control |
Description |
|---|---|
|
Group Transactions |
Select Yes to display delegation requests grouped by delegate. Select No to display individual delegation requests. |
|
Revoke |
Select this button to revoke delegation requests for a delegate. You must select at least one check box for this button to function. You can revoke individual or grouped delegation requests, depending on the Group Transactions selection. When you revoke a request, the system changes the status to Revoked and automatically sends an email notification to the delegate (proxy) about the status of the delegation request. Note: When requests are grouped, selecting a single row revokes all requests for a delegate. |
|
Delegates |
Displays the delegate associated with the delegation request. |
|
Start Date, End Date |
Displays the start and end date associated with the delegation request. |
|
Transactions |
When individual delegation requests are displayed (Group Transactions set to No), this field displays the transaction associated with the delegation request. When delegation requests are grouped (Group Transactions set to Yes), this field displays the View Details button and a count of the number of transactions that have been delegated. |
|
View Details |
Select to access the Details page and view the transactions associated with the delegate. |
|
Status |
Displays the status of the transaction associated with the delegate. Status is only available in the Active tab. |
The Accepted tab displays delegation requests that the delegate has accepted.
The Ended tab displays delegation requests that are expired.
The Rejected tab displays delegation requests that the delegate has rejected.
The Revoked tab displays delegation requests that you have revoked.
The Submitted tab displays delegation requests that you have submitted.
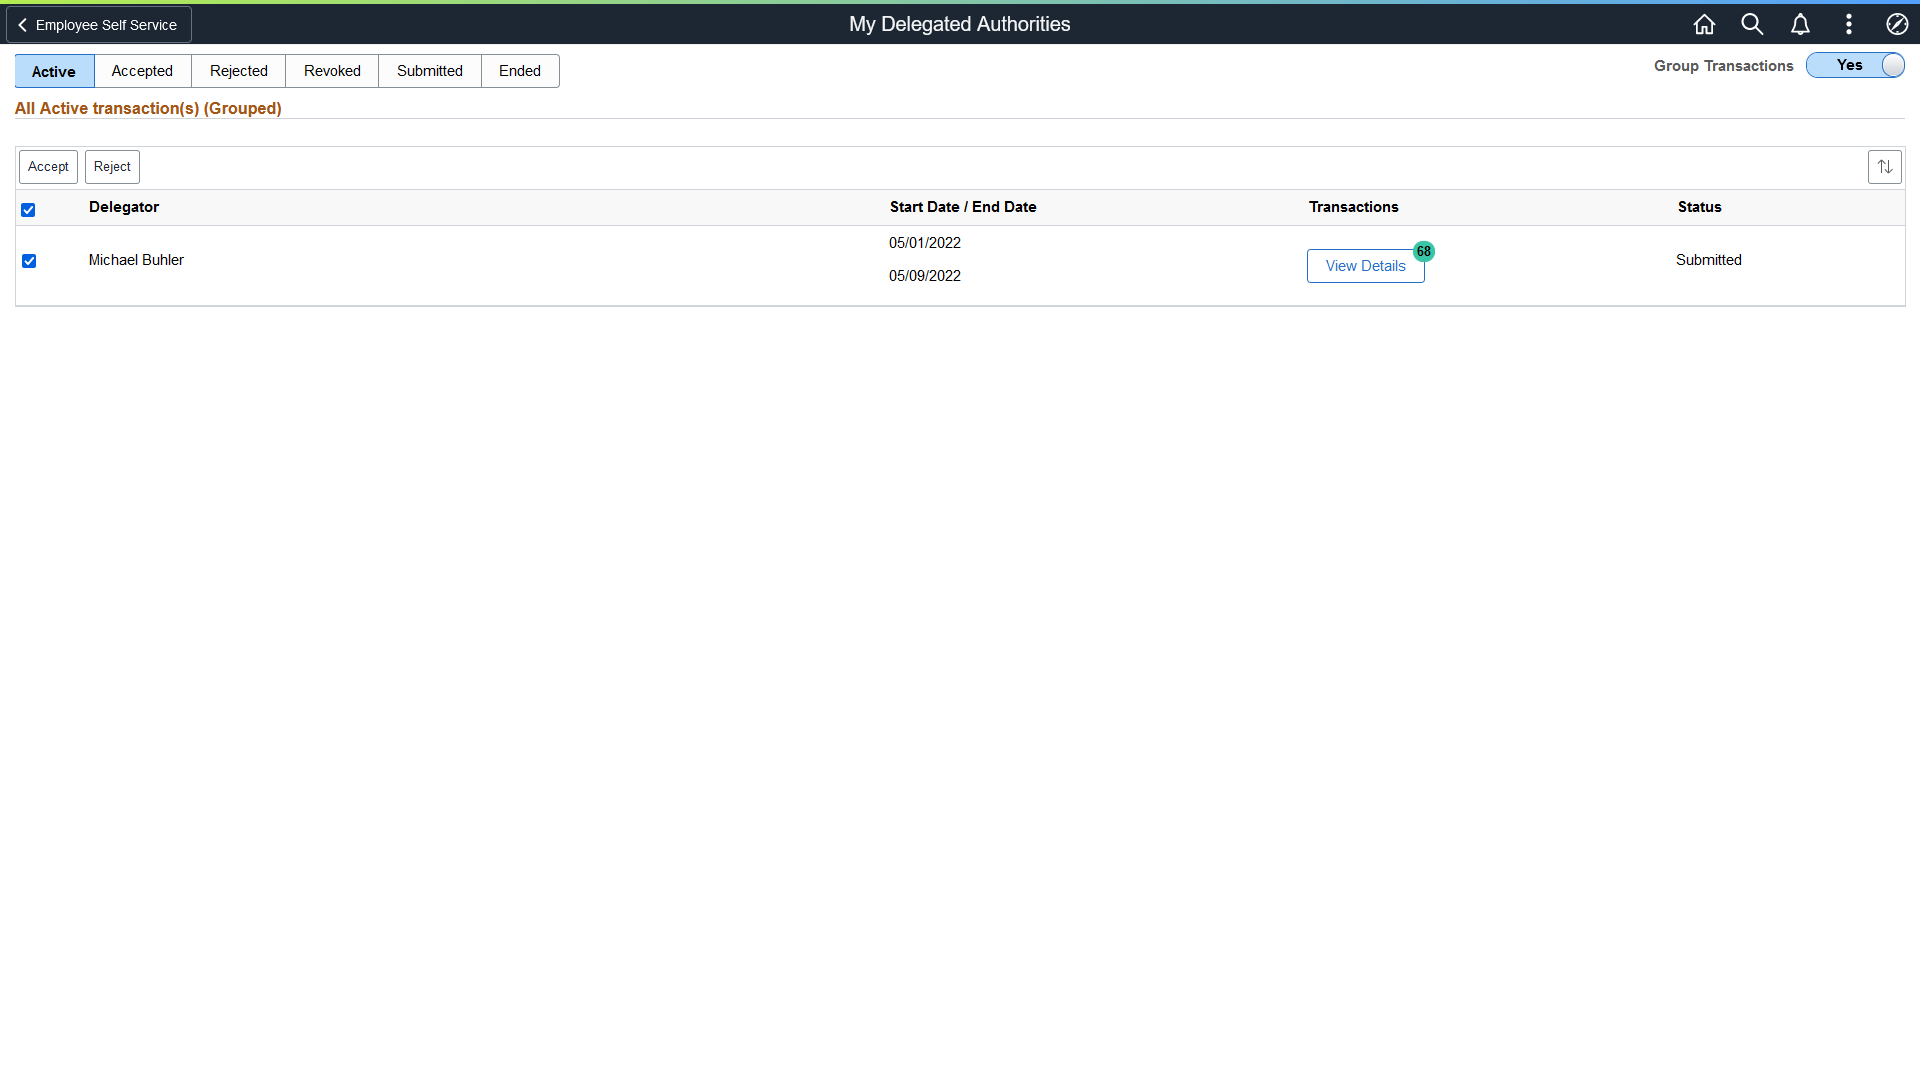
Use the My Delegated Authorities page (EODL_DLGT_AUTH_PG) to manage delegations requested of you by others.
Navigation:
Fields or controls and descriptions for the My Delegated Authorities page.
|
Field or Control |
Description |
|---|---|
|
Group Transactions |
Select Yes to display requests grouped by delegator. Select No to display individual requests. |
|
Accept |
Select this button to accept delegations requested of you. You must select at least one check box for this button to function. You can accept individual or grouped requests, depending on the Group Transactions selection. Note: When requests are grouped, selecting a single row accepts all requests for a delegator. |
|
Reject |
Select this button to reject delegations requested of you. You must select at least one check box for this button to function. You can reject individual or grouped requests, depending on the Group Transactions selection. Note: When requests are grouped, selecting a single row rejects all requests for a delegator. |
|
Delegator |
Displays the delegator associated with the request. |
|
Start Date, End Date |
Displays the start and end date associated with the request. |
|
Transactions |
When individual requests are displayed (Group Transactions set to No), this field displays the transaction associated with the request. When delegation requests are grouped (Group Transactions set to Yes), this field displays the View Details button and a count of the number of transactions that have been requested. |
|
View Details |
Select to access the Details page and view the transactions associated with the request. |
|
Status |
Displays the status of the transaction associated with the delegator. Status is only available in the Active tab. |
The Accepted tab displays requests that you have accepted.
The Ended tab displays requests that are expired.
The Rejected tab displays requests that you have rejected.
The Revoked tab displays requests that have been revoked by the delegator.
The Submitted tab displays delegation requests that have been submitted by the delegator.