Using Manual Counting Events
In manual counts, you enter the count data first and then create the counting event with its header, counting event detail lines, and count quantities. You can collect the count quantities using electronic data collection devices or with pen and paper. With manual counting events, you can incorporate the previously established counting methods with PeopleSoft Inventory.
|
Page Name |
Definition Name |
Usage |
|---|---|---|
|
COUNT_INF_DE_INV |
Enter count results into the system. |
|
|
COUNT_INF_INV_UDF |
Select items based on user-defined values, item family, and item group and create counting events. |
|
|
COUNT_INF_INV |
Change the information that you entered on the Manual Count page or uploaded from an electronic data collection device. |
Use the Manual Count page (COUNT_INF_DE_INV) to enter count results into the system.
Navigation:
This example illustrates the fields and controls on the Manual Count page. You can find definitions for the fields and controls later on this page.
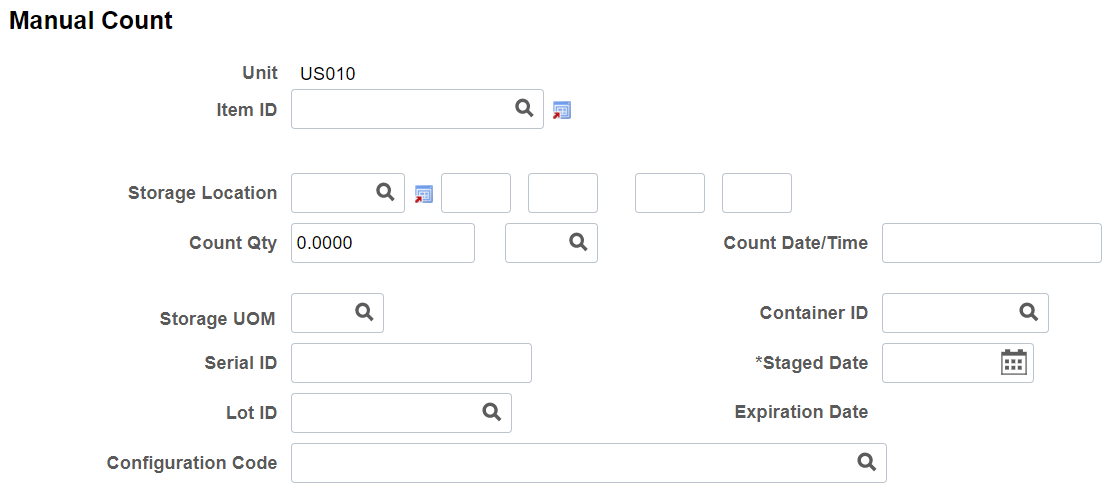
The Manual Counting page is used to manually enter your count results. This page runs in deferred mode. Therefore all page edits are performed when you save the page.
Depending on the item and the setup parameters, other fields may be required:
If the item is lot controlled, enter the Lot ID.
If the item is serial controlled, enter the Serial ID.
If you use staged-date tracking, enter the Staged Date.
Field or Control |
Description |
|---|---|
Count Date/Time |
Update this field if you have not frozen the storage location. If you do not make an entry, the system enters the current date and time in the field when you save the page. Transactions occurring since the creation of the counting event are not taken into account when the system makes adjustments for the location. |
Lot ID, Serial ID, Expiration Date, Staged Date, Qty Reserved, Storage Location and Configuration Code |
These fields display depending on setup on the Business Unit Display Options page. |
Note: The Manual Count and Update Manual Count pages allow you to select item status in the Look Up Item ID prompt. The Look Up Item ID prompt lists the statuses only if you enable the Use Status For Counting option on the Business Unit Options page.
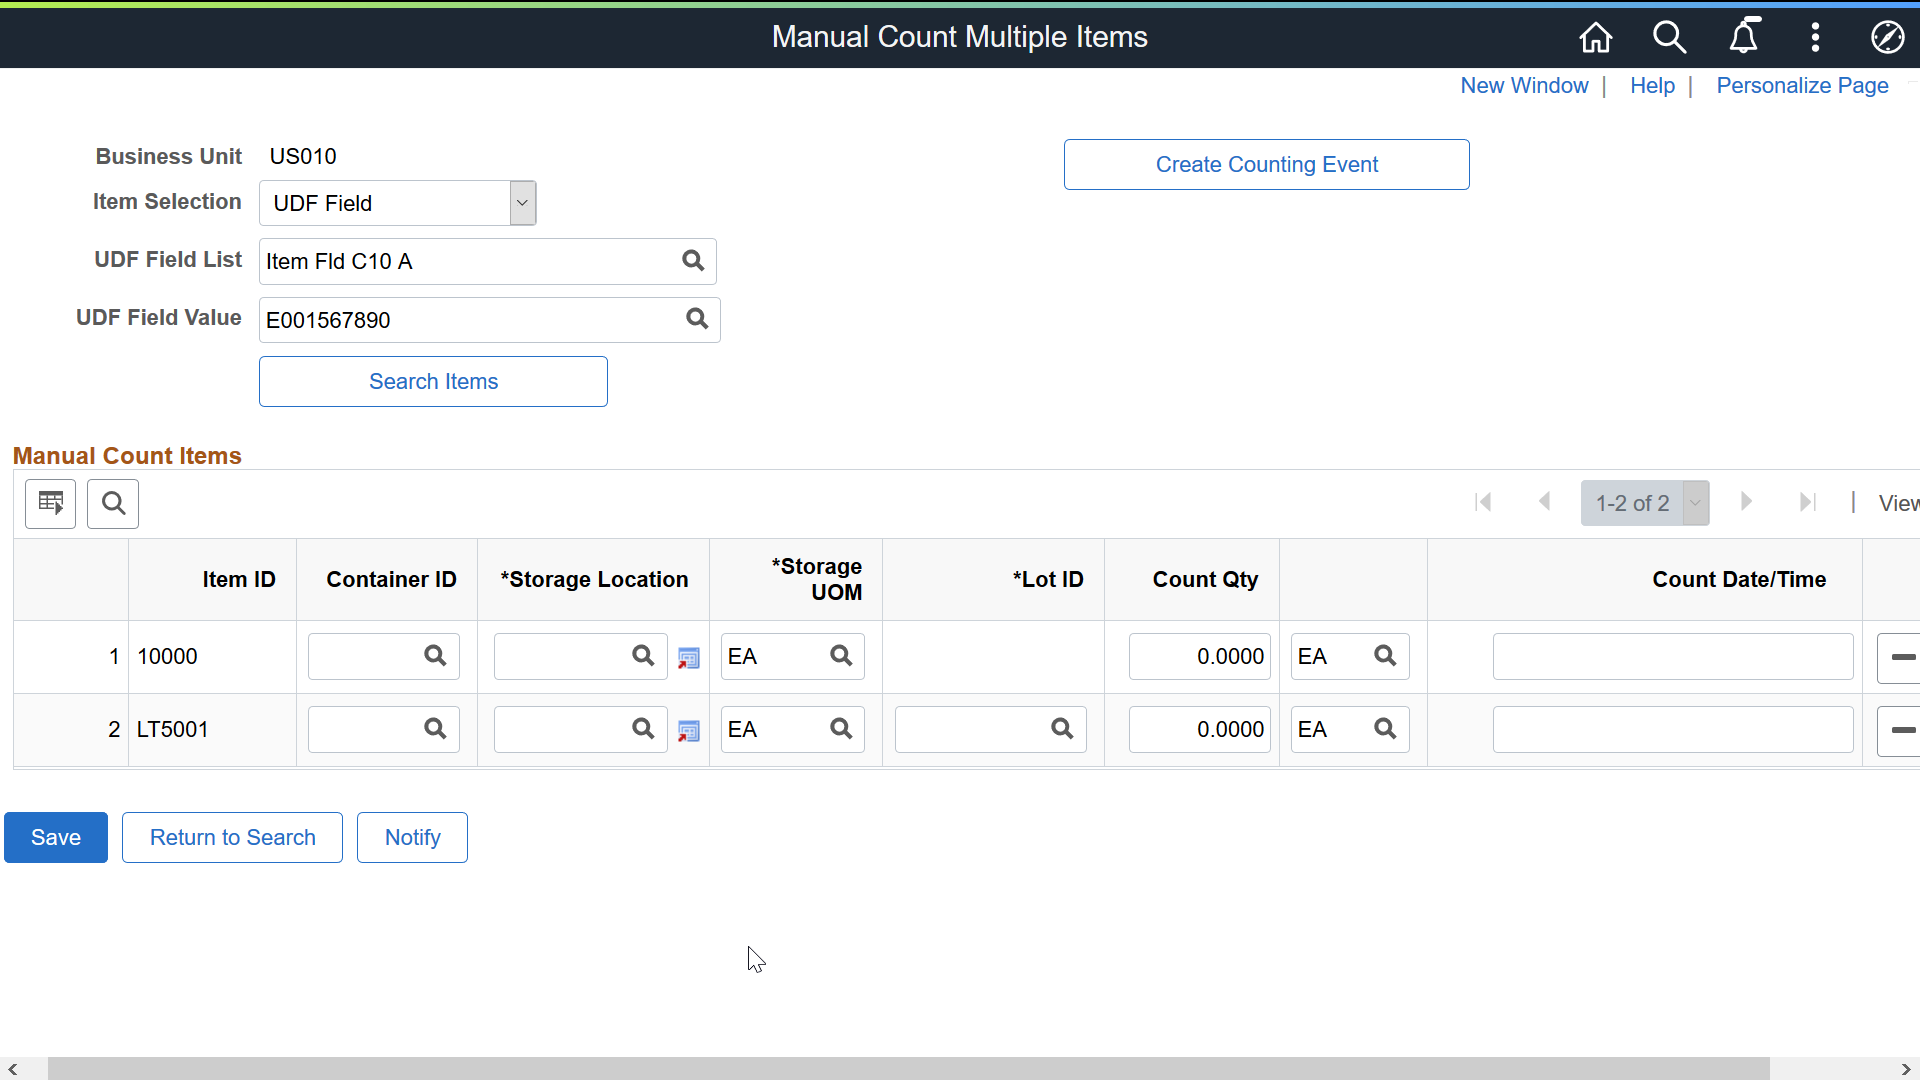
Use the Manual Count Multiple Items page (COUNT_INF_INV_UDF ) to select items based on user-defined values, item family, and item group and create counting events.
Navigation:
This example illustrates the fields and controls on the Manual Count Multiple Items page. You can find definitions for the fields and controls later on this page.
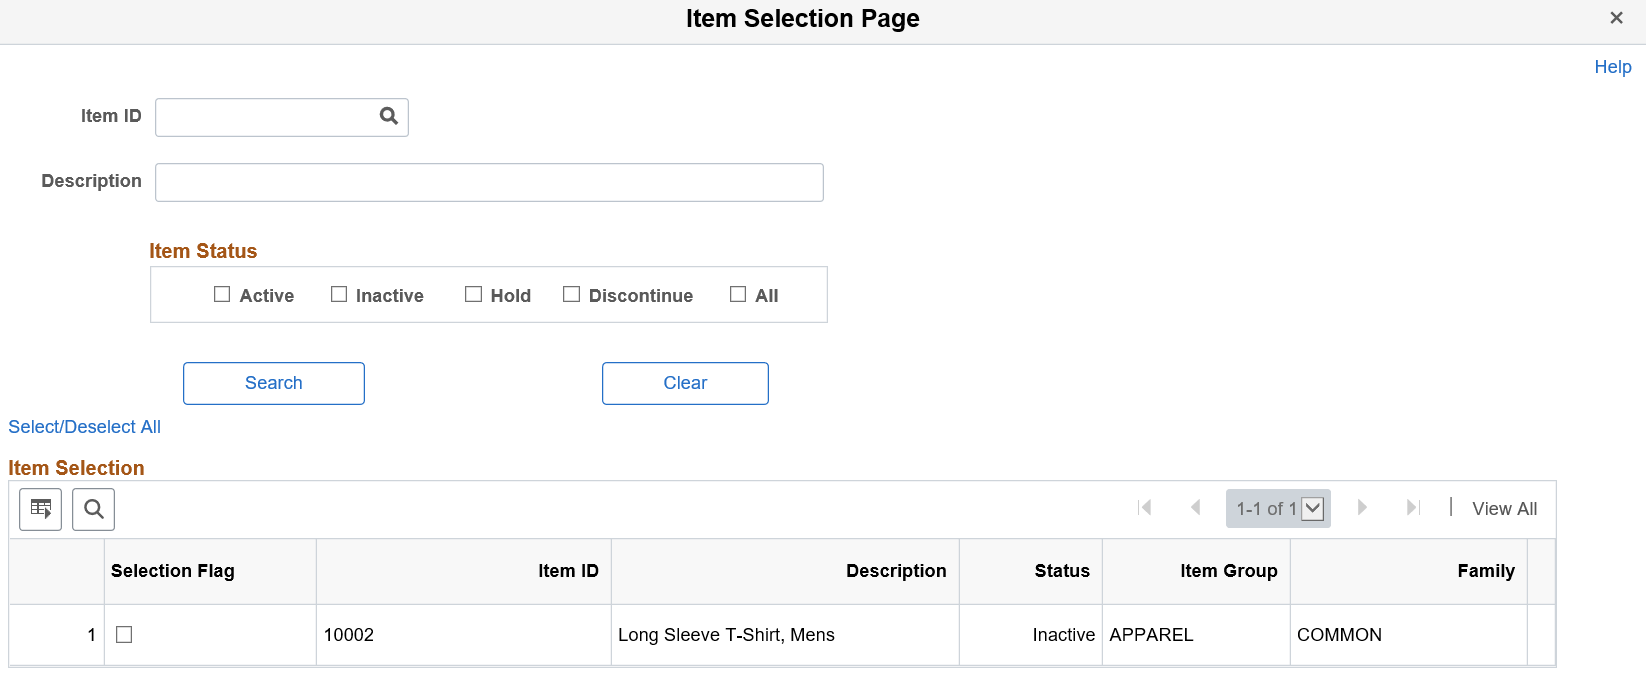
This example illustrates the fields and controls on the Item Selection page. You can find definitions for the fields and controls later on this page.
Field or Control |
Description |
|---|---|
Item Selection |
Select a drop down value. Available options are Item Family, Item Group, and UDF Field. The default value is UDF Field. |
UDF Field List |
Displays only if you select UDF Field in the previous step. The prompt displays all the user-defined field names. For more information on user-defined fields, see Defining Custom Item Attributes. |
UDF Field Value |
Select a value using the prompt. The prompt displays values based on the UDF Field List value for the business unit. |
Search Items |
Click to display the Item Selection page, where you can view the items that match the specified criteria. You can select individual or multiple items, or use the Select/Deselect All link to select or deselect all items at the same time. Note: You can use the Item ID and Description fields on the Item Selection page to further narrow down the items list. Items can be selected based on their statuses as well. If you select an item ID, the item status check boxes are unavailable for selection, and vice versa. The Item Status group box is available for selection only if the Use Status For Counting option is set to Yes on the Inventory Definition - Business Unit Options page. |
Manual Count Items grid |
Enter values in the fields such as Container ID, Storage Location, Storage Level (Lev 1), Storage UOM, and Count Qty. The Count Date/Time displays text after you enter the count quantity. For lot-controlled and serial-controlled items, LOT ID and Serial ID fields are also displayed. Note: A message displays when you proceed to a different search without saving the selected item(s). You can either save the data and proceed with your search, or discard the current selection and choose new items. If you save the items, confirm the counting event creation process in the message displayed. To avoid the data accumulation, you can create counting events each time you save items. |
Create Counting Event |
Click this button to create a counting event for the items saved for manual count. A message displays asking whether you want to proceed with the event creation process. The process considers Manual Count as the Cycle Count option. For more information on create counting events, see Creating Counting Events. |
Use the Manual Counting page (COUNT_INF_INV) to change the information that you entered on the Manual Count page or uploaded from an electronic data collection device.
Navigation:
Note: Use this page to change the manual count data before creating the counting event. To change data after creating the counting event, use the Item Counts page.
Click the Search button to populate the page with records from the Manual Count table.