Setting Up eProcurement Requisition Navigation
This section provides an overview of setting up eProcurement requisition left navigation order and labels, which can be configured.
|
Page Name |
Definition Name |
Usage |
|---|---|---|
|
PV_LEFTNAV |
Set up eProcurement requisition left navigation order and labels for the Classic User Interface. |
|
|
PV_LEFTNAV |
Set up eProcurement requisition left navigation order and labels for the Fluid user Interface. |
|
|
PV_LEFTNAV_XTRA |
Assign Role Names to a specific Navigation ID. |
Use the eProcurement Requisition Navigation: Classic page (PV_LEFTNAV) to set up eProcurement requisition left navigation order and labels for the Classic User Interface.
This setting will be the default, system level setting for the left navigation.
Navigation:
This example illustrates the fields and controls on the eProcurement Requisition Navigation: Classic page. You can find definitions for fields and controls later on this page.
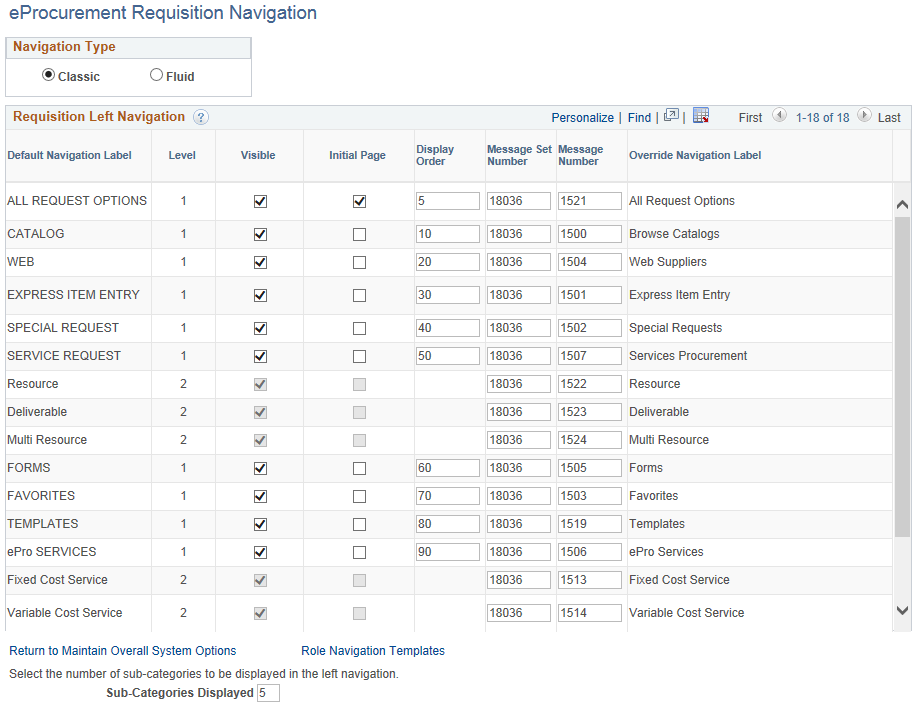
Field or Control |
Description |
|---|---|
Default Navigation Label |
Displays all the labels for the left navigation that has been defined through message catalog. The items appear in the following order:
|
Level |
Displays the level for the label. Level 1 labels will be at the top followed by level 2 labels. |
Visible |
Select to show level 1 labels. Level 2 labels cannot be hidden, hence the check box cannot be edited. |
Initial Page |
Select to set a page as initial page to be displayed when accessing the create requisition component for the first time. Initial page can also be set at the role action level. Note: Only level 1 page can be selected as initial page also you can select only one level 1 page as initial page. |
Display Order |
Enter the order in which you want the level 1 labels to be displayed. Level 2 labels cannot be re-ordered. |
Message Set Number, Message Number |
Enter appropriate number to modify the left navigation label. The message number is associated with the message text in the message catalog. Hence if you enter invalid label which does not correspond with the message text associated with the message number then the user will get an error message. |
Override Navigation Label |
Enter required label name. The label name you enter here will override the navigation label. |
Sub-categories Displayed |
Enter the number of sub-categories to be displayed in the left navigation. Default value is 5. |
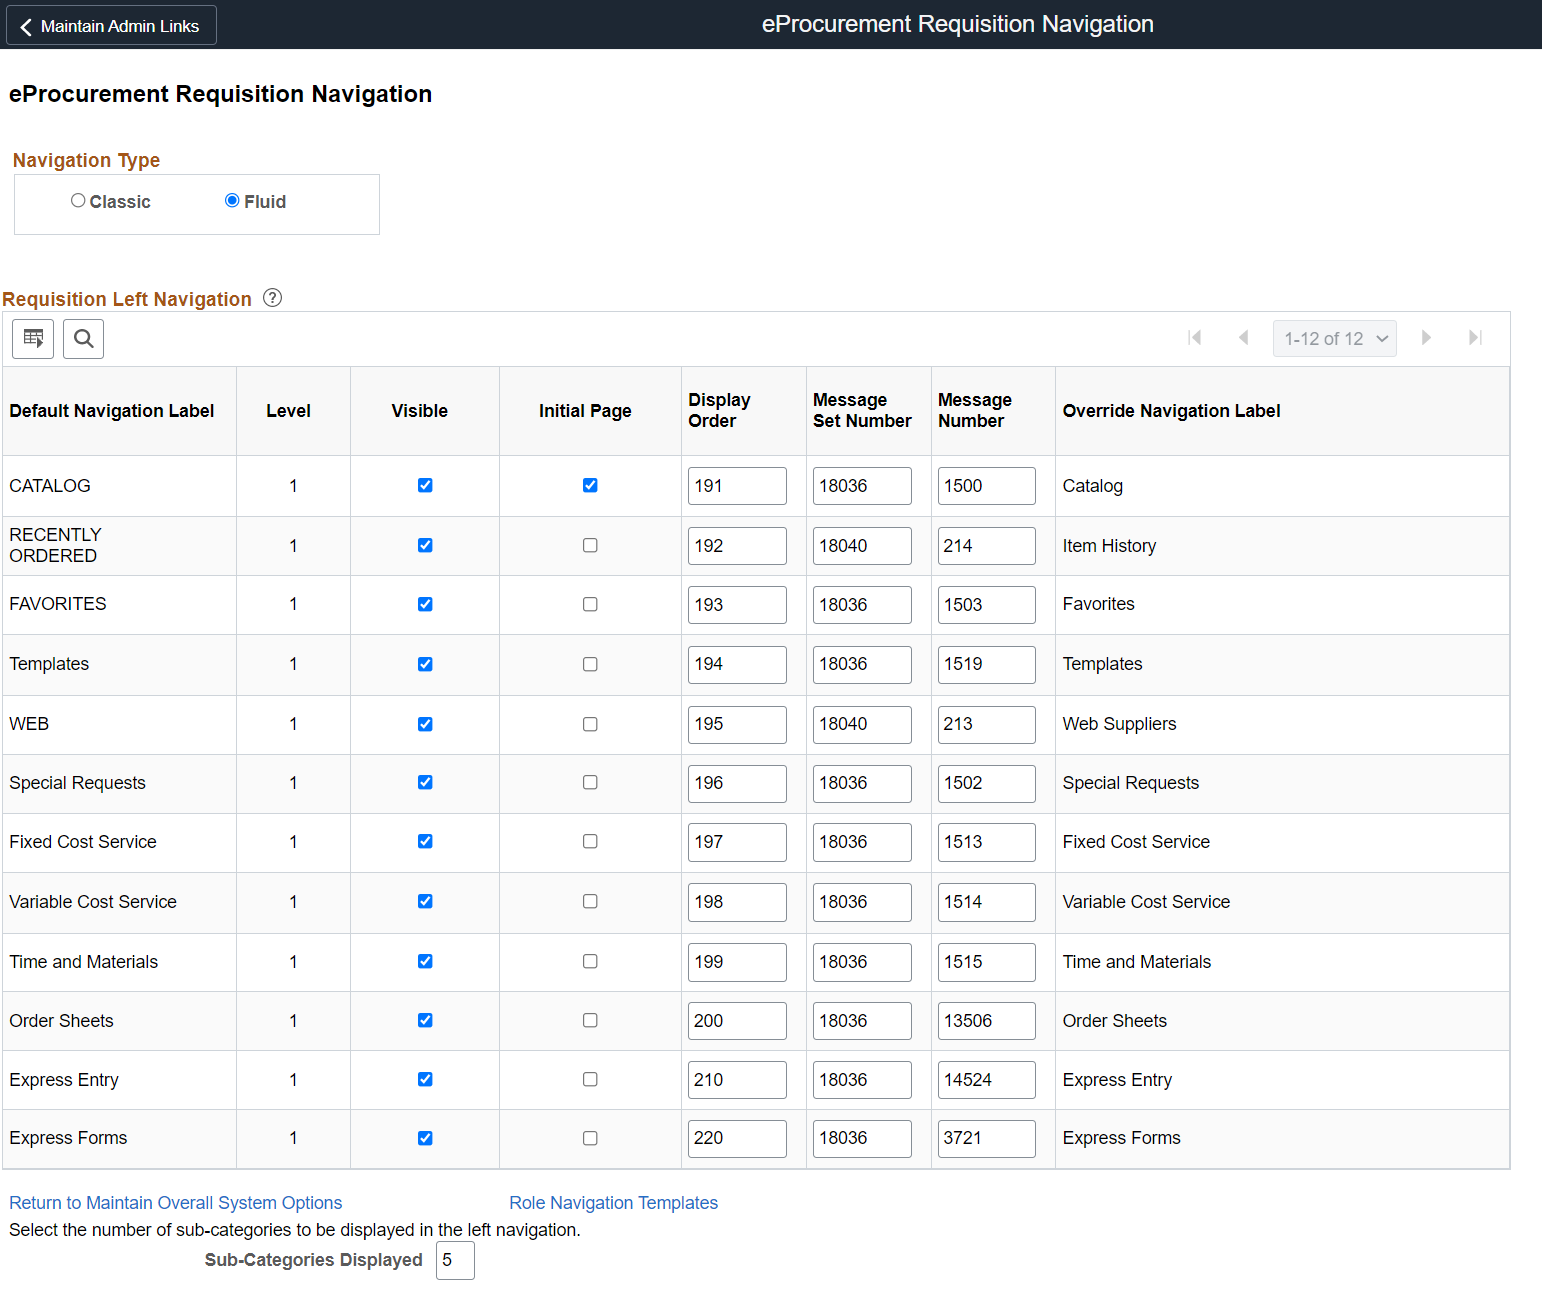
Use the eProcurement Requisition Navigation: Fluid page (PV_LEFTNAV) to set up eProcurement requisition left navigation order and labels for the Fluid User Interface.
Navigation:
. Select the Fluid option as the Navigation Type.
This example illustrates the fields and controls on the eProcurement Requisition Navigation: Fluid page.
Use the eProcurement Navigation Setup: Assign Roles page (PV_LEFTNAV_XTRA) to assign Role Names to a specific Navigation ID. In addition to the default navigation defined, you can change the Navigation options and the initial page for a subset of requesters by role.
Navigation:
. Click the Role Navigation Templates link.
This example illustrates the fields and controls on the eProcurement Navigation Setup: Assign Roles page. You can find definitions for fields and controls later on this page.
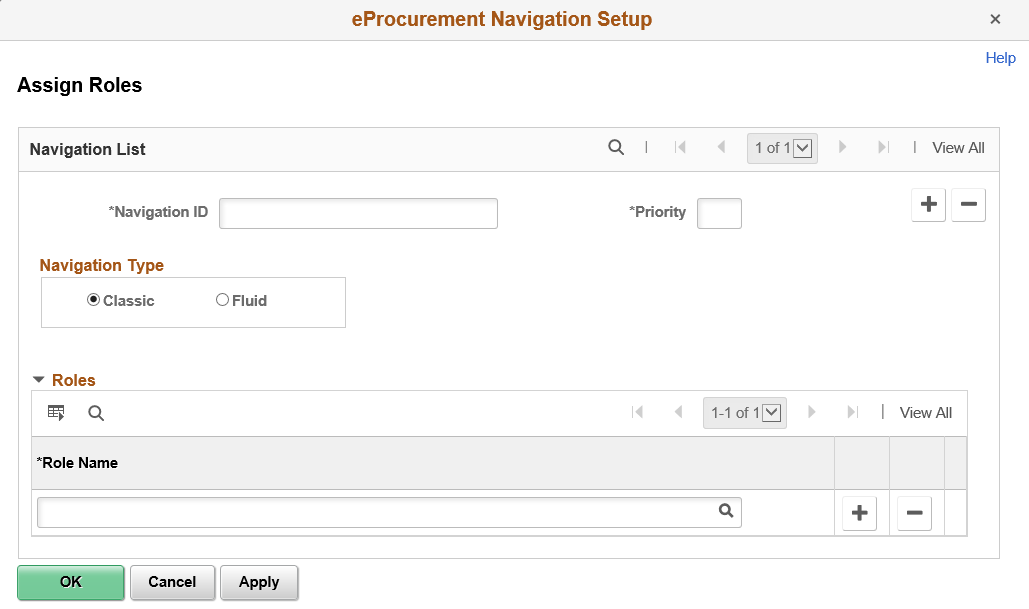
Role Navigation Templates
Settings on this page takes precedence over the system level settings.
|
Field or Control |
Description |
|---|---|
|
Navigation ID |
Enter required navigation ID. You can define multiple navigation IDs. |
|
Priority |
Enter priority for the navigation ID. The priority decides what navigation IDs will be used for a role if there are multiple navigation IDs associated with it. |
|
Role Name |
Select required role name to be assigned. Each navigation ID can be associated with multiple role names. |
By selecting the navigation type, you can change the settings for both fluid and classic defaults and present different navigation displays. For more information on the Navigation ID, Priority, and Role Name for the Fluid role navigation template, see the table above.
When you assign a navigation ID and a priority, the Requisition Navigation options from the defaults are copied to this page. You can change the visibility and the initial page for the entire group of people identified by the Role Name(s) identified in the Roles grid.