Defining Mass Transactions
Before you run the Mass Transaction application engine that transfers and alters data, you can provide additional information about the changes that you want to make. Use the pages in the Mass Transaction setup (PSDMT) component to do so.
Note that when you have created your own transactions from scratch, you must use the Mass Transaction setup pages.
This topic discusses how to define Mass transactions.
|
Page Name |
Definition Name |
Usage |
|---|---|---|
|
PSDMT_UNITS_01 |
Define high-level transaction information. |
|
|
PSDMT_UNITS_02 |
Define detailed transaction information. |
|
|
PSDMT_UNIT_DTL |
Define the list of field filters available on the run control page for a given transaction and configure the filter behavior. |
|
|
PSDMT_UDC |
Choose the filter fields to display on the run control page for a given transaction. |
|
|
PSDMT_OSECURITY |
Set up security for a transaction by associating permission lists with the transaction. |
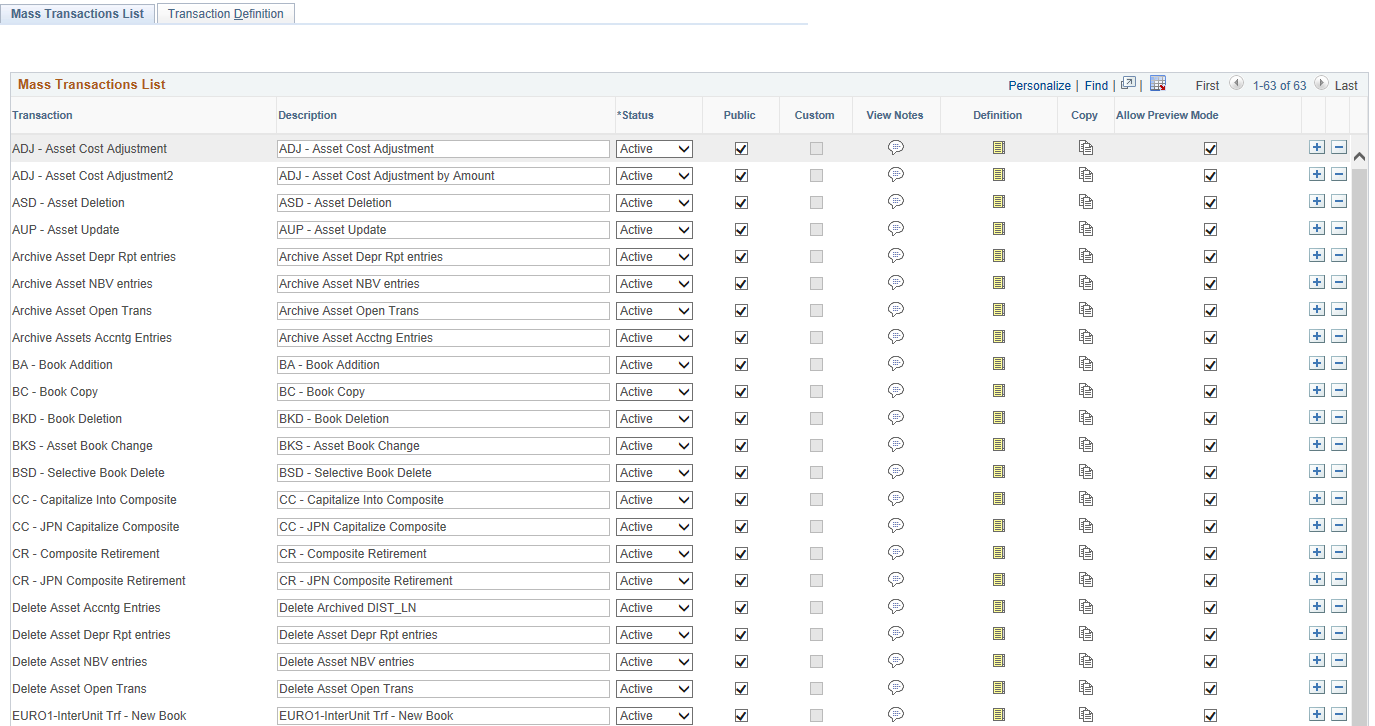
Use the Mass Transactions List page (PSDMT_UNITS_01) to define high-level transaction information.
Navigation:
This example illustrates the fields and controls on the Mass Transactions List page (1 of 2). You can find definitions for the fields and controls later on this page.
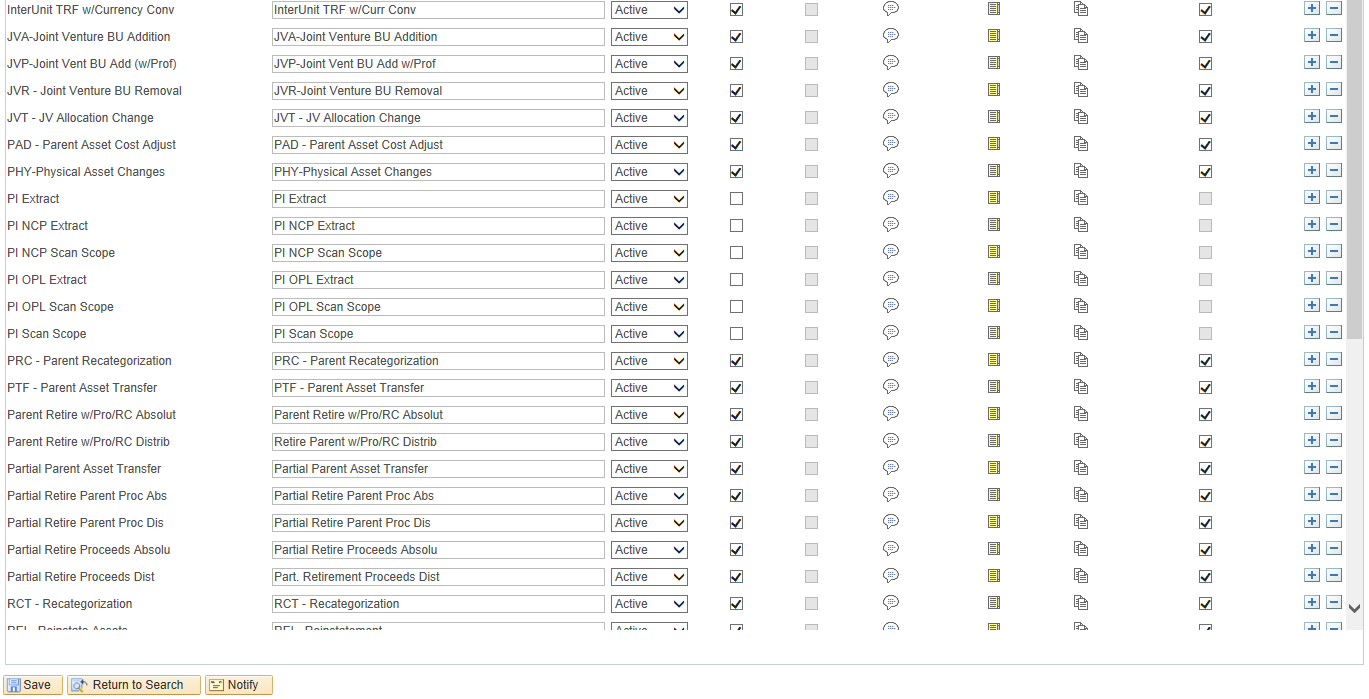
This example illustrates the fields and controls on the Mass Transactions List page (2 of 2). You can find definitions for the fields and controls later on this page.
Field or Control |
Description |
|---|---|
Transaction |
Enter the ID, or name, of the transaction. |
Description |
Enter a brief description of the transaction. |
Status |
Select Active or Inactive for the transaction. Only active transactions will be available to run from the run control page. |
Public |
Select this option to make the transaction public. Only public transactions will be available to run from the run control page. |
View Notes |
Click to access the Mass Transaction Notes page and enter additional transaction descriptions, comments, notes, or instructions. |
Definition |
Click the icon to access the Transaction Definition page and define detailed information for the transaction, such as user input parameters for the run control and the source records that will be used to build the list of filtering fields. |
Copy |
Click the icon to make a copy of the Transaction Definition. |
Allow Preview Mode |
Select this check box to enable preview mode for this transaction. There are some transactions that do not support the preview mode. |
Tracking Customizations
The Custom field is used to indicate whether a transaction is PeopleSoft-delivered or user-created. When selected, the field indicates the transaction is user-created. When empty, the field indicates the transaction is PeopleSoft-delivered. You cannot edit this field, the system automatically selects the option when you add a new transaction or copy an existing transaction.
Warning! If you have added new transactions to your system or customized PeopleSoft-delivered transactions prior to applying the enhancement that allowed the copying of transaction definitions, you must use the copy transaction functionality to make copies of these transactions. This ensures the transactions are formally flagged as custom by the system. Transactions that are not flagged custom may be overwritten when you apply a new PeopleSoft Image. Copying your new and customized transactions will ensure they will not be overwritten the next time you apply a new image.
Ensure that you update security for the copied transactions using the Mass Transaction Security page, and add them to the appropriate permission list.
Copying Transactions
Click the Copy icon to copy the transaction in the row. When you click the Copy icon, the Copy Transaction pagelet appears:
Copy Transaction pagelet
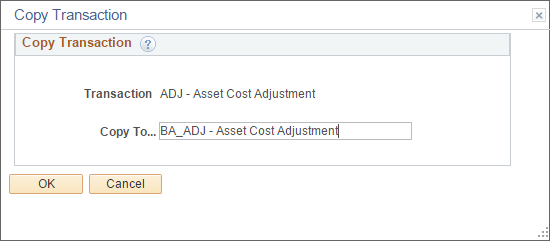
The Copy Transaction pagelet enables you to enter a new name for the transaction you are copying. Enter a name for the new transaction using the Copy To field. The system automatically adds the existing transaction name, but you must alter it to differentiate it from the original.
Once you save the new transaction by clicking OK, it is added to the Mass Transaction List page and the Custom field is automatically selected.
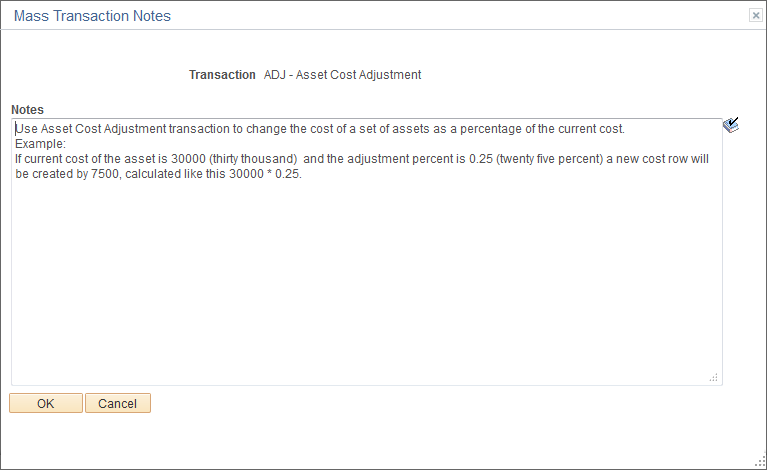
Adding Notes
Click the View Notes icon on the Mass Transactions page to access the Mass Transaction Notes page and enter additional transaction descriptions, comments, notes, or instructions.
This example illustrates the fields and controls on the Mass Transactions Notes page.
Use the Transaction Definition page (PSDMT_UNITS_02) to define detailed transaction information.
Navigation:
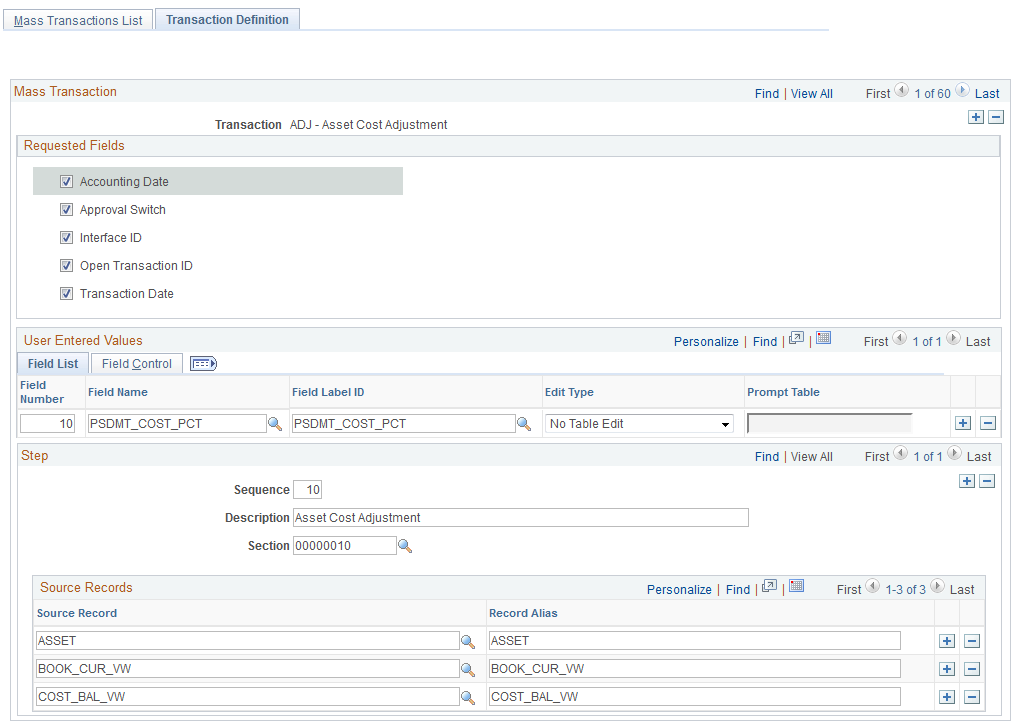
This example illustrates the fields and controls on the Transaction Definition page. You can find definitions for the fields and controls later on this page.
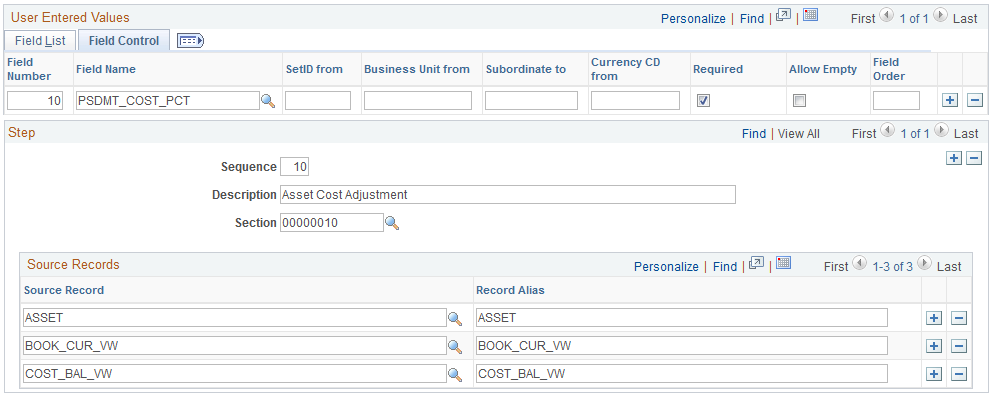
Field Control tab on the Transaction Definition page
Requested Fields
This group box displays a list of fields that, when selected, will appear on the Run Mass Transactions page as requested input parameters for the run control. Typically these are fields that are common across Asset Management tables. The fields in this group box are populated automatically from the MTM_PRODUCT_CFG record and MTM_RQST_AM_SBR subrecord.
User Entered Values - Field List and Field Control Tabs
This group box enables you to define field-level user input parameters that will appear on the Run Mass Transactions page as required input parameters for the run control. These are fields that are specific to a particular transaction. Available fields are obtained from the MTM_PRODUCT_CFG record and MTM_UEV_AM_SBR subrecord are available for selection.
You can use the Field List tab to define basic field-level information and behavior, such as field name and edit type.
You can use the Field Control tab to refine field behavior, such as adding subordinate fields and requiring users to input data for the field on the Run Mass Transactions page.
Field or Control |
Description |
|---|---|
Field Number |
Enter a numerical value to uniquely identify the field. The number provides a sort order on this page as well as a field reference for the SetID from, Business Unit from, and Currency CD from fields. It also provides a default order on the Mass Transaction Criteria and Run Mass Transactions pages. |
Field Name |
Select a field you would like to use as user-defined input parameter on the Run Mass Transactions page. Available fields are obtained from the MTM_PRODUCT_CFG record and MTM_UEV_AM_SBR subrecord. |
Field Label ID |
Select a field label for the field. This will be populated automatically after you select a field for the Field Name. |
Edit Type |
Specify the type of field edit or validation for the user-defined field. This impacts how users can select values against the field on the Run Mass Transactions page. Available options are:
Note: When you select the Prompt Table option, you must enter the associated prompt table using the Prompt Table field. |
Prompt Table |
Enter the prompt table associated with the field. This field is required only when you select the Prompt Table option from the Edit Type field. |
SetID from |
When a field requires a SetID as a key for its prompt, enter the field number associated with the field you want to use to obtain the SetID. For example, assume the DEPTID field requires a SetID as a key for its prompt and you want to obtain this information from the BUSINESS_UNIT field, which you have labeled with the field number ‘10.’ In this scenario you will enter ‘10’ in this field. This field can be left empty when no SetID is required. |
Business Unit from |
When a field requires a business unit as a key for its prompt, enter the field number associated with the field you want to use to obtain the business unit. For example, assume the ASSET_ID field requires a business unit as a key for its prompt and you want to obtain this information from the BUSINESS_UNIT field, which you have labeled with the field number ‘10.’ In this scenario you will enter ‘10’ in this field. This field can be left empty when no business unit is required. |
Subordinate to |
When a field is subordinate to another, that is, it contains a prompt that depends on another field, enter the field number associated with the governing field. For example, assume the ASSET_SUBTYPE field contains a prompt that depends on the ASSET_TYPE field, which you have labeled with the field number ‘50.’ In this scenario you will enter ‘50’ in this field. This field can be left empty when no governing field is required. |
Currency Code from |
When a field requires formatted currency amounts based on a currency field, enter the field number associated with the field you want to use to obtain the formatted amount. For example, assume the TXN_COST field requires a formatted currency amount based on a currency field and you want to obtain this information from the TXN_CURRENCY_CD field, which you have labeled with the field number ‘30.’ In this scenario you will enter ‘30’ in this field. This field can be left empty when no currency formatting is required. |
Required |
Select this option when you want to require users to input data for this field on the Run Mass Transactions page. If you do not select this option, inputting data for this field will be optional on the Run Mass Transactions page. |
Allow Empty |
Select this option when you want to allow users to select Is Empty for this field on the Run Mass Transactions page. When a user selects Is Empty for the field on the Run Mass Transactions page, the value field is hidden and the system removes the value of that field and replaces it with a space, a zero, or null, depending on the field type. |
Field Order |
Enter a numerical value to define the order of the field. The system will use values entered here for the field sort order, overriding the order as provided by the Field Number field. This field is optional. |
Step
Use the Step group box to provide an ordered sequence to execute transactions and define the source records that will be used to build the list of filtering fields on the Mass Transaction Configuration page.
Field or Control |
Description |
|---|---|
Sequence |
Enter a numerical value to assign the transaction a step order. |
Description |
Enter a description of the step. |
Section |
Enter the Application Engine Library (MTM_LIB_AM) section associated with the transaction. |
Source Record |
Select the source record that will be used to build the list of filtering fields on the Mass Transaction Configuration page. The filtering fields on the Mass Transaction Configuration page will be used to create the FROM clause in the SQL statement, so it is important to include all the source records needed to create the desired statement. |
Record Alias |
Enter an alias for the record. This field is populated automatically after you enter the source record, but you can change it if you have a different alias in your SQL or need to leave it empty to use it in PeopleCode. |
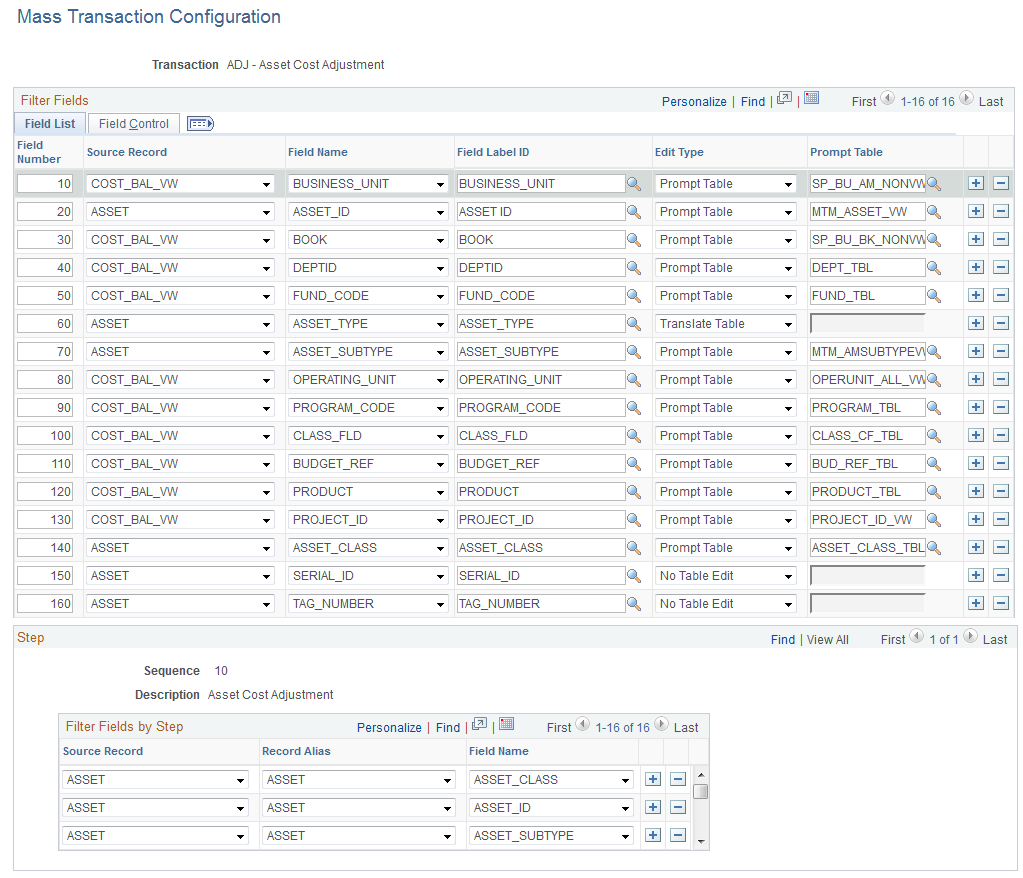
Use the Mass Transaction Configuration page (PSDMT_UNIT_DTL) to define the list of field filters available in the Selection Criteria portion of the run control page and configure the filter behavior.
Navigation:
This example illustrates the fields and controls on the Mass Transaction Configuration page. You can find definitions for the fields and controls later on this page.
Field Control tab of the Mass Transaction Configuration page
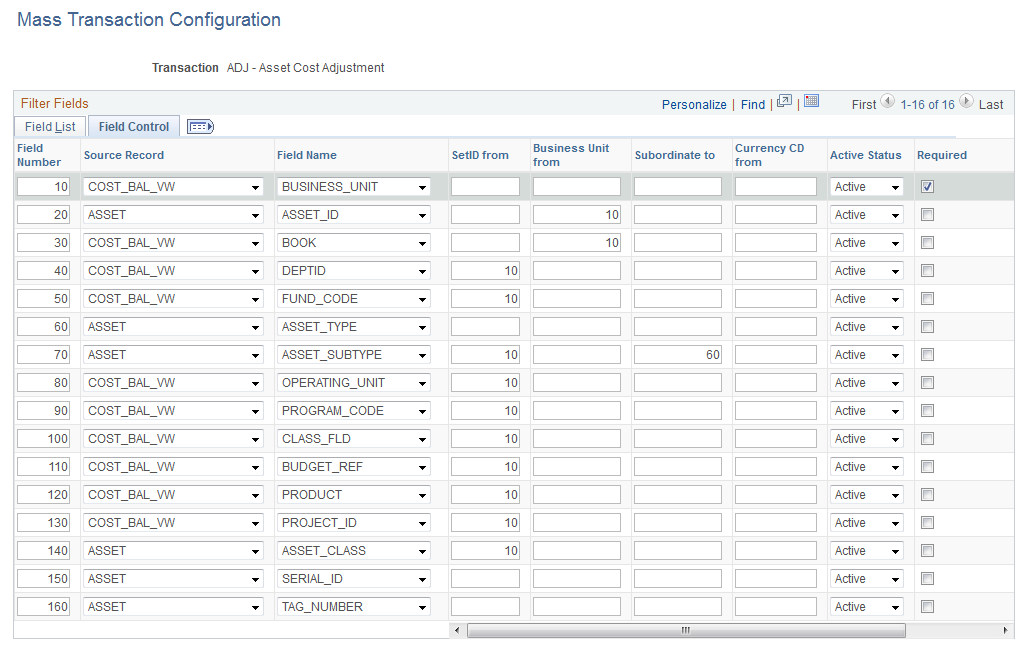
The fields you define here will be available in the Selection Criteria portion of the run control page. You can indicate whether a certain field will require input by the user. You can also define the behavior of each field—for example, whether the user will prompt for field values and, if prompting is enabled, prompt using a prompt table or translate table.
Note: The fields on this page are identical in name and usage as those on the Transaction Definition page. Please refer to the documentation for the Transaction Definition page for detailed field definitions.
Use the Mass Transaction Criteria page (PSDMT_UDC) to choose the filter fields to display in the Selection Criteria portion of the run control page for a given transaction.
Navigation:
This example illustrates the fields and controls on the Mass Transaction Criteria page. You can find definitions for the fields and controls later on this page.
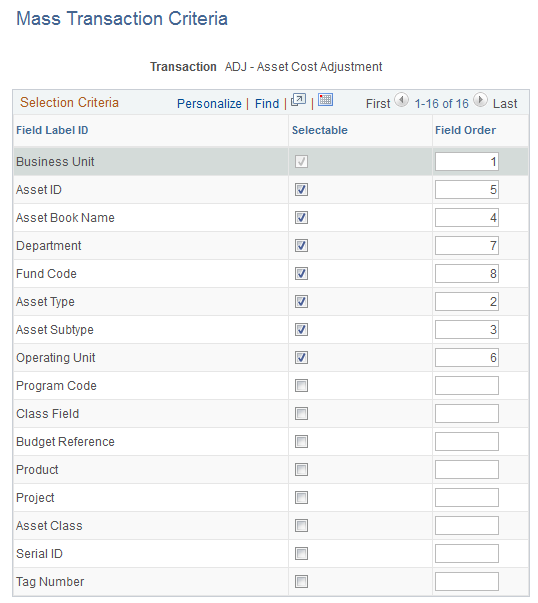
The Mass Transaction Criteria page enables you to select the filter fields to display in the Selection Criteria portion of the run control page for a given transaction.
Use the Selectable option to indicate the filter fields that will display on the run control page. Fields designated as required on the Mass Transaction Configuration page are automatically selected here and unavailable for editing.
Use Field Order to override the default order specified on the Mass Transaction Configuration page. Fields with no value will maintain its default order but display at the bottom.
Use the Mass Transaction Security page (PSDMT_OSECURITY) to set up security for a transaction by associating permission lists with the transaction.
Navigation:
This example illustrates the fields and controls on the Mass Transaction Security page. You can find definitions for the fields and controls later on this page.
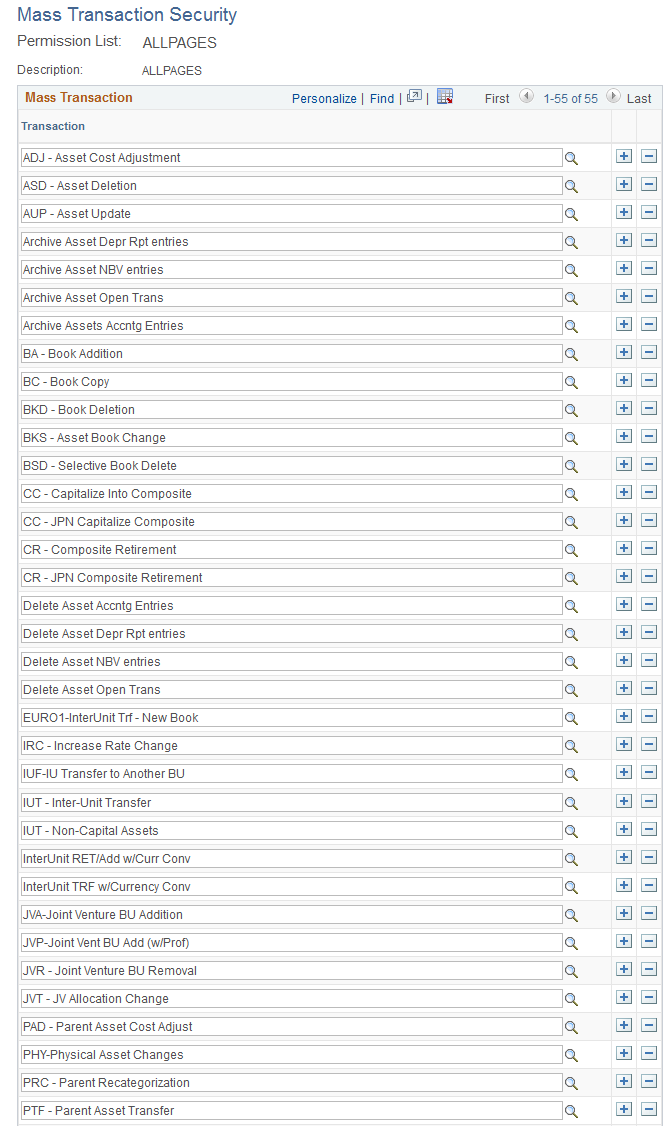
This example illustrates the fields and controls on the Mass Transaction Security page. You can find definitions for the fields and controls later on this page.
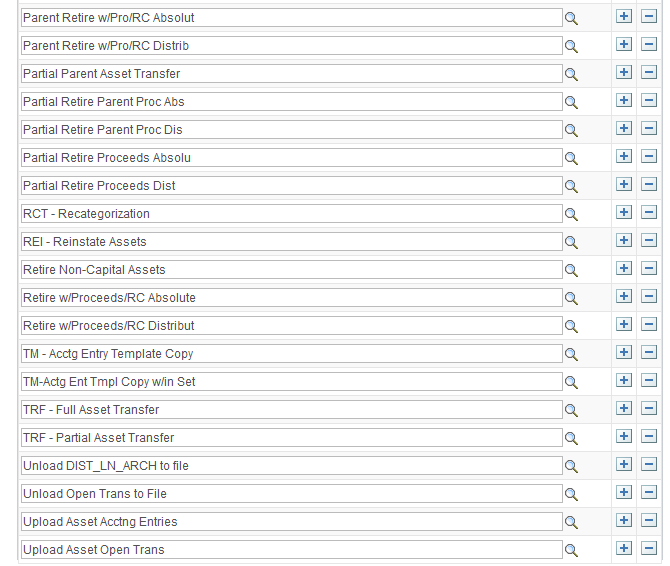
Use the Mass Transaction Security page to select a permission list, then add the transactions you want the permission list to access. Users will only be able to access transactions that are public and associated with their permission list.