Setting Up Integration Broker for ELM
This topic provides instructions for configuring Integration Broker for the ELM side of the integration between PeopleSoft HCM and PeopleSoft ELM. It discusses how to:
Configure local and remote message nodes.
Configure Single Signon.
Configure the gateway.
Confirm domain activation.
Confirm queue activation.
This documentation describes a very specific Integration Broker setup between HCM and ELM. For more in-depth information on Integration Broker,see the product documentation for PeopleTools: Integration Broker and PeopleTools: Integration Broker Administration.
In your ELM environment, you create a local ELM node and a remote HCM node.
Configuring the Local ELM Node
To create a default local node for the ELM database in your ELM environment:
Access the Node Definitions page ().
This example illustrates the setup on the Nodes Definitions page for a local HCM node.
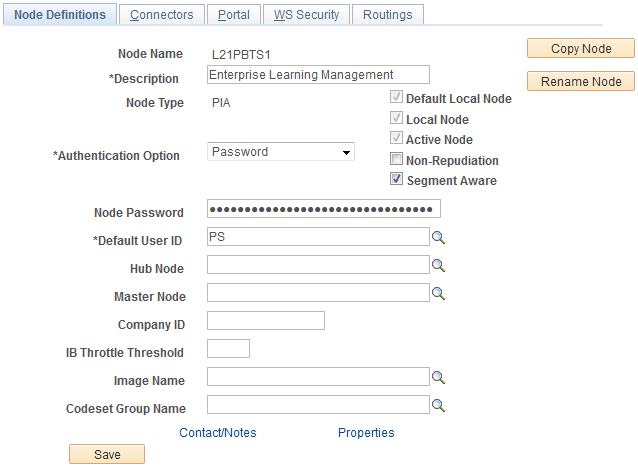
The Authentication Option is defined as Password so you must specify a password for this node. Because this node will also be defined in your HCM environment, the password specified in HCM must be the same, otherwise you will encounter an integration error.
Access the Connectors page ().
This example illustrates the setup on the Connectors page for a local ELM node.

Confirm that the value of the Connector ID field is PSFTTARGET.
Note: If your ELM node is used as a single signon node and it is referenced by any ELM components that are displayed as part of a portal, you must define values for the Content URI Text and Portal URI Text fields on the Portal page.
For more information on defining portal nodes, see the product documentation for PeopleTools: Portal Technology.
Configuring the Remote HCM Node
To create a remote node for the HCM database in your ELM environment:
Access the Node Definitions page ().
This example illustrates the setup on the Nodes Definitions page for a remote HCM node.
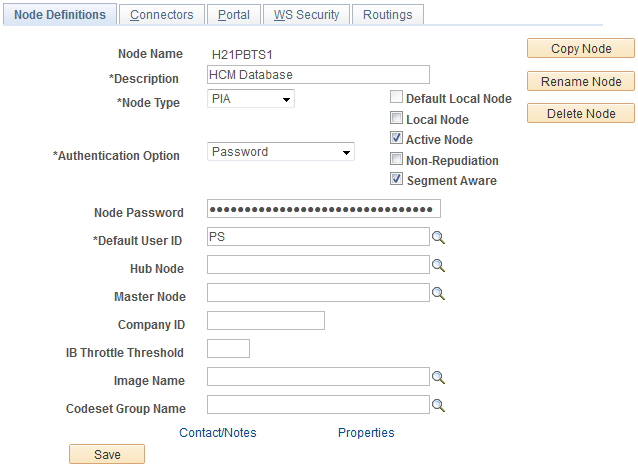
Make sure that the Node Name and Node Password that you define for the remote HCM node match the Node Name and Node Password of the default local HCM node that you define in your HCM environment.
Access the Connectors page ().
This example illustrates the setup on the Connectors page for a remote HCM node.
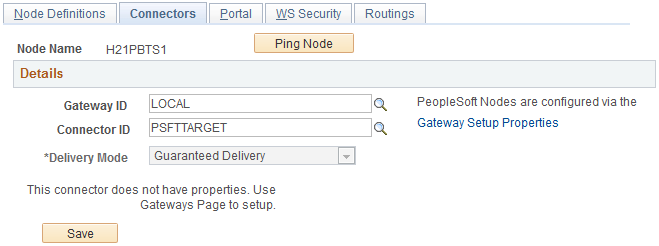
Confirm that the value of the Connector ID field is PSFTTARGET.
Adding the Remote HCM Node to the Network
After configuring the remote HCM node, you must add it to the node network. To do this:
Click the Node Network link in the Integration Network Workcenter ().
On the Node Network page, select the In Network check box for your remote HCM node.
This example illustrates the Node Network page with the In Network check box selected for the remote HCM node.
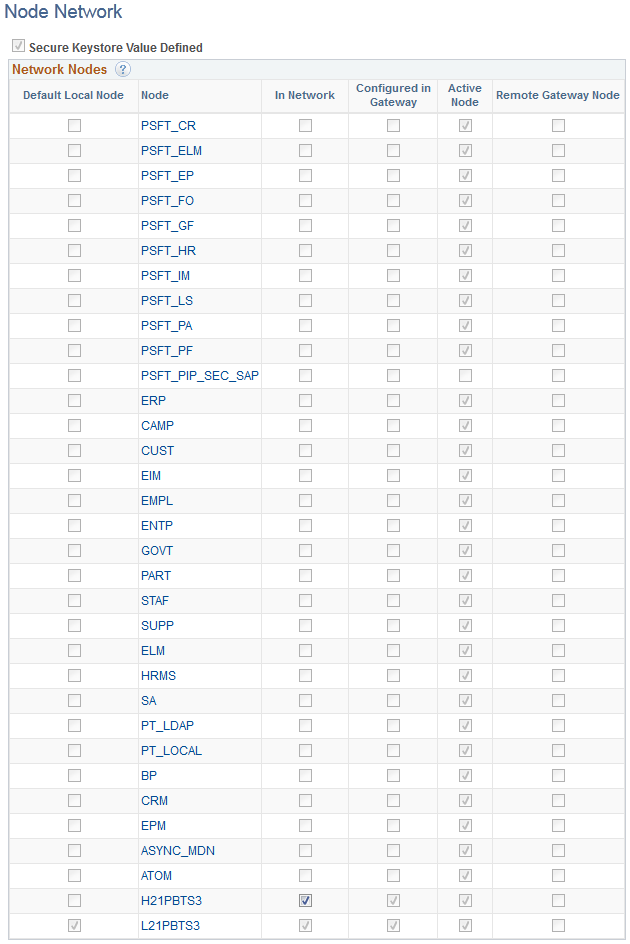
Click Save.
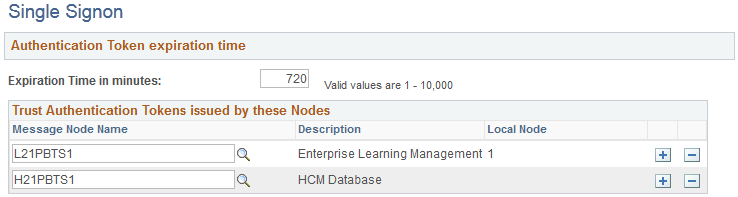
Because the two message nodes that you created for HCM and ELM represent PeopleSoft applications, you must update the trusted nodes for the Single Signon setup to reflect these new nodes. Access the Single Signon page (
This example illustrates the Single Signon page in an ELM environment with the local ELM and remote HCM nodes added.
The Integration Gateway platform manages the actual receipt and delivery of messages passed between systems through the Integration Broker. Messages are received through listening connectors and are delivered from target connectors. The Gateway Manager is a dispatcher for messages that flow through the Integration Gateway.
To configure a gateway between your HCM and ELM databases so that they can communicate with each other:
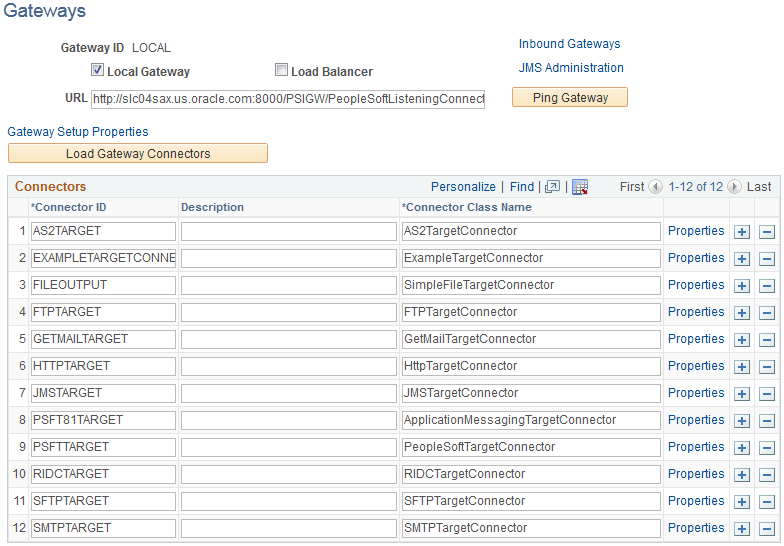
Access the Gateways page for the LOCAL Gateway ID from the Integration Network Workcenter (
This example illustrates a gateway set up to communicate between HCM and ELM environments.
Specify the URL with the format http://machinename:port/PSIGW/PeopleSoftListeningConnector. The machinename:port is the machine name and port, host name, or IP address of the web server hosting the gateway.
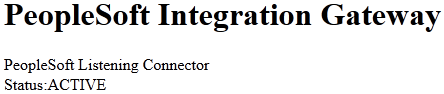
Click the Ping Gateway button to confirm that it is active.
This example illustrates the message that appears when you click the Ping Gateway button for an active gateway.
Click the Load Gateway Connectors button to have PeopleSoft Integration Broker examine the properties of all installed target connectors and load those properties into the gateway definition. All the connectors appear in the Connectors grid, and the properties of each connector are updated to reflect the current state.
The Connectors grid on the Gateways page lists the target connectors registered with the current gateway. Initially, none of the delivered connectors is loaded and the grid is empty. You can load target connectors automatically by clicking the Load Gateway Connectors button or by manually entering information in the grid.
Note: The Load Gateway Connectors button never overrides existing information. It adds only missing information, so it doesn’t affect manually edited values. If you modified a connector, the button loads new and modified properties and does not interfere with existing properties.
Because communication is between PeopleSoft applications, it is important that the Connector ID for PSFTTARGET is listed in the Connectors grid.
Click the Gateway Setup Properties link to access the Gateways Properties page.
This example illustrates the fields and controls on the Gateway Properties page.
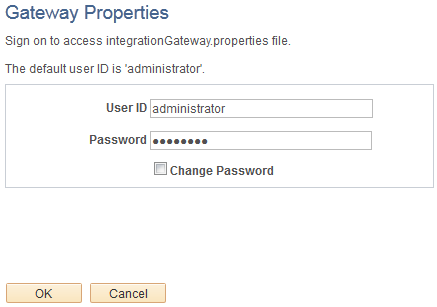
Enter a valid User ID and Password and click OK to access the PeopleSoft Node Configuration page.
This example illustrates the fields and controls on the PeopleSoft Node Configuration page.
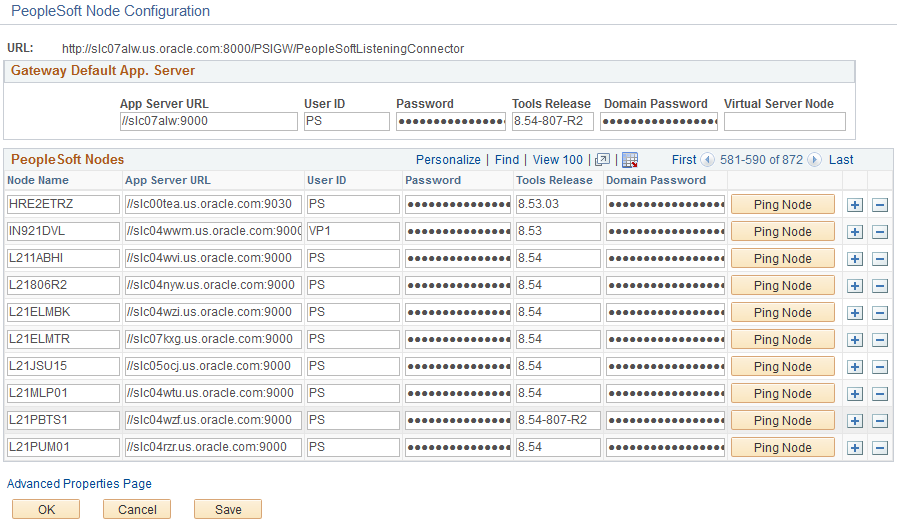
The PeopleSoft Node Configuration page enables you to specify a Gateway Default Application Server and the local target nodes.
When the integration gateway receives an inbound message, it receives the name of the message and the target node for the message. If the message does not have a target node, the system uses the Gateway Default Application Server settings.
If the target node is specified for the message, however, then the system searches the PeopleSoft nodes specified for the gateway so that it can direct the message properly.
For the integration between PeopleSoft HCM and PeopleSoft ELM, you do not have to specify a Gateway Default Application Server. However, you do have to enter the HCM and ELM nodes that you created in the PeopleSoft node grids.
This example illustrates how you might configure the local ELM node.

This example illustrates how you might configure the remote HCM node.

Field or Control
Description
App Server URL (application server URL)
Enter the machine name and the Oracle Jolt port number. You can find the Jolt port number in the JOLTListener section of the psappsrv.cfg file or by using psadmin.exe to review the JSL port setting for the application server configuration.
User ID and Password
Enter the User ID and Password that you specified when you created the application server domain. PeopleSoft Integration Broker automatically encrypts this password entry.
Tools Release
Enter the version number installed on the application server.
Click the Save button.
Note: After saving, if you click the Ping Node button for your local ELM node, the system should return a successful result. If your integration setup is not yet complete for your HCM environment, however, clicking the Ping Node button for your remote HCM node will return an authentication error.
You must verify that the Integration Broker domain is active so that the integration between PeopleSoft HCM and PeopleSoft ELM can process.
Access the Domain Status page from the Integration Network Workcenter()
This is an example of an active domain for an ELM environment.
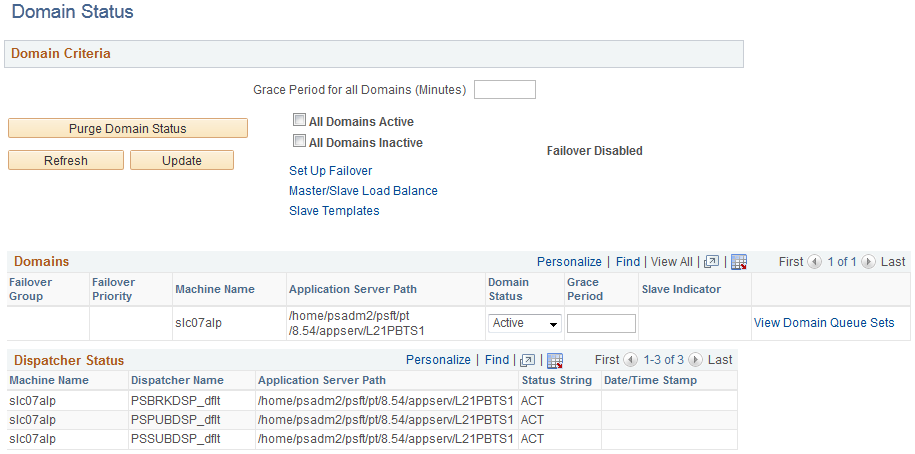
The Domain Status page enables you to view the domains that have pub/sub servers on them that are running against the application database. You also use this page to set domain grace periods manually, allowing processing in a domain to finish before you pause the processing or take the domain offline.
Make sure that the Domain Status field is set to Active for the machine name listed in the Domains grid, and then click the Update button. This action activates the domain and when you click Refresh, you will see the Dispatcher Status update the Status String to ACT (Active).
For the full sync integration points in ELM Full Sync Integration Guided Process, the following integration broker queues must be active in your ELM environment:
ENTERPRISE_SETUP
TBLSET_CONTROL
PERSON_SETUP
HR_SETUP
PERSON_DATA
To confirm that the queues are active, access the Queue Definitions page for each queue ().
This example illustrates the fields and controls on the Queue Definitions page.
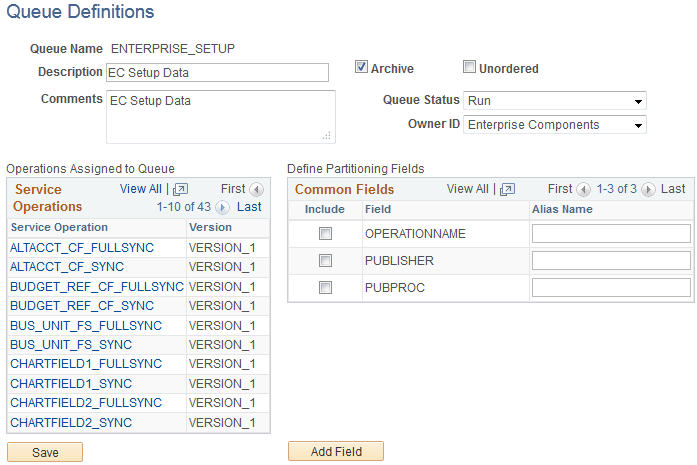
Make sure that the Queue Status field has a value of Run and click Save. Repeat these steps for each queue that needs to be active.