Selecting the Customer for a Lead or Opportunity
This topic discusses how to:
Select a customer for a lead or opportunity.
Search for customer information.
Use the Quick Create feature to create a customer.
Select the customer address.
Select the customer site address.
|
Page Name |
Definition Name |
Usage |
|---|---|---|
|
RSF_LEAD_ENTRY |
Select the customer for a sales lead. |
|
|
Opportunity - Discover Page |
RSF_OPP_DETAIL |
Select the customer for a sales opportunity. |
|
RBQ_BOSRCH |
Search for a customer. |
|
|
RBQ_QCREATE |
Create a new company and save it in the database. |
|
|
Create Consumer Page |
RBQ_QCREATE |
Create a new consumer and save it in the database. |
|
RSF_LE_ADDR_SEC |
Enter the customer's address for a lead. |
|
|
Customer Address |
RSF_OPP_ADDR_SEC |
Enter or review the customer's address for an opportunity. |
|
RSF_LE_SITE_SEC |
Enter or review the customer site address for a lead. |
Use the Lead - Discover page (RSF_LEAD_ENTRY) to select the customer for a sales lead.
Navigation:
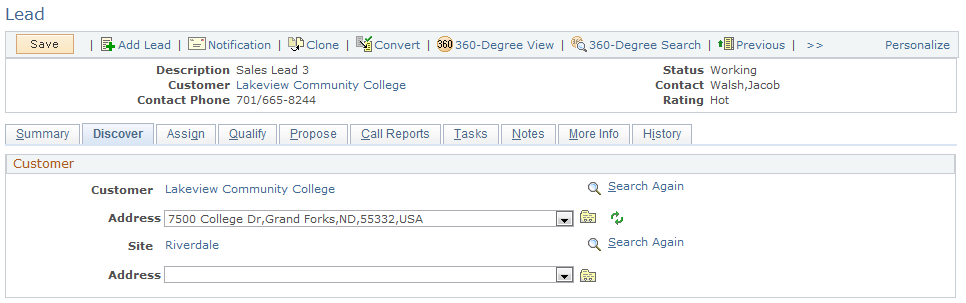
Note: The Customer section appears on the Lead - Discover page and the Opportunity - Discover page. Although the following example shows the Lead component, the information here applies to both leads and opportunities.
This example illustrates the fields and controls on the Lead - Discover page.
Field or Control |
Description |
|---|---|
Search |
Before clicking a Search button, you must enter a business unit. Also, you have the option to enter characters in the Customer or Site field. Click the Search button to search for customer or site data and to determine if a customer or site already exists. If it does not exist, you can quickly create a customer or site. If you select a site before a customer, then the system automatically populates the Customer field. If you select a customer before a site, then you can only search for sites of that customer. |
Advanced Search |
Click the Advanced Search link to search for customer or site data. You can enter specific criteria to use in the search. |
Address |
After you select a customer, the system populates the Address field with the primary address for the customer. Use the drop-down box to select whether to use an existing address, search for an existing address not in the list, or add a new address. Then click the Go button to search for an address or add a new address. |
Note: If you already selected a customer or a site, the system displays a Search Again link instead of the Search box and Advanced Search link.
Use the Search For Customer page (RBQ_BOSRCH) to search for a customer.
Navigation:
Click the Search button on the Lead - Discover or Opportunity - Discover page.
This example illustrates the fields and controls on the Search For Customer page.
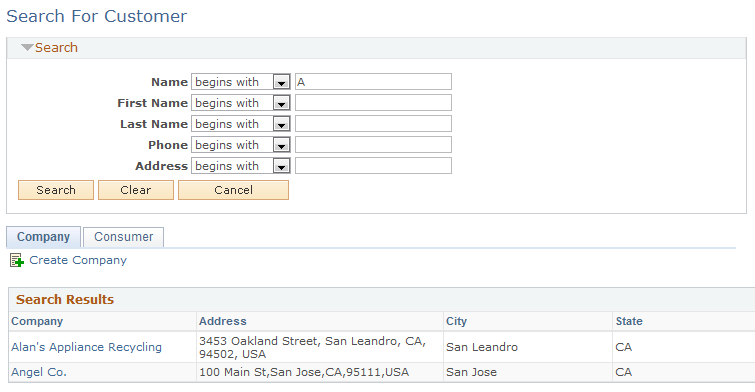
To select a customer, click a company or consumer in the Search Results section. To add a new company or consumer, click the Create Company link or Create Consumer link.
Use the Create Company page (RBQ_QCREATE) to create a new company and save it in the database.
Navigation:
Click the Create Company link on the Company tab of the Search For Customer page.
This example illustrates the fields and controls on the Create Company page.
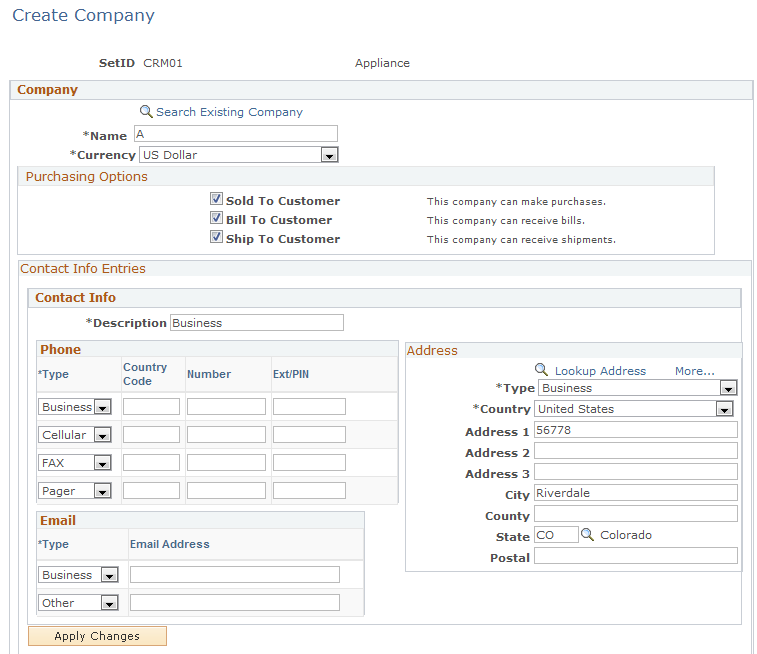
The Create Company page and the Create Consumer page are similar in appearance and usage.
When you use the Quick Create feature, you enter the customer information directly into the database, and the customer entry immediately becomes available for searching.
Note: When you use the Quick Create feature to create a new company or consumer all applicable information from the lead or opportunity is passed to it.
Use the Customer Address page (RSF_LE_ADDR_SEC) to enter the customer's address for a lead.
Navigation:
Select —> add address in the first Address field of the Customer section of the Lead - Discover page. Click the Go button.
Use the Customer Address page (RSF_OPP_ADDR_SEC) to enter or review the customer's address for an opportunity.
Navigation:
Select —> add address in the first Address field of the Customer section of the Opportunity - Discover page. Click the Go button.
Note: Although the following example shows a customer address, the information applies to both the Customer Address page and the Site Address page.
This example illustrates the fields and controls on the Customer Address page.
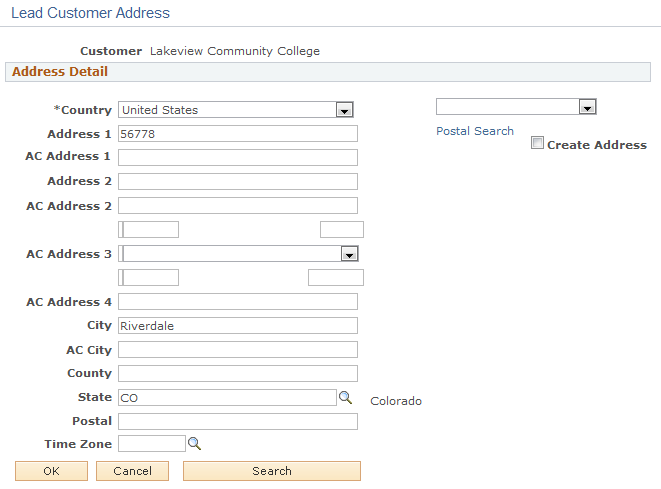
Note: In PeopleSoft Sales, you can save only one customer address and one customer site address for each customer for the lead or opportunity. However, you can create multiple addresses for the same customer in the database. To add or update addresses in the database, use the Quick Create pages or customer information pages under the CRM Customer menu.
Field or Control |
Description |
|---|---|
OK |
Click to save data on this page and make it available for viewing or updating later. The system displays the beginning of the address in the Address drop-down box for the Customer or Site field on the Lead - Discover page or Opportunity - Discover page. |
Search |
Click to search for an address to determine if it already exists. Note: If an address already exists and you enter it again, the system creates a duplicate entry in the database. To avoid duplicates, always search first to determine if the address exists before adding it. If the address already exists, select it from the list. The system displays the Customer Address page with the address and its associated purchasing options designations (Sold To Address, Billing Address, and Shipping Address). The Enter New Address button becomes available. |
Use the Site Address page (RSF_LE_SITE_SEC) to enter or review the customer site address for a lead.
Navigation:
Select —> add address in the second Address field of the Customer section of the Lead - Discover page. Click the Go button.
Note: Fields on the Site Address page function in the same way as the fields on the Customer Address page.