Setting Up Trees for Installed Products
To set up trees for installed products, use the Installed Product Tree Setup (RF_IPRD_TREE_DEFN) component.
|
Page Name |
Definition Name |
Usage |
|---|---|---|
|
RF_IPRD_TREE_DEFN |
Define the tree configuration (images to display in the tree, image size, page size, and date filter). |
|
|
RF_IPRD_TREE_NODE |
Define the parent and child relationship of the tree nodes. |
|
|
RF_IPRD_TREE_TEST |
Test the 360-Degree View tree to ensure that you configured it correctly. |
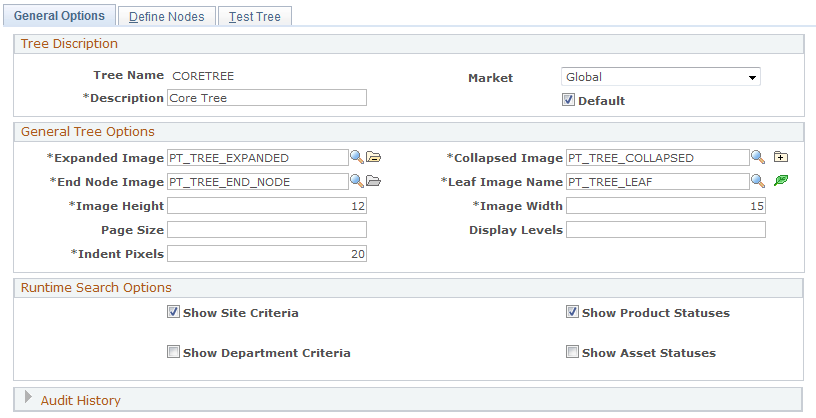
Use the General Options page (RF_IPRD_TREE_DEFN) to define the tree configuration (images to display in the tree, image size, page size, and date filter).
Navigation:
This example illustrates the fields and controls on the General Options page.
Field or Control |
Description |
|---|---|
Tree Name |
Displays the name for the tree for the installed product that you entered on the Add page. |
Description |
Enter a description of the tree you are adding. |
Market |
Select the market that will use the tree. |
Default |
Select to set this tree as the default tree that appears for this market on the Installed Product Hierarchy page if multiple trees exist. |
General Tree Options
Use the fields in this group box to configure how the tree will look on the Installed Product Hierarchy page.
Field or Control |
Description |
|---|---|
Expanded Image, Collapsed Image, End Node Image, and Leaf Image Name |
Enter the images that you want the system to display on the tree. A representation of the image appears to the right of the field. The defaults are:
|
Image Height and Image Width |
Enter the size of the image that you want to appear on the tree. The default size is 12 by 15. |
Page Size |
Enter the page size for the tree. This is the size of the HTML area where the tree is displayed on the Installed Product Hierarchy page. To show the entire tree, enter zero (0). |
Display Levels |
Enter the maximum number of levels to display on the tree at any given time. To show all levels, enter zero (0). |
Indent Pixels |
Enter the number of pixels to indent each node. The recommended value is 20. |
Runtime Search Options
When a user accesses the Installed Product Hierarchy page, the system displays the Product Name and Installed Product ID fields. To add additional search options to the page, select one or more of the check boxes that appear in this group box.
If you do not select any of the status check boxes, then the system hides the All and Single Status options and status drop-down list boxes. If you select one or more status check boxes, the system combines the statuses when it prompts the user for a value.
Note: The system does not display the Show Department Criteria and Show Asset Statuses check boxes unless you have PeopleSoft HelpDesk installed.
Use the Define Nodes page (RF_IPRD_TREE_NODE) to define the parent and child relationship of the tree nodes.
Navigation:
This example illustrates the fields and controls on the Define Nodes page.
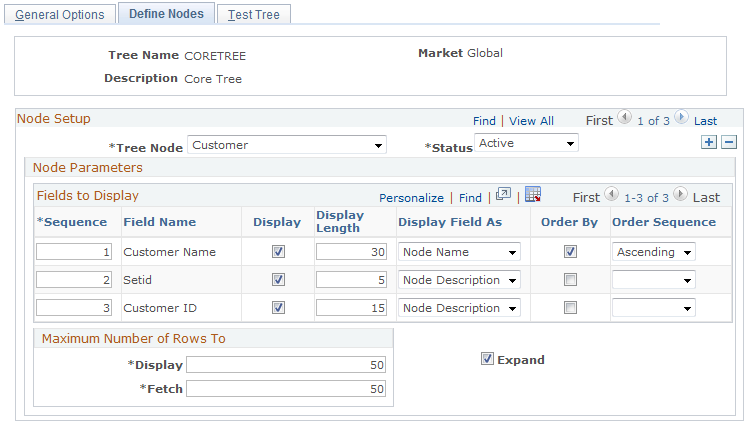
This page enables you to establish nodes for customer, site, contact, department, employee, and installed product and children.
Node Setup
Field or Control |
Description |
|---|---|
Tree Node |
Select the type of node that you want to add to the tree. The system displays a list of fields associated with the node type in the Node Parameters - Fields to Display group box.
Note: If PeopleSoft HelpDesk is not installed, then the system does not display the Department and Employee nodes in the Tree Node drop-down list. Also, if you establish nodes for Customer or Site, then the system does not permit you to establish nodes for either the Department or Employee nodes and vice versa. |
Status |
Select the tree node status; either Active or Inactive. For the node to appear on the tree, the status must be Active. |
Node Parameters - Fields to Display
Use the fields in this group box to indicate how you want the fields to display for the node you selected.
Field or Control |
Description |
|---|---|
Sequence |
Enter a number to indicate the order in which you want the fields to appear on the tree. |
Display |
Select this check box for all the fields that you want the system to display for the node. |
Display Length |
The system displays the number of characters that it can display for the field. The system can connect in a series one or more fields on any of the Display Field As options. Each option, however, has a maximum concatenated display length. For Node Name, the maximum is 30 characters. For Node Description, the maximum is 40 characters. For Mouseover Text, the maximum is 100 characters. |
Display Field As |
Select an option to indicate how you want the system to display the field name. You can choose either Node Name, Node Description, or Mouseover Text. If you select Mouseover Text, the system displays the name of the field when a user moves their mouse over the node image whether it is a collapsed, expanded, or leaf image. Note: Nodes always display text as < Node Name> – <Node Description>. Thus, all Node Name fields should be sequenced before entering node descriptions. The system forces you to enter it in this sequence if you make a mistake. |
Order By and Order Sequence |
Select this check box if you want the system to order the nodes in the tree in either ascending or descending order. If you select the Order By check box for a field, then you must select either Ascending or Descending from the Order Sequence drop-down list box. The sequence number determines the order in which the system orders the fields if you select the Order By check box for multiple fields. |
Maximum Number of Rows To
Field or Control |
Description |
|---|---|
Display and Fetch |
Enter the maximum number of rows to display under the expanded node in the Installed Product Hierarchy. Then enter the maximum number of rows to fetch, or retrieve, from the database when the user clicks View All on the tree node. Note: If you leave this field blank, the system retrieves 1000 rows. For the Installed Product and Children node, this value applies to the number of installed product records matching the search criteria, not the total installed product records in the entire family. |
Expand |
Select this check box if you want the system to automatically expand the node when a user accesses the tree. For all nodes other than the Installed Product and Children node, the system loads all parents and children despite the setting of this flag. The system either collapses or expands each node as necessary based on the setting of this flag before display. For the Installed product and child nodes, however, the system loads the children upon demand if you do not select this check box for the node. |
Use the Test Tree page (RF_IPRD_TREE_TEST) to test the 360-Degree View tree to ensure that you configured it correctly.
Navigation:
This example illustrates the fields and controls on the Test Tree page.
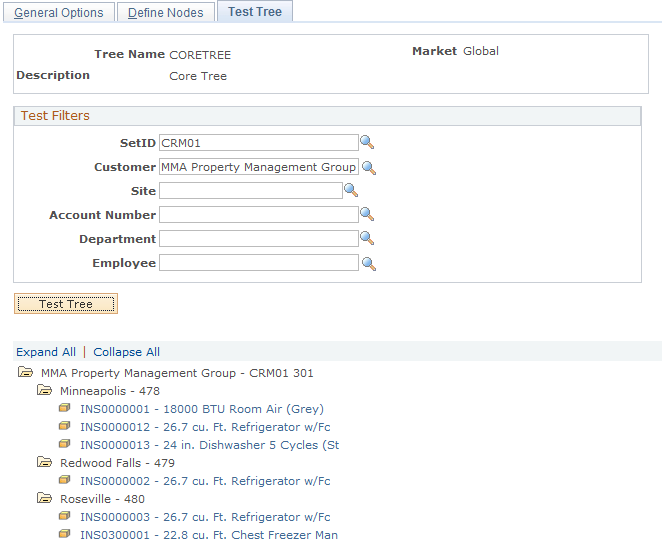
Enter data into at least two of the fields in the Test Filters group box (at a minimum, one field must be SetID).
Click the Test Tree button.
The system verifies the tree configuration and displays that particular tree based on the criteria you entered. This is how the tree will appear on the Installed Product Hierarchy page.