Setting Up Automatic Numbering
To set up automatic numbering, use the Automatic Numbering (AUTO_NUM_PNL) component.
This topic discusses how to set up autonumbering rules.
|
Page Name |
Definition Name |
Usage |
|---|---|---|
|
AUTO_NUM_PNL |
Define automatic numbering for objects that use numbering rules. |
|
|
RC_LAST_NBR_TYPE |
Specify last numbers for objects that use last numbers in autonumbering. |
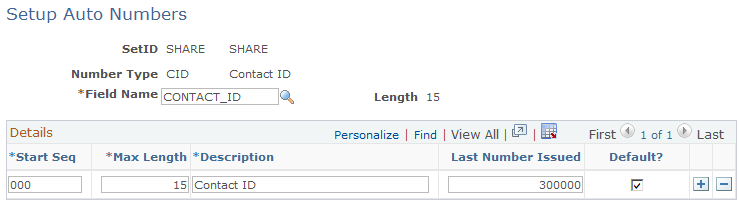
Use the Setup Auto Numbers page (AUTO_NUM_PNL) to define automatic numbering for objects that use numbering rules.
Navigation:
This example illustrates the fields and controls on the Setup Auto Numbers page.
Note: If you have PeopleSoft Integrated FieldService installed and you are setting up autonumbering for service order IDs (SO_ID), you must also set up autonumbering for timesheets, material IDs and manage expenses IDs or you will receive an error message when using the application.
Field or Control |
Description |
|---|---|
SetID |
Displays the setID that controls the numbering rules. A few objects are hard-coded to use either the SHARE or NONE setID. See Automatic Numbering. |
Number Type |
Displays the type of object whose rules you are setting up or displaying. |
Field Name |
Displays the field where the number is stored—for most objects, this is the object identifier. The system enters the appropriate field name based on the number type. |
Length |
Displays the length of the field, so that you are sure that the numbers that you generate are not too large for the field. |
Start Seq (start sequence) |
Enter a prefix that is placed in front of the number. The prefix can contain up to three alphanumeric characters. A start sequence of three zeroes (“000”) indicates that no prefix is used. Note: PeopleSoft CTI requires that all user inputs are either all numbers or all letters, but not a mix. Certain autonumbered fields that PeopleSoft CTI users enter (for example, IDs for orders, service orders, and customers) normally can contain a mix of numbers and letters, but if you use PeopleSoft CTI, give these fields autonumbering definitions that use just one or the other. |
Max Length (maximum length) |
Enter the maximum length of the number. This cannot exceed the length of the field. |
Last Number Issued |
Enter the last number issued. Automatic numbering begins with the next number. |
Default? |
Select the autonumbering rule to use by default when the start sequence is not specified. If more than one row of autonumbering rules exists, you can activate only one as the default. |
Use the Last Number Setup page (RC_LAST_NBR_TYPE) to specify last numbers for objects that use last numbers in autonumbering.
Navigation:
This example illustrates the fields and controls on the Last Number Setup page.
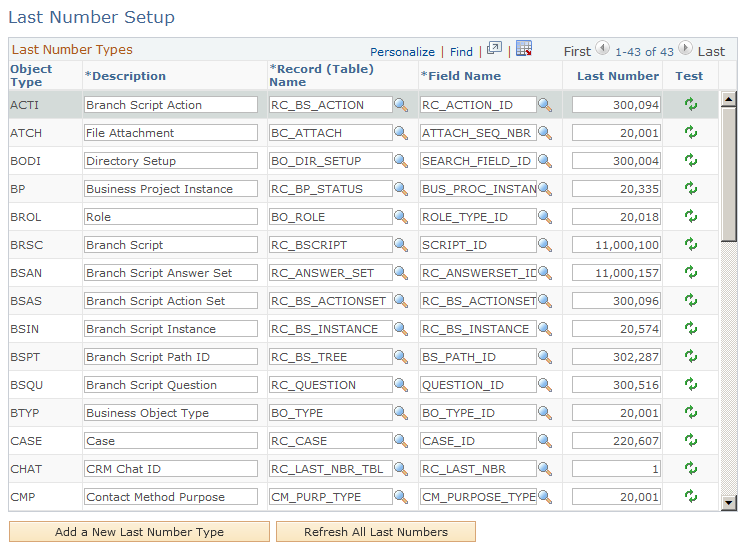
Note: Not all rows that appear on the Last Number Setup page appear here.
Field or Control |
Description |
|---|---|
Object Type |
Displays the objects for which you can set up autonumbering. The installation process creates a row for each object whose numbering you manage on this page. |
Record (Table) Name and Field Name |
Enter the table and field name of the object. |
Last Number |
Enter the last identification number that is in use for this object. Automatic numbering begins with the next number. The numbers from 0 to 20000 are reserved for delivered data. |
|
Click the Test icon to increase the last number by one and test the autonumbering functionality. |
Add a New Last Number Type |
Click this button to select a new last number type from a list of last number types. When you add a last number type, you must specify the Object Type, Record (Table) Name, and Field Name with which it is associated. |
